Summary
Don't Starve Together servers have many available mods that function both client-side and server-side. The Don't Starve modding community develops many mods, ranging from convenient UI mods that expand on Player Stats to more involved mods such as adding custom characters, which typically need to be installed by both server and client. Mods that require clients to install them will also display to users when they connect to the server, which ensures that all players have a shared experience.
How to Install Mods on a Don't Starve Together Server (Workshop)
1. Create a Steam Workshop Collection.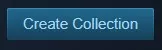
2. Copy the Workshop ID from the address bar.![]()
3. Log in to the BisectHosting Starbase panel.
4. Stop the server.![]()
5. Go to the Startup tab.![]()
6. On the Workshop Collection table, paste the Workshop ID from step 2.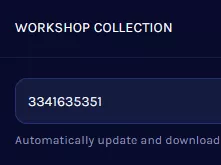
7. Start the server.![]()
How to Install Mods on a Don't Starve Together Server (Manual)
1. Log in to the BisectHosting Starbase panel.
2. Stop the server.![]()
3. Go to the Files tab.![]()
4. Find the following directory: /home/container/DoNotStarveTogether/config/server/Master .![]()
5. Choose Create > Create File from the top-right.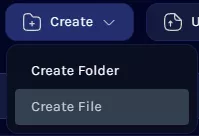
6. Copy the following template and paste it into the folder:return { ["workshop-WorkshopIDHere"] = { configuration_options = {}, enabled = true, }}
7. Add multiple mods by adding a comma (,) after the bracket, as seen in this template:return { ["workshop-WorkshopIDHere"] = { configuration_options = {}, enabled = true, }, ["workshop-WorkshopIDHere"] = { configuration_options = {}, enabled = true, }, ["workshop-WorkshopIDHere"] = { configuration_options = {}, enabled = true, }}
8. Once finished editing, choose Create File.![]()
9. Name the file modoverrides.lua.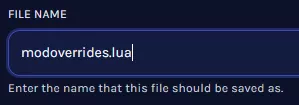
10. Download the modoverrides.lua file.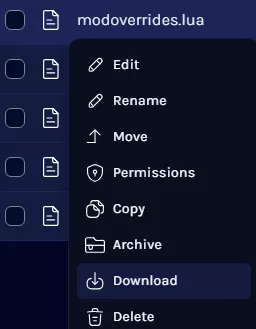
11. Find the following directory: /home/container/DoNotStarveTogether/config/server/Caves .![]()
12. Upload the file from Step 10.
13. Next, navigate to the home/container/mods directory.![]()
14. Open the dedicated_server_mods_setup.lua file.![]()
15. Add the following string for each mod: ServerModSetup(WorkshopID) to the bottom of the file, separated per line.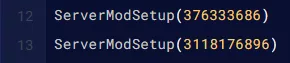
16. Once finished editing, choose Save.
17. Start the server.![]()
18. The server listing will display any installed mods.