Summary
Uploading a co-op save to a Stardew Valley server enables collaboration and gameplay with friends or the online community. Players can invite others to join their farm, trade resources, and collectively work towards common goals. With the server always staying online, it enriches the multiplayer experience, making it an excellent option for those seeking collaborative gameplay and interaction.
| Requirement |
| The save must be co-op and have SMAPI installed before uploading. Learn how to install SMAPI here. |
| Note | If the save is modded, install the mods and match configs on the server before uploading. Learn how to install mods here and learn how to edit mod settings here. |
| Note | The previous host will need to create a new character. |
How to Upload a Co-op Save to a Stardew Valley Server
1. On the desktop, launch the Run app. (Shortcut: Windows Key + R)
2. Enter %appdata%/stardewvalley/saves and press OK.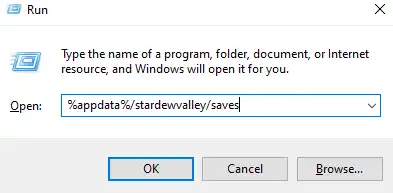
3. Select the desired save folder indicated by the farm name.
4. Right-click and choose Send to>Compressed (zipped) folder. 
5. Minimize the file to use later in the tutorial.
6. Log in to the BisectHosting Games panel.
7. Stop the server.![]()
8. Go to the Files tab.
9. Find the following directory: /home/container/.config/StardewValley/Saves .![]()
10. Choose the Upload button.![]()
11. Select the .zip file from step 5 and click Open.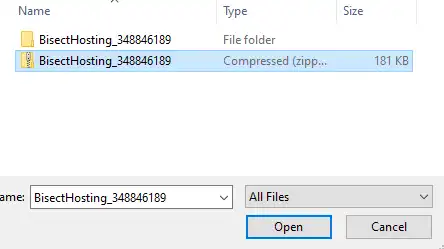
12. Right-click on the .zip file and choose Unarchive.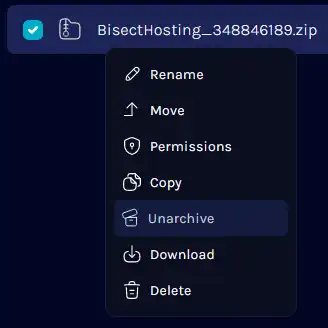
13. Copy the folder name before the underscore. ![]()
14. On the Config Files tab, select Dedicated Server Config.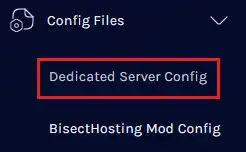
15. On the "FarmName": line, paste the folder name from step 13 between the quotations.![]()
| Note | If custom settings are active on the save, make changes to match the server. Learn about farm settings here. |
16. Choose the blue Save Content button on the lower right.
17. Start the server.