Summary
Players can find Arma 3 mods that add new weapons, vehicles, and equipment. Some mods introduce new maps, scenarios, and game modes. Arma 3 also has community-made custom missions, which you can learn how to add here. With the ability to add mods, players can tailor their Arma 3 experience to their liking and continue to enjoy the game long after they've exhausted the base game's content.
How to Add Mods to an Arma 3 Server
1. From the Arma Steam page, choose the Workshop tab.![]()
2. Subscribe to the desired mods..![]()
3. Launch Arma 3. ![]()
4. From the Arma 3 Launcher, go to the Mods tab.![]()
5. Select all the mods to be installed on the server. 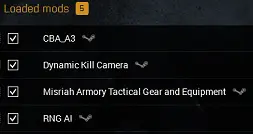
| Note | Ensure the mods are selected with the required dependencies. |
6. From the More drop-down menu, choose Export list of mods to a file.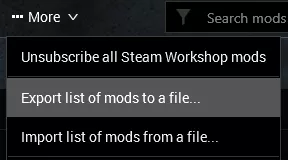
7. Press the Only loaded mods button.![]()
8. Save the list of mods as modlist in the desired directory.![]()
9. Log in to the BisectHosting Starbase panel.
10. Stop the server.![]()
11. Go to the Files tab.![]()
12. Upload the modlist.html file from Step 8.![]()

13. Go to the Startup tab.![]()
14. From the Modlist File field, match the name of the modlist.html file from Step 12.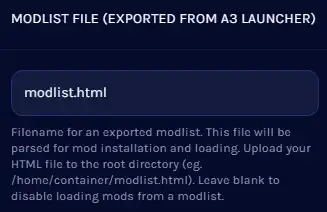
15. Start the server. ![]()