Summary
Adding Steam Workshop maps to a Project Zomboid server can provide players with new and unique locations to explore, adding more variety to the game. These maps range from small additions like new buildings or places to full-scale custom maps. Incorporating Workshop maps into a Project Zomboid server can provide players with more content, challenges, and opportunities for exploration and creativity.
| Note | To upload a world, an FTP client must be used. Follow this tutorial on how to connect a server to an FTP client. |
How to Add Steam Workshop Maps to a Project Zomboid Server
1. Subscribe to a Project Zomboid Server map on the Steam Workshop Page.![]()
2. Start Project Zomboid to Install the Map locally.![]()
3. Right-click Project Zomboid on Steam, hover Manage and select Browse Local Files.
4. Find the following directory: steamapps/workshop/content/108600/[Mod ID]/mods/[Map Name]/media.![]()
5. Log in to the server with an FTP client. 
6. Go into the Media folder.
7. Drag and upload the files from the local media folder into the server's media folder.
8. Find the following directory: /.cache/Server and open the [server name]_spawnregions.lua.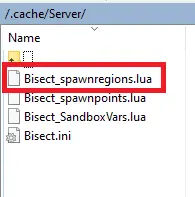
9. Enter the following on the 7th line { name = "Steam Map Name", file = "media/maps/Steam Map Name/spawnpoints.lua" },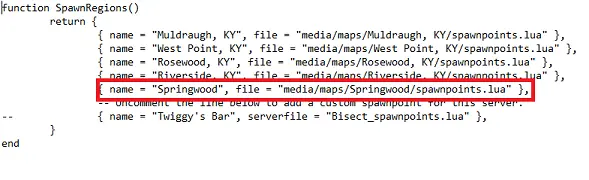
"Steam Map Name" to the name of the map from step 1. 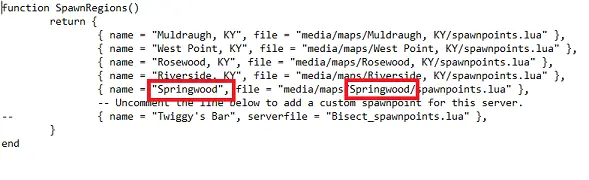
11. Save and close the document.
12. Open the [Server name].ini file. 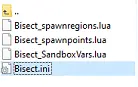
13. On the Map= line, input the map name between the "=" and "Muldraugh, KY" separated by a ";".
14. On the Mods= line above, input the Mod ID.
14. Save and close the document.
15. Restart the server. ![]()

