Summary
7 Days to Die, a survival horror game, offers players a diverse and immersive experience through overhaul mods. These mods, such as Age of Oblivion and Darkness Falls, significantly transform the game by introducing new locations, enemies, weapons, and gameplay mechanics. Whether aiming for increased difficulty, realistic survival elements, or a more in-depth progression system, these overhaul mods cater to different player preferences, providing a fresh and challenging take on the post-apocalyptic world of 7 Days to Die.
How to Install an Overhaul Mod on a 7 Days to Die Server
1. Log in to the BisectHosting Starbase panel.
2. Stop the server.

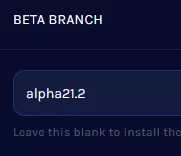
3. Go to the Startup tab.

4. On the Beta Branch field, input the corresponding version for the overhaul mod:
| Overhaul |
Version |
| 28 Alphas Later A21 |
alpha21.1 |
| 28 Alphas Later v1.0 |
v1.0 |
| Afterlife Overhaul v1.3 |
v1.3 |
| Age Of Oblivion A7 |
alpha21.2 |
| Darkness Falls A20 |
alpha20.6 |
| Darkness Falls A21 |
alpha21.2 |
| Darkness Falls v1.4 |
v1.4 |
| District Zero v1.0 |
v1.0 |
| EndZ A21 |
alpha21.2 |
| Ravenhearst |
v1.1 |
| Rebirth Overhaul v1.3 |
v1.3 |
| The Wasteland v1.1 |
v1.1 |
| Undead Legacy A20.7 |
alpha20.7 |
War of the Walkers A21
|
alpha21.2 |
| War3zuk Alpha 21 AIO OverHaul |
alpha21.2 |
| War3zuk AIO Overhaul 1.3 B33 |
v1.3 |
| Note |
More overhaul mods will be added in the future. |
5. Start the server.

6. Once fully booted, stop the server.
7. Go to the Mods tab.

8. Install the desired overhaul mod.

9. Press the Install button to confirm.

10. Wait a few minutes.

11. Start the server.