
Summary
Uploading a single-player world to a 7 Days to Die server is a great way to continue playing online with friends or other players. Collaborate to build bases, explore the world, and fight off zombies together. It can provide a more social, challenging, and enjoyable experience for 7 Days to Die players. When the world is uploaded and set up, learn how to connect to the 7 Days to Die server here.
| Requirement |
| World files will need to be transferred using an FTP client. Follow this tutorial to learn how to use an FTP client. |
| Note | In order to keep player data when uploading a Randomly Generated World, both the world file in GeneratedWorlds and the player data from the Saves folder will be needed. |
How to Upload a World to a 7 Days to Die Server
1. Log in to the BisectHosting games panel.
2. Stop the server.
3. To find a singleplayer world, press the Windows Key + R and enter %appdata%\7daystodie .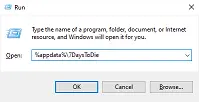
4. If the world is a Randomly Generated World, choose the GeneratedWorlds folder. Pregenerated world saves, such as Navezgane, will be in the Saves folder.
| Note | When uploading world saves from Pre-generated Worlds the player data for that save will be included in the main folder. |
5. Connect to the 7 Days to Die server with an FTP client.
6. From the sFTP client, Click Data > Worlds. 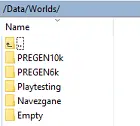
7. Drag the world folder from the Generated Worlds folder into the FTP client's Worlds folder. 
8. Go Back to the root directory in the FTP client.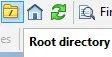
9. Choose the serverconfig.xml file.
10. Change <property name="GameWorld" value="PREGEN10k"/> to <property name="GameWorld" value="New_World_Folder_Name"/> . Enter in the correct world folder name for "New_World_Folder_Name". The folder name should be one of the following names depending on the size of the world; Juvupe Valley (6k), West Xuyofu Territory (8k), or Kubixe County (10k).
11. Change <property name="WorldGenSize" value="8192"/> to have the correct world size within value="".
12. Change <property name="GameName" value="Default"/> to <property name="GameName" value="New_Game_Name"/>. Enter in the correct world name for "New_Game_Name".
Example: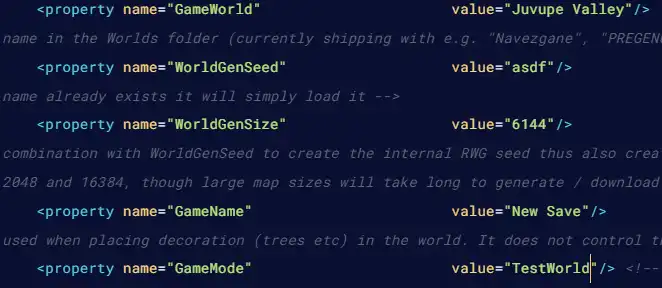
13. Once finished editing, choose the Save Content button.
14. Start the server.