
Summary
Whitelisting a Project Zomboid server is a simple but effective way to control who accesses the server and ensure a better gaming experience for all involved. By adding players to the whitelist, the server owner can ensure that only trusted players can access the server. It can be helpful for servers meant for a specific group of players, as it can help prevent unwanted players from joining and disrupting gameplay.
How to Whitelist a Project Zomboid Server
1. Log in to the BisectHosting Games panel.
2. Stop the server.![]()
3. Go to the Files tab.![]()
4. Find the following directory: /home/container/.cache/Server .![]()
5. Open [SaveName].ini for editing. The .ini file is labeled depending on the Save/Config Name in the Startup tab.![]()
6. On the Open= line, change the value from true to false.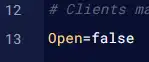
7. Choose the Save Content button.
8. Start the server.![]()
How to Whitelist Players on a Project Zomboid Server
1. Run the following command in the console to add a player to the whitelist:
AddUser <username> <password>
![]()
2. Run the following command in the console to remove a player from the whitelist:
RemoveUserFromWhitelist <username>
![]()

