
Summary
Changing the name and description of a Project Zomboid server can help differentiate the server from others offering similar gameplay. A clear and defining name and description can give potential players a better idea of what to expect on the server and entice them to join. Updating the name and description can also signal to current players that the server is active and evolving, keeping them engaged and interested in continuing to play on the server.
| Note | To show these changes publicly, the server must be set to public=true in the .ini file. |
How to Change the Name and Description of a Project Zomboid Server
1. Log in to the BisectHosting Games panel.
2. Stop the server.![]()
3. Go to Files. ![]()
4. Find the following directory: /home/container/.cache/server .
5. Open [SaveName].ini for editing. The .ini file is labeled depending on the Save/Config Name in the Startup tab.![]()
6. Find PublicName= and change this to a suitable name. 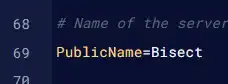
7. Find PublicDescription= and change this to a suitable description.
| Note | The name and description can only be a certain length. If either does not show up, try lowering the character count. |
8. Press the Save Content button.
9. Start the server.![]()

