
Summary
Forge is a comprehensive framework designed to streamline the creation and installation of mods for Minecraft. By acting as a bridge between the game and individual mods, Forge provides a standardized interface for seamless interaction and ensures compatibility. This framework simplifies the mod development process by offering a structured environment and a suite of tools, empowering modders to craft and share their modifications easily. Once installed on the Minecraft client and server, Forge enables players to install and manage a wide range of compatible mods effortlessly.
| Note | The server must fully start once to generate config files and folders. |
How to Install Forge on a Minecraft Server
1. Log in to the Bisecthosting Starbase panel.
2. Stop the server.![]()
3. From the Minecraft Tools tab, choose Minecraft Jar.
4. Depending on preference, select Forge Latest or Forge Recommended on the left.
5. Next to the desired Forge Version, click Install.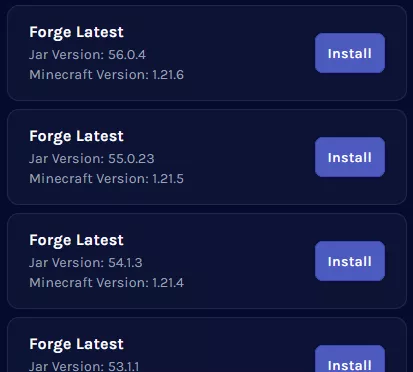
6. Confirm the Game Version and choose Next.![]()
7. Choose what to do with the existing server files and click Next.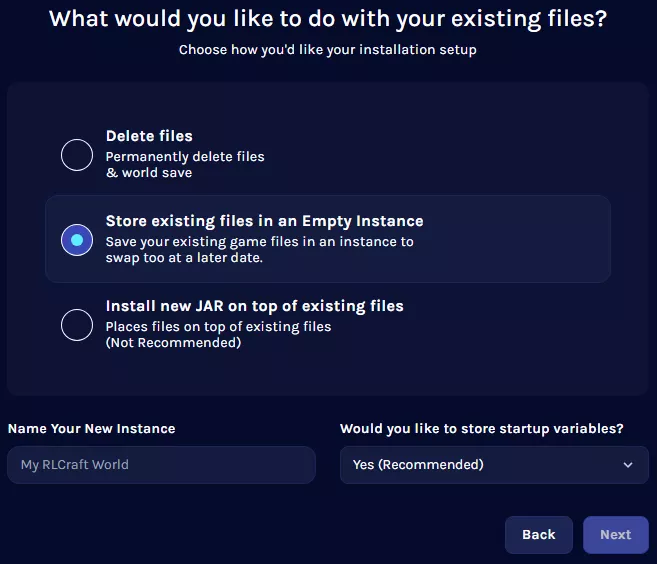
8. Press the Confirm button.![]()
9. Start the server. ![]()
How to Install Forge on a Minecraft Server (Manual)
1. Download Forge.
2. Choose a version and select Installer.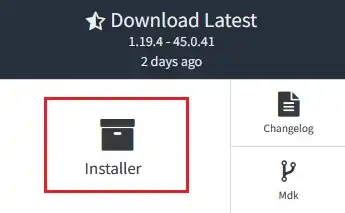
3. Launch the Forge installer and select Install server.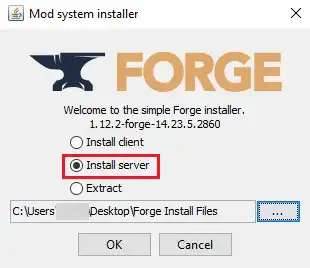
4. Change the install location to a folder.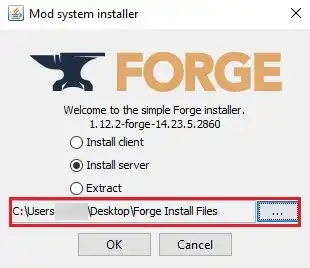
5. Click OK.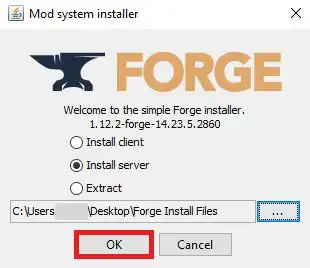
6. Once finished, navigate to the folder.![]()
7. Copy the name of the forge-<mc_version>-<loader_version>.jar.
If there is no .jar, skip this step.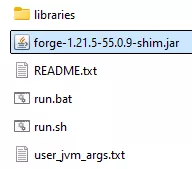
8. Select all files. Right-click and choose Send to>Compressed (zipped) folder. 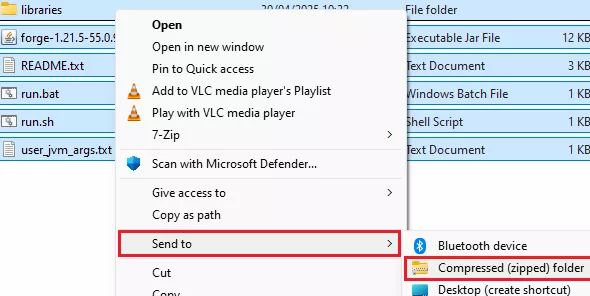
9. Minimize the .zip file to use later in the tutorial.
10. Log in to the Bisecthosting Starbase panel.
11. Stop the server.![]()
12. From the Minecraft Tools tab, choose Minecraft Jar.
13. Select Custom on the left.![]()
14. Depending on the version, click Install next to the following options:
Forge Versions 1.17-1.20.1: Custom JAR (Forge/Neo 1.17-1.20.1)
All Other Versions: Custom JAR (Non-NeoForge/Forge 1.17-1.20.1)
![]()
15. Confirm the Game Version and click Next.![]()
16. Choose what to do with the existing server files and click Next.
17. Press the Confirm button.![]()
18. Wait for the installation to finish.![]()
19. Go to the Files tab.![]()
20. Upload the .zip file from step 9.
21. Right-click on the .zip file and choose Unarchive.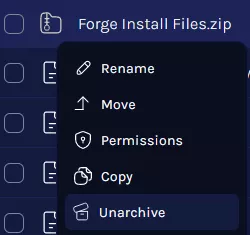
22. Go to the Startup tab.![]()
23. On the Server Jar File table, input the .jar name from step 7.
If there was no .jar, skip this step.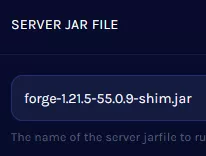
24. Go to the Home tab.![]()
25. On the Java Version table, choose the appropriate version.

| Minecraft Version | Java Version |
| 1.16 and below | Java 8 |
| 1.17 to 1.20.1 | Java 17 |
| 1.20.2 and above | Java 21 |
| Note | Java Adoptium is the default option, although some modpacks may perform better on other versions. |
26. Start the server.![]()

