Summary
Arma 3 offers a range of difficulty levels to suit players' preferences and skill levels. The difficulty settings affect various aspects of the game, such as the enemy AI's skill level, player health and stamina, and the amount of ammunition and supplies available. Additionally, some servers may have custom difficulty settings, offering players a unique and personalized experience. Server admins can also change up the default missions on the server.
How to Change the Difficulty on an Arma 3 Server (Default Difficulties)
1. Log in to the BisectHosting Starbase panel.
2. Stop the server.![]()
3. Go to Config Files > Server Config from the left sidebar. 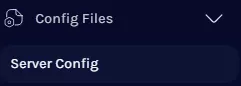
4. From the // Missions Cycle line, change the difficulty from one of the following 4 options: Recruit, Regular, Veteran, or Elite.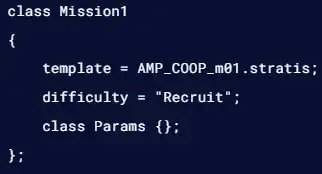
5. Press the Save Content button.
6. Start the server. ![]()
How to Change the Difficulty on an Arma 3 Server (Custom Difficulty)
1. Log in to the BisectHosting Starbase panel.
2. Stop the server.![]()
3. Go to Config Files > Server Config from the left sidebar.
4. From the // Missions Cycle line, change the difficulty to custom. 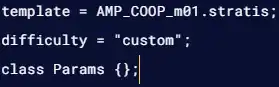
5. Press the Save button.
6. Go to the Files tab.![]()
7. Find the following directory: /home/container/serverprofile/home/Player .![]()
8. Open the Player.Arma3Profile file. (Player will be the playername of the server owner)![]()
9. Copy and paste the following below the brightness=1; line.
class DifficultyPresets{ class CustomDifficulty { class Options { /* Simulation */
reducedDamage = 0; // Reduced damage /* Situational awareness */ groupIndicators = 0; // Group indicators (0 = never, 1 = limited distance, 2 = always) friendlyTags = 0; // Friendly name tags (0 = never, 1 = limited distance, 2 = always) enemyTags = 0; // Enemy name tags (0 = never, 1 = limited distance, 2 = always) detectedMines = 0; // Detected mines (0 = never, 1 = limited distance, 2 = always) commands = 1; // Commands (0 = never, 1 = fade out, 2 = always) waypoints = 1; // Waypoints (0 = never, 1 = fade out, 2 = always) tacticalPing = 0; // Tactical ping (0 = disable, 1 = enable)
/* Personal awareness */
weaponInfo = 2; // Weapon info (0 = never, 1 = fade out, 2 = always) stanceIndicator = 2; // Stance indicator (0 = never, 1 = fade out, 2 = always) staminaBar = 0; // Stamina bar weaponCrosshair = 0; // Weapon crosshair visionAid = 0; // Vision aid
/* View */
thirdPersonView = 0; // 3rd person view (0 = disabled, 1 = enabled, 2 = enabled for vehicles only (Since Arma 3 v1.99)) cameraShake = 1; // Camera shake
/* Multiplayer */
scoreTable = 1; // Score table deathMessages = 1; // Killed by vonID = 1; // VoN ID
/* Misc */
mapContent = 0; // Extended map content autoReport = 0; // (former autoSpot) Automatic reporting of spotted enemied by players only. This doesn't have any effect on AIs. multipleSaves = 0; // Multiple saves }; // aiLevelPreset defines AI skill level and is counted from 0 and can have following values: 0 (Low), 1 (Normal), 2 (High), 3 (Custom). // when 3 (Custom) is chosen, values of skill and precision are taken from the class CustomAILevel. aiLevelPreset = 3; }; class CustomAILevel { skillAI = 0.5; precisionAI = 0.5; };};
10. After editing, press the Save button.
11. Start the server. ![]()