Summary
Voice chat on a Forge, Fabric, or Spigot/PaperMC Minecraft server enables real-time player communication, facilitating collaboration and social interaction. By allowing players to discuss strategies and provide instant feedback, voice chat enhances teamwork and coordination. Additionally, it fosters a sense of community, enabling players to build connections and friendships in a fun and engaging environment.
| Note | Minecraft clients must also install the voice chat mod. For Spigot/PaperMC servers, players must use the Forge/Fabric/Quilt versions. |

How to Set Up Voice Chat on a Minecraft Server (Forge)
1. Download the Simple Voice Chat mod.
2. Log in to the BisectHosting Starbase panel.
3. Stop the server.![]()
4. Go to the Files tab.![]()
5. Open the mods folder.![]()
6. Upload the .jar file from step 1.
7. Start the server.![]()
8. Once the server fully starts, stop the server.![]()
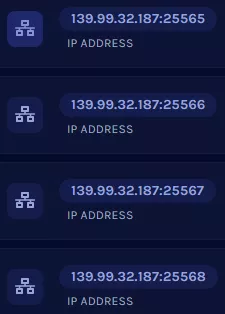
9. Go to the Network tab on the lower left.![]()
10. Depending on the server type, take note of an available port.
Budget Servers: Choose a port not in use by other mods.
Premium Servers/Dedicated IP: Create a port to be used by the mod.![]()
11. Go to the Files tab.![]()
12. Find the following directory: /home/container/config/voicechat .![]()
13. Open voicechat-server.properties for editing.![]()
14. On the port= line, change the value to the port from step 10.![]()
15. Choose the Save button.
16. Start the server.![]()

How to Set Up Voice Chat on a Minecraft Server (Fabric)
1. Download the Simple Voice Chat mod.
2. Log in to the BisectHosting Starbase panel.
3. Stop the server.![]()
4. Go to the Files tab.![]()
5. Open the mods folder.![]()
6. Upload the .jar file from step 1.
7. Start the server.![]()
8. Once the server fully starts, stop the server.![]()
9. Go to the Network tab on the lower left.![]()
10. Depending on the server type, take note of an available port.
Budget Servers: Choose a port not in use by other mods.
Premium Servers/Dedicated IP: Create a port to be used by the mod.![]()
11. Go to the Files tab.![]()
12. Find the following directory: /home/container/config/voicechat .![]()
13. Open voicechat-server.properties for editing.![]()
14. On the port= line, change the value to the port from step 10.![]()
15. Choose the Save button.
16. Start the server.![]()

How to Set Up Voice Chat on a Minecraft Server (Spigot/PaperMC)
1. Download the Simple Voice Chat mod.
2. Log in to the BisectHosting Starbase panel.
3. Stop the server.![]()
4. Go to the Files tab.![]()
5. Open the plugins folder.![]()
6. Upload the .jar file from step 1.
7. Start the server.![]()
8. Once the server fully starts, stop the server.![]()
9. Go to the Network tab on the lower left.![]()
10. Depending on the server type, take note of an available port.
Budget Servers: Choose a port not in use by other mods.
Premium Servers/Dedicated IP: Create a port to be used by the mod.![]()
11. Go to the Files tab.![]()
12. Find the following directory: /home/container/config/voicechat .![]()
13. Open voicechat-server.properties for editing.![]()
14. On the port= line, change the value to the port from step 10.![]()
15. Choose the Save button.
16. Start the server.![]()

