Summary
Headless clients on an Arma 3 server are additional instances of the game that run without a graphical interface, focusing solely on processing AI and other simulation tasks. These headless clients offload computational work from the server's central instance, improving performance and reducing player latency. By distributing the workload across headless clients, Arma 3 servers can handle larger-scale battles and complex scenarios more efficiently, enhancing the overall gameplay experience.
How to Setup a Headless Client on an Arma 3 Server
| Guide | Description |
| How to Add a Headless Client | Launch a Headless Client parallel to server start. |
| How to Reset the Headless Client | Clear the cache of the Headless Client to fix errors. |
| How to Connect a Headless Client | Connect a Headless Client to the server. |
How to Add a Headless Client on an Arma 3 Server
1. Log in to the BisectHosting Starbase panel.
2. Stop the server.![]()
3. Go to the Startup tab.![]()
4. From the Headless Client field, enter a value from 1 to 5.
| Note | BisectHosting can launch up to 5 Headless Clients parallel to the server start. This feature will add more overhead to current server resources and only work when the mission file supports HCs. |
5. Start the server.![]()
How to Reset the Headless Client on an Arma 3 Server
1. Log in to the BisectHosting Starbase panel.
2. Stop the server.![]()
3. Go to the Startup tab.![]()
4. From the Clear HC Profiles Cache field, enter 1.
5. Start the server.![]()
6. After a complete start, stop the server.![]()
7. Go to the Startup tab.![]()
8. From the Clear HC Profiles Cache field, enter 0.
9. Start the server.![]()
How to Connect a Headless Client to an Arma 3 Server
| Note | Ensure that the client mods match the server's. |
1. Log in to the BisectHosting Starbase panel.
2. Stop the server.![]()
3. Go to Config Files > Server Config from the left sidebar. 
4. Navigate to the Headless Client IP Whitelists line.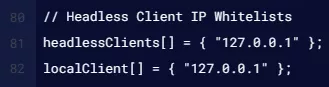
5. Next to headlessClients[], add the HC IP in quotation marks separated by a comma.![]()
| Note | If the server is password-protected, ensure the HC launches with the server password. |
6. Press the Save button.
7. Start the server.![]()