Summary
Switching game servers on the BisectHosting Starbase panel offers players flexibility and control over their gaming experience. With a diverse selection of game servers, players can easily explore new gaming experiences or switch between their preferred game instances without hassle. Switching servers allows players to tailor their gameplay to their preferences, whether seeking a change of pace or diving into multiplayer action with friends. Additionally, BisectHosting's robust infrastructure ensures reliable performance and low latency, providing an optimal gaming environment across all supported games.
How to Switch Game Servers on the Starbase Panel
1. Log in to the BisectHosting Starbase panel.
2. Stop the server.![]()
3. Under the Installed table, select Swap Game.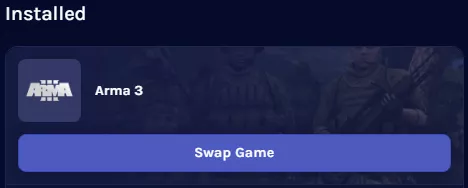
4. Pick the desired game.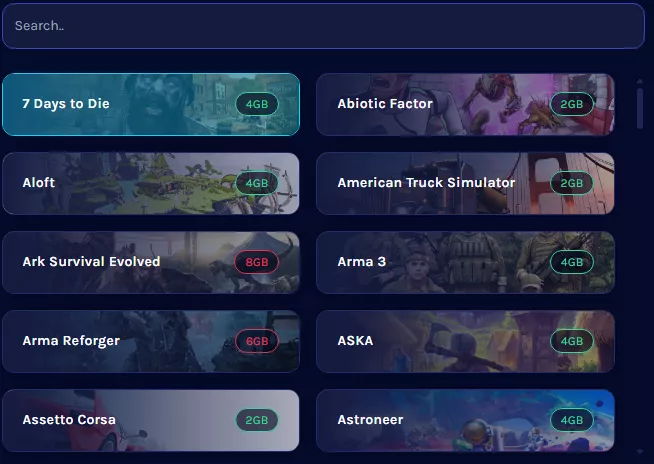
| Note | The recommended RAM is on each game in the game selector. Before switching, this must be less than or match the current server's RAM for optimal performance. |
5. Choose what to do with the current instance: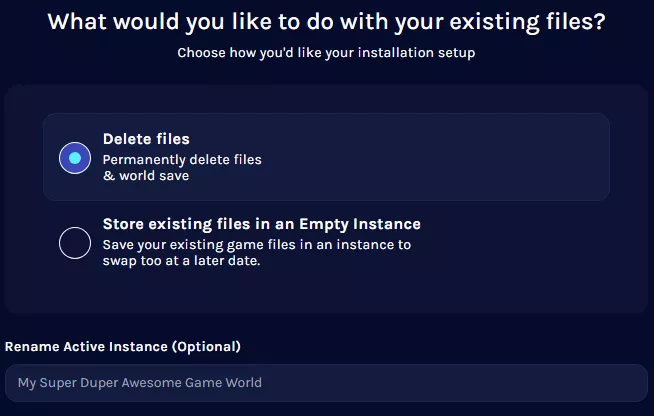
a. Delete Files
Replaces and deletes the current files and replaces them with the new instance.
b. Store existing files in an Empty Instance
Creates a new instance and saves the current files in a separate instance for later use.
| Note | The Instance Manager has a 15GB limit per game instance. If the game files exceed this limit (e.g., Ark servers), it is recommended to back up saves and create a new install instead. |
6. If Delete files is chosen, click Next.![]()
If creating a new instance, name the instance and choose the desired startup variables setting.
7. Once finished, press the Next button.![]()
8. Click Confirm. ![]()
9. Wait for the installation to finish. This may take a few minutes.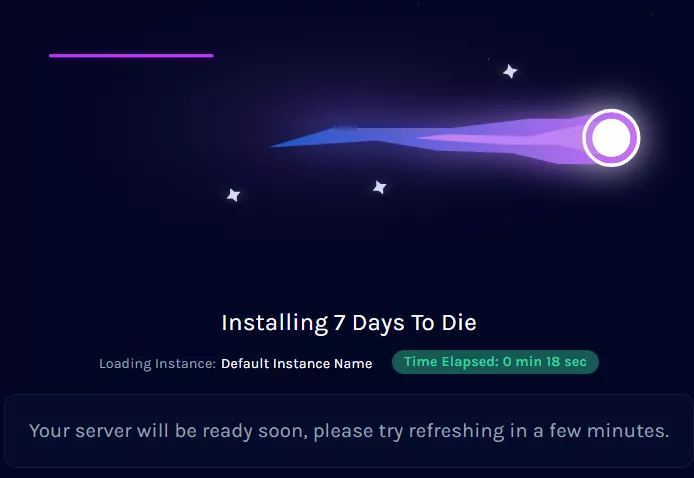
10. Start the server.![]()

