Summary
Adding a resource pack to a Minecraft Bedrock server can significantly enhance the game's visual experience. A resource pack, also known as a texture pack, can replace the default textures and sounds of the game with custom ones, providing a unique look and feel to the game. Resource packs can range from simple tweaks to major overhauls and completely transform the game's appearance.
| Requirement |
| The resource pack version must match the server version. Learn how to update the server version here. |
| Note | Uploaded single-player worlds will have the resource pack installed beforehand. |
How to Add a Resource Pack on a Minecraft Bedrock Server (Manual)
1. Download the desired resource pack. If the resource pack is a .mcpack file, rename the file extension to .zip. ![]()
To view file extensions on Windows 11, open the View dropdown and choose Show to File name extensions.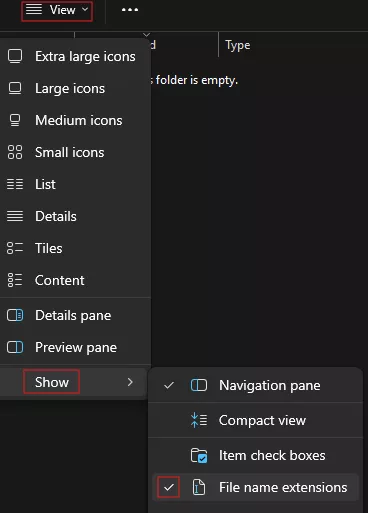
2. Extract the .zip resource pack. If the files do not have its own folder, extract to a folder with the same name.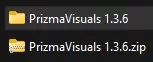
3. From the extracted folder, Open the manifest.json file with a Notepad app.![]()
4. Minimize the file to use later in the tutorial.
5. Right-click the resource pack folder from Step 2 and choose Compress to a .zip file. Replace or delete the file from Step 1.
6. Log in to the BisectHosting Starbase panel.
7. Stop the server.![]()
8. Go to the Files tab.![]()
9. Open the resource_packs folder. ![]()
10. Upload the file from Step 5.
11. Unarchive the uploaded file.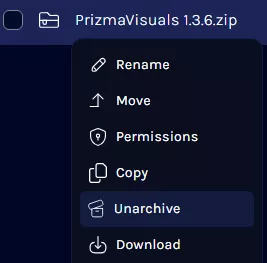
12. Return to the previous directory.![]()
13. Find the following directory: /home/container/worlds/[World Name] . ![]()
| Note | The [World Name] will depend on the current save. |
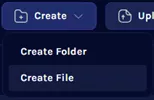
14. Open the world_resource_packs.json file. If it does not yet exist, select Create and choose Create File.![]()
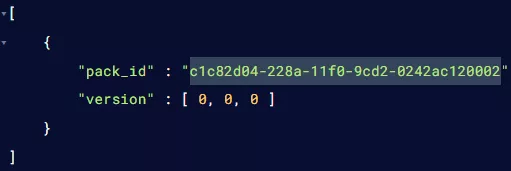
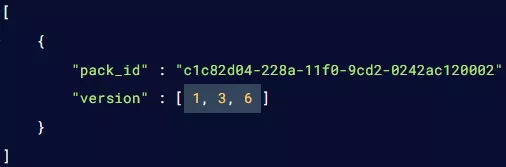
15. Paste the following text or add the curly bracket lines into the square brackets:[ { "pack_id" : "Paste uuid from manifest.json here", "version" : [ 0, 0, 0 ] }]
16. Replace the "pack_id": value with the uuid from the manifest.json file in Step 4.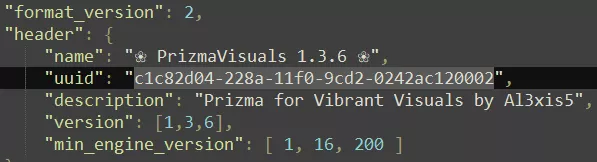
17. Replace the "version": values with the version numbers from the manifest.json file in step 4.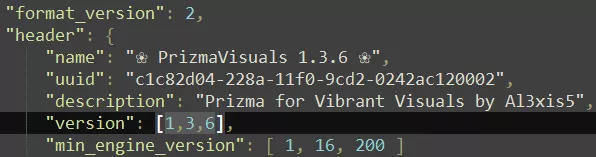
18. Press the Save button or select Create File on the lower right.
![]()
19. Name the file world_resource_packs.json and click Create File.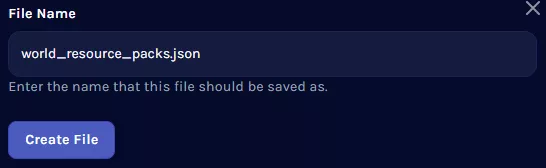
20. Start the server. ![]()
How to Add a Resource Pack on a Minecraft Bedrock Server (Uploaded)
1. Download the desired resource pack.![]()
2. Launch Minecraft Bedrock.![]()
3. Click the Play button.![]()
4. Double-click the resource pack to import the files to the game.![]()

5. On Minecraft Bedrock, choose Create new world.![]()
6. From the Resource packs tab, toggle on Shared packs.![]()
7. Under Owned, activate the desired resource pack.
8. Confirm the activated pack on the Active tab.![]()
9. After the editing the world settings, click CREATE.![]()
10. Return to the main menu.
11. From the created world, choose Edit.![]()
12. Under File management, press the Export world button.![]()
13. Confirm Export world.![]()
14. Export the world to the desired folder.![]()
15. Log in to the BisectHosting Starbase panel.
16. Stop the server.![]()
17. Go to the Files tab.![]()
18. Open the worlds folder.![]()
19. Select Create and choose Create Folder.
20. Enter the name of the world from Step 9.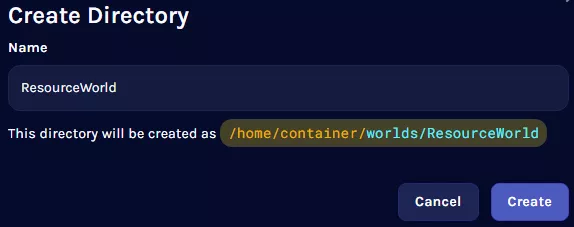
21. Upload the .mcworlds file from Step 14.
22. Rename the .mcworlds file to .zip.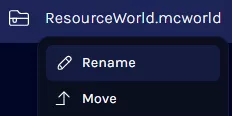
23. Unarchive the .zip file from Step 22.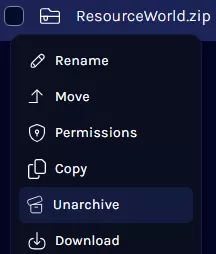
24. From the Config Files tab, choose Server Properties.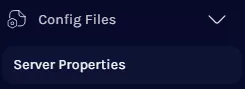
25. On the Level Name field, input the world name.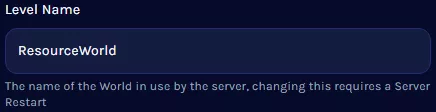
| Note | Uploaded resource pack worlds will always have the pack enabled as long as the pack is present on the server's resource folder or specified world folder. The pack will not display as running on the console tab but will run nonetheless while still installed. |
26. Start the server.![]()

