Summary
Connecting to the VPS server via VNC allows remote access and control. This enables users to manage and configure the server as if they were physically present. VNC access provides a secure and reliable way to interact with the server, allowing for tasks such as installing software, configuring settings, and troubleshooting issues. When access is complete, VNC Access should be disabled to maintain security. Leaving VNC access enabled can pose a security risk, as it allows unauthorized access to the server.
How to Connect to the VPS server using VNC
1. Log in to the BisectHosting VPS panel.
2. Select Manage on the preferred server.
3. Go to the Options tab.
4. Choose Enable VNC Access.
5. Take note of the login details.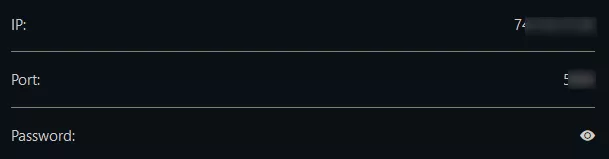
6. Click Browser VNC or use a VNC client to connect to the server.
7. When access is no longer needed, click Disable VNC Access.