Summary
In this tutorial we will take a look at how to install WordPress on your web hosting account. WordPress is one of the most commonly used content management systems. We will be using Softaculous Apps Installer to install WordPress. Softaculous can be used to install hundreds of web applications with just few clicks.
How to Install WordPress
1. Login to the cPanel account.
2. Scroll down to the Software field and click Softaculous Apps Installer.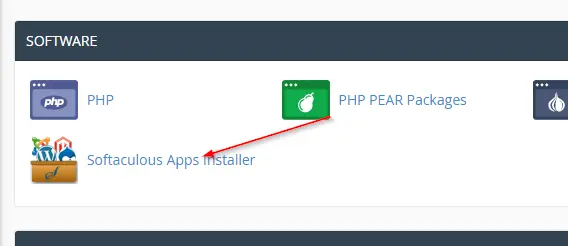
3. From the sidebar, click Blogs and choose WordPress.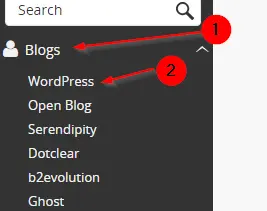
4. Press the Install button to go to the WordPress install page.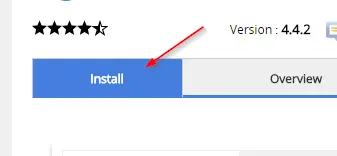
5. Set most options to the default value, but change the following options:
In Directory - This is where WordPress will be installed. For example, to install at http://mydomain/blog/ just type blog. To install in base directory (http://mydomain/) leave this empty.Site Name - Enter the website name.Site Description - Enter the website description.Admin Username - Enter a username that will be used to login to admin WordPress account.Admin Password - Enter password for the admin WordPress account.Admin Email - Enter the email address.Select Theme - This is optional and it will use the default WordPress theme if not selected.Email installation details to - Enter the email address.
Once finished, click Install to install WordPress. Installation will take 2-3 minutes. Do not leave the page while WordPress is being installed.
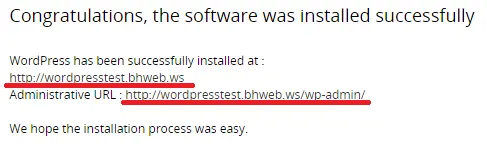
6. After installation, the Administrative URL is used to customize and manage the WordPress site. Login to the WordPress Administrative page using the username and password used during the installation.