Summary
Hosting Minecraft on a VPS (Virtual Private Server) offers several benefits. A VPS provides a stable and dedicated environment for the server, free from the limitations and risks associated with hosting on a personal computer. This setup ensures a dedicated IP address, guaranteed resources, and full control over the server, resulting in a more reliable and efficient Minecraft experience.
| Note | Ubuntu 22.04 is used in the guide below. |
How to Install Minecraft on a VPS Server
| Table of Contents |
| Java |
| Bedrock |
How to Install Minecraft on a VPS Server (Java)
1. Log in to the VPS server.
2. Run the following commands to install Java JRE.sudo apt-get updatesudo apt install [OpenJDK version]![]()
![]()
The required OpenJDK version depends on the Minecraft version and may vary in availability across different Ubuntu versions.
| Minecraft Version |
Java Version |
OpenJDK Version |
| 1.16.x and below | Java 8 | openjdk-8-jre-headless |
| 1.17.x | Java 16 | openjdk-16-jre-headless |
| 1.18.x - 1.20.4 | Java 17 | openjdk-17-jre-headless |
| 1.20.5 and above | Java 21 | openjdk-21-jre-headless |
3. Input y when prompted.![]()
4. Install screen.sudo apt install screen -y5. Create a non-privileged user for the Minecraft server.![]()
sudo useradd -r -U -d /usr/local/games/minecraft_server/ -s /usr/sbin/nologin [Username]![]()
| Note | Do not use root or a user with privileges to prevent security vulnerabilities and unauthorized access. |
6. Make the Minecraft folder.sudo mkdir -p /usr/local/games/minecraft_server/java7. Grant folder permissions to the user created in step 5.![]()
sudo chown -R [Username]: /usr/local/games/minecraft_server/8. Switch to the user.![]()
sudo su - [Username] -s /bin/bash9. Enter the Minecraft folder.![]()
cd /usr/local/games/minecraft_server/java10. Download the server.jar. Links can be retrieved from MCVersions.net.![]()
wget [server.jar link]11. Create a screen for the Minecraft server.![]()
screen -S [Screen name]12. Boot the Minecraft server. ![]()
java -Xmx1024M -Xms1024M -jar server.jar nogui13. Once it stops, accept the EULA.![]()
sed -i 's/\bfalse\b/TRUE/' eula.txt14. Run the Minecraft server. Modify the ![]()
Xmx and Xms RAM parameters as desired.java -Xmx1024M -Xms1024M -jar server.jar nogui![]()
| Note | RAM allocation should not exceed VPS RAM capacity. |
How to Install Minecraft on a VPS Server (Bedrock)
1. Log in to the VPS server.
2. Install screen.sudo apt install screen -y![]()
3. Navigate to the temp folder.cd /tmp![]()
4. Download the linux version of the server.jar. Links can be retrieved from the Minecraft wiki.wget [server link]![]()
5. Extract the .zip file.apt-get install unzipsudo unzip -d /usr/local/games/minecraft_server/bedrock [.zip filename]![]()
![]()
6. Create a non-privileged user for the Minecraft server.sudo useradd -r -U -d /usr/local/games/minecraft_server/ -s /usr/sbin/nologin [Username]![]()
| Note | Do not use root or a user with privileges to prevent security vulnerabilities and unauthorized access. |
7. Make the Minecraft folder.sudo mkdir -p /usr/local/games/minecraft_server/bedrock![]()
8. Grant folder permissions to the user created in step 5.sudo chown -R [Username]: /usr/local/games/minecraft_server/9. Switch to the user.![]()
sudo su - [Username] -s /bin/bash![]()
10. Enter the Minecraft folder.cd bedrock![]()
11. Create a text file named launch_mc_bedrock_server.sh.nano launch_mc_bedrock_server.sh![]()
12. Input the following content:#!/bin/bashLD_LIBRARY_PATH=. ./bedrock_server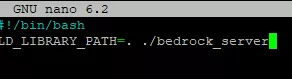
13. Press CTRL + S to save, then CTRL + X to exit the file.
14. Convert the file into an executable.chmod +x launch_mc_bedrock_server.sh![]()
15. Create a screen for the Minecraft server.screen -S [Screen name]![]()
16. Launch the Minecraft server. ./launch_mc_bedrock_server.sh![]()