Summary
Transferring a single-player Ark world to an Ark server allows players to experience the game with others in a multiplayer environment, adding a new level of excitement and challenge to the gameplay. It can provide players with a more stable and reliable gaming experience. Dedicated servers often have better performance and support than single-player games. Check out the BisectHosting Ark server plans here.
| Note | Some singleplayer configs may differ from server configs. Make a note of any custom game settings. Learn how to edit server settings here. |
How to Transfer a Singleplayer World to an Ark Server
1. Right-click ARK: Survival Evolved on Steam, hover Manage and select Browse Local Files.
2. Find the following directory: steamapps\common\ARK\ShooterGame\Saved\SavedArksLocal .
3. Take note of the .arktribe, .arkprofile, and .ark files. The .ark file must match the map on the server.
4. Minimize the folder to use later in the tutorial.
5. Log in to the BisectHosting Starbase panel.
6. Stop the server.![]()
7. Log in to the Ark server using an SFTP client. Learn how to SFTP here.![]()
8. Find the following directory: ShooterGame/Saved/SaverArks .![]()
9. Drag and drop the files from step 3.
10. Right-click and rename the .arkprofile file to [SteamID64].arkprofile. Learn how to find the SteamID64 here.![]()
11. Return to the BisectHosting Starbase panel.
12. Go to the Files tab.![]()
13. Find the following directory: /home/container/ShooterGame/Saved/Config/LinuxServer .![]()
14. Delete Game.ini and GameUserSettings.ini.![]()
15. Confirm the Delete button.![]()
16. Return to the local Ark folder window and find the following directory: steamapps/common/Ark/ShooterGame/Saved/Config/WindowsNoEditor .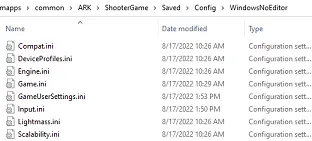
17. Drag and drop the local Game.ini and GameUserSettings.ini files into the LinuxServer folder.
18. Start the server.![]()