Summary
Counter-Strike 2 custom maps are player-created environments that expand the game's variety and gameplay. These maps are not part of the official game but are crafted by the community, offering unique settings, challenges, and gameplay experiences. Custom maps range from competitive arenas to creative, offbeat designs, adding a vibrant and ever-evolving dimension to the CS2 gaming experience.
| Requirement |
| An FTP client is required to transfer files onto the Counter-Strike 2 server. Follow this tutorial to learn how to use an FTP client. Both the server and the client must have the map installed. |
| Note | Previous CS:GO maps are not playable in CS2's new source engine. Check the mod description for updates. |
How to Install Custom Maps on a Counter-Strike 2 Server
1. Download a CS2 map.
2. Log in to the BisectHosting Games panel.
3. Stop the server.![]()
4. Log in to the Game FTP server.
5. Find the following directory: /game/csgo/maps .![]()
6. Upload the map .vpk file from Step 1.![]()
7. Start the server.![]()
8. Go to the Console tab.![]()
9. Enter the following: changelevel MAPNAME .![]()
How to Install Custom Maps on a Counter-Strike 2 Client
1. Download a CS2 map.
2. From Steam, right-click CS2 to open Manage and choose Browse local files.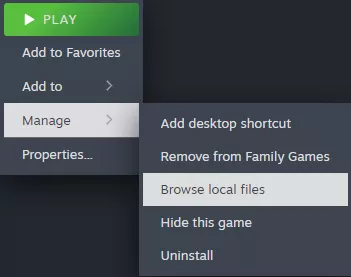
3. Find the following directory: \SteamLibrary\steamapps\common\Counter-Strike Global Offensive\game\csgo\maps .![]()
4. Move or paste the map .vpk file from Step 1.![]()
5. From Steam, right-click CS2 to open Properties.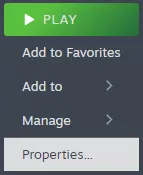
6. Under Launch Options, enter the following: -insecure .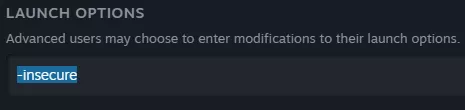
| Note | The -insecure command will temporarily not allow joining an official server. Remove the command later on to play on official servers. |