No One Survived Beginner’s Guide
Posted on by
Share:
Share on X
Share on Facebook
Share on Threads
Share on Bluesky
Copy to Clipboard
Share via email
(Estimated Read Time: 11 minutes)
Survival games can often be confusing and overwhelming, especially for new players, and that indeed remains the case with No One Survived. To help introduce this exciting game to new players and help experienced players who are struggling, here we've prepared a No One Survived beginner's guide to get you started!Starting in No One Survived
Character Customization & Attributes
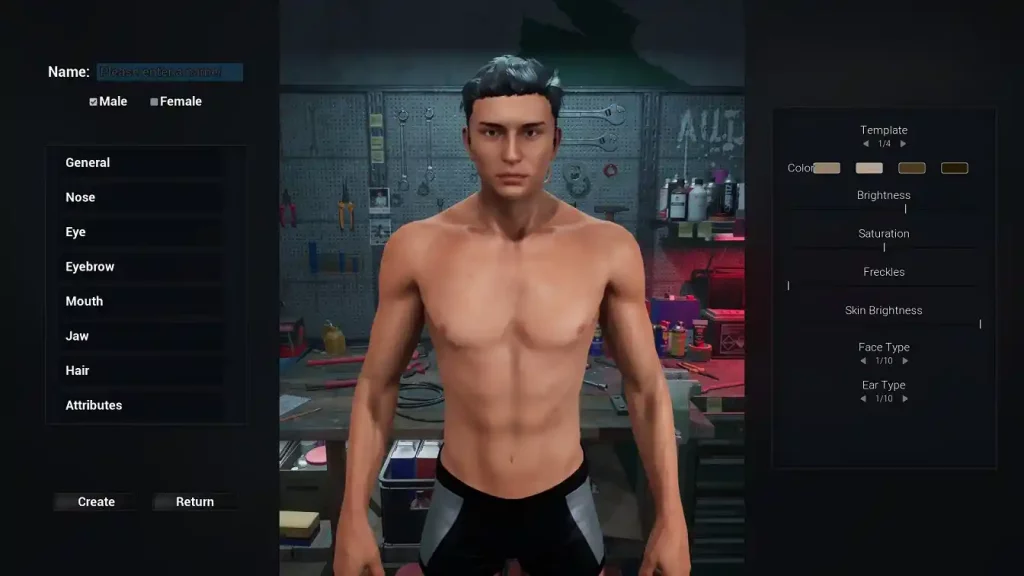 Before you start a single or multiplayer game in No One Survived, the game asks you to create a character. Here, you can select different visual features, such as hair type, eye color, and jaw shape. Don’t forget to name your character and select if you want a male or female build.
At the bottom of the list at the character customization window is an option for Attributes. Unlike other games, the trait selection in No One Survived is random. So, you may want to spend some time clicking the “Random” button on the right to get the traits you want. Much like Project Zomboid, there are good and bad traits and attributes that can have a big impact on your adventures for better or worse.
For example, the Runner trait may help with stamina management, while the Unorganized trait reduces your character’s maximum carry weight.
Once you’re satisfied with your character’s attributes and visuals, click the “Create” button on the lower left of the screen.
Before you start a single or multiplayer game in No One Survived, the game asks you to create a character. Here, you can select different visual features, such as hair type, eye color, and jaw shape. Don’t forget to name your character and select if you want a male or female build.
At the bottom of the list at the character customization window is an option for Attributes. Unlike other games, the trait selection in No One Survived is random. So, you may want to spend some time clicking the “Random” button on the right to get the traits you want. Much like Project Zomboid, there are good and bad traits and attributes that can have a big impact on your adventures for better or worse.
For example, the Runner trait may help with stamina management, while the Unorganized trait reduces your character’s maximum carry weight.
Once you’re satisfied with your character’s attributes and visuals, click the “Create” button on the lower left of the screen.
Gameplay Settings
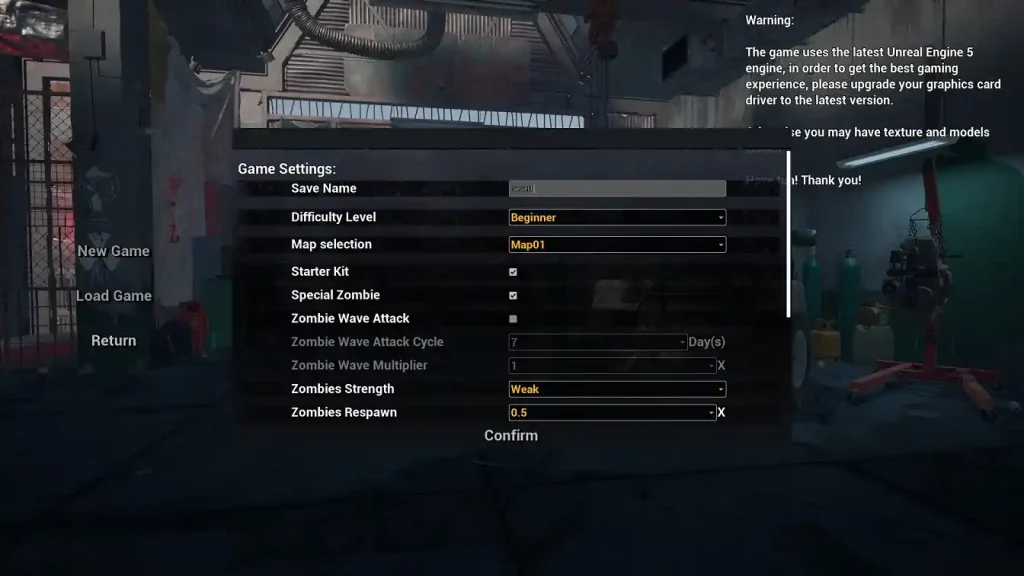 If you’re playing solo or starting a server from the game, No One Survived will let you select various gameplay settings to help generate your world. Below are the fields you can modify in the Game Settings window:
- Save Name: The world’s file name.
- Difficulty Level: The game’s difficulty levels (from easiest to hardest) are Beginner, Catastrophe, and Hardcore.
- Starter Kit: Toggle to receive a basic starter kit upon spawning for the first time.
- Special Infection: Toggle to spawn special zombies on your map.
- Zombie Wave Attack: Toggle to let the game spawn zombie waves.
- Zombie Wave Attack Cycle: Indicate the number of days when an undead horde occurs.
- Zombie Wave Multiplier: Indicate the amount of undead spawning during zombie waves.
- Zombies Strength: Indicate the strength of zombies.
- Zombies Respawn: Indicate the amount of time zombies respawn.
- Sprinters Zombies: Set the percentage of zombies on the map that can run.
- Virus Death Rate: Increases or decreases your character’s immunity.
- Year Duration: Indicate the number of in-game days that make a year.
- Permadeath: Toggle to enable or disable permadeath mode.
- Loot Distribution: Select the randomization of loot across the map and its assets.
- Loot Respawn Interval: Indicates the number of days loot spawn.
- Merchant Restock Interval: Indicates the number of days the NPC merchant restocks wares.
- PVP: Toggle to enable or disable PVP mode.
Health and Stats
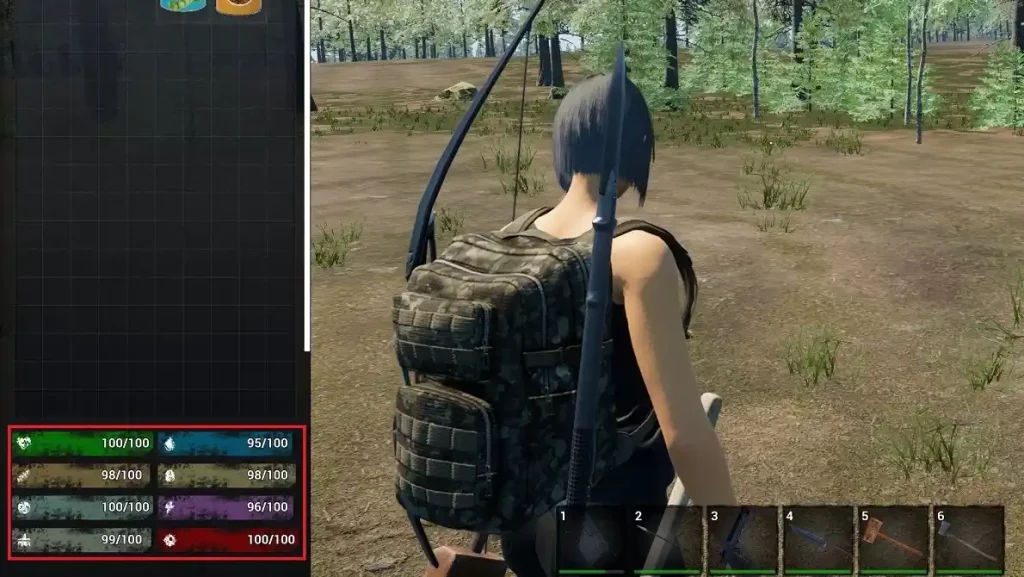 Like other survival games, No One Survived has various vitals and stats to maintain. For this game, you have eight main stats, which are the following:
- Health
- Water
- Protein
- Carbohydrates
- Happiness
- Fatigue
- Cleanliness
- Infection
Surviving Your First Day in No One Survived
 After completing your initial preparations, it’s finally time to get into the action.
Spawning
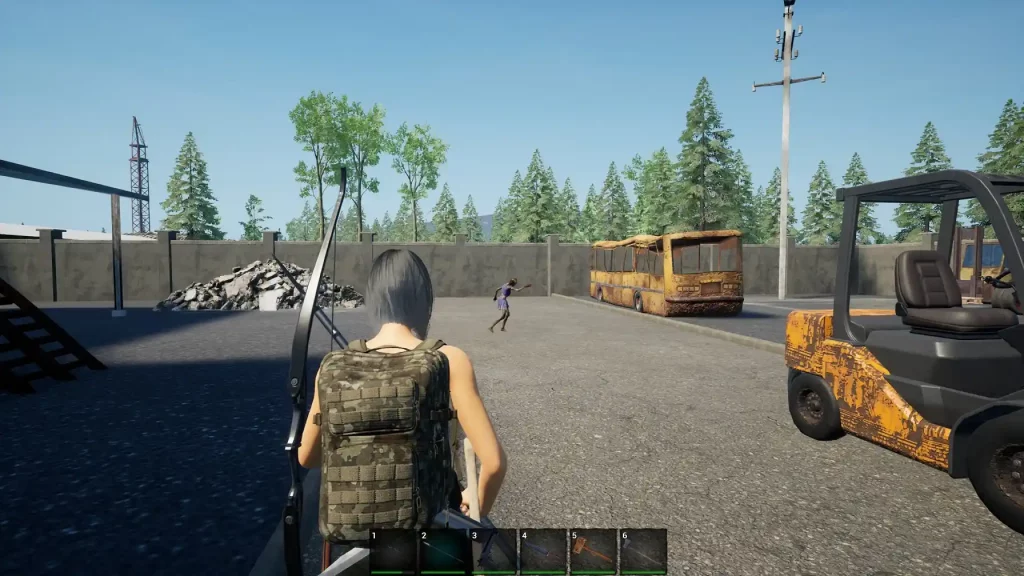
 Unlike other survival games like The Front, No One Survived spawns players at seemingly random locations. Albeit there are pre-determined spawn locations across the map, you won’t know which of these places you’ll appear, and not all of them are so visually distinct that they stand out easily.
Thankfully, spawn points are generally near NPC merchants, giving you somewhere safe to visit. Do keep in mind, however, that traders don’t usually sell meaningful items on Day 1. Nonetheless, it’s worthwhile to remember this location so you’ll know when to come back when the NPC restocks and you have more resources at your disposal.
Note: Merchants illuminate their lights at night as of version 0.0.6.2, making them easier to locate in the dark.
Unlike other survival games like The Front, No One Survived spawns players at seemingly random locations. Albeit there are pre-determined spawn locations across the map, you won’t know which of these places you’ll appear, and not all of them are so visually distinct that they stand out easily.
Thankfully, spawn points are generally near NPC merchants, giving you somewhere safe to visit. Do keep in mind, however, that traders don’t usually sell meaningful items on Day 1. Nonetheless, it’s worthwhile to remember this location so you’ll know when to come back when the NPC restocks and you have more resources at your disposal.
Note: Merchants illuminate their lights at night as of version 0.0.6.2, making them easier to locate in the dark.
Interactive Map
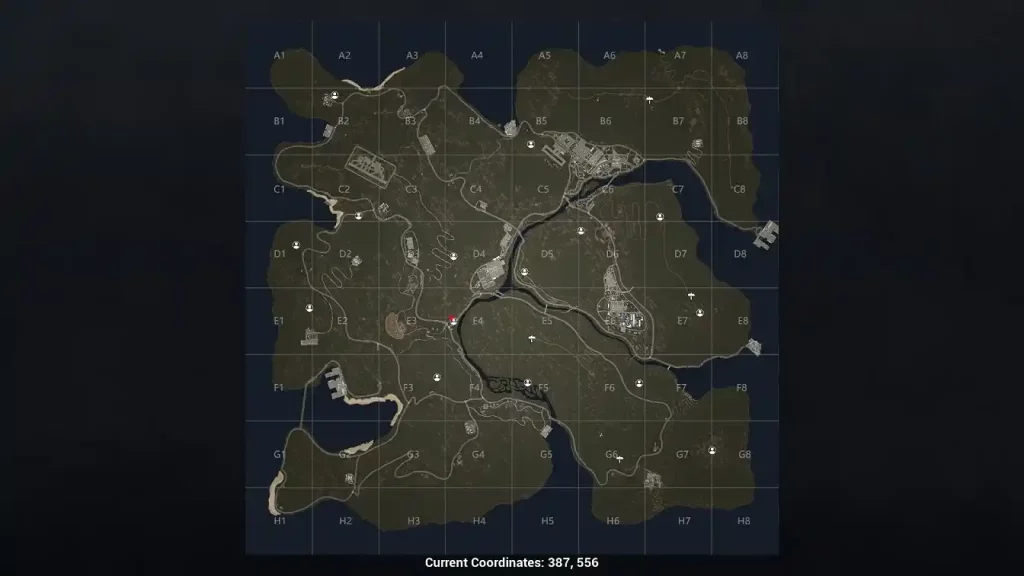 Press the “M” keyboard key (by default) to open the interactive map. Pay attention to the different places you clear to help you gauge the best place to build your base.
Note that building a base in No One Survived typically depends on player preference. For example, building a base in the city can be worthwhile since you’ll have quick access to loot. On the other hand, setting up camp in the forest can be ideal for PVP servers and those looking to have a safe haven since it’ll be difficult for hostile players to find your whereabouts.
Press the “M” keyboard key (by default) to open the interactive map. Pay attention to the different places you clear to help you gauge the best place to build your base.
Note that building a base in No One Survived typically depends on player preference. For example, building a base in the city can be worthwhile since you’ll have quick access to loot. On the other hand, setting up camp in the forest can be ideal for PVP servers and those looking to have a safe haven since it’ll be difficult for hostile players to find your whereabouts.
Crafting
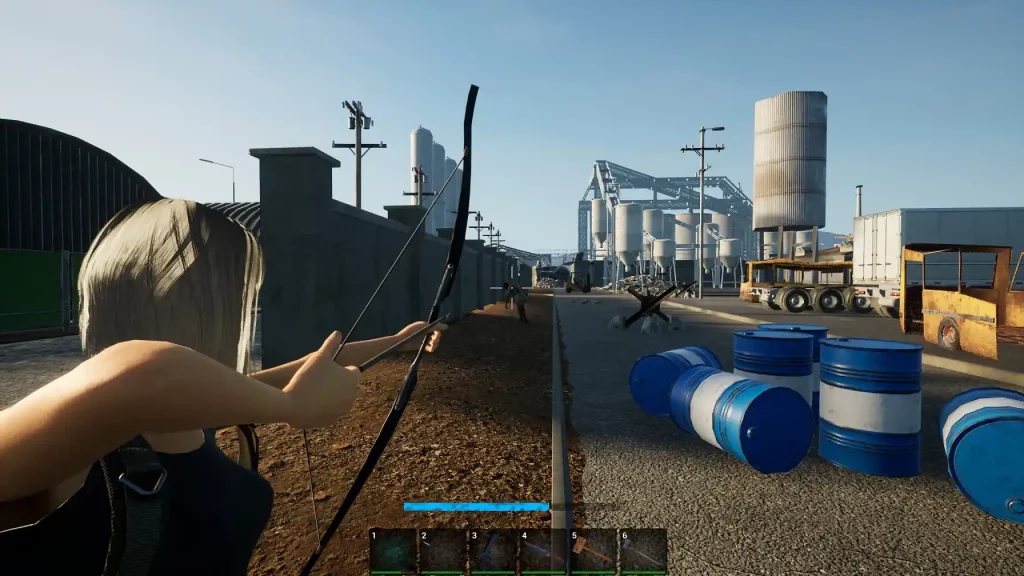
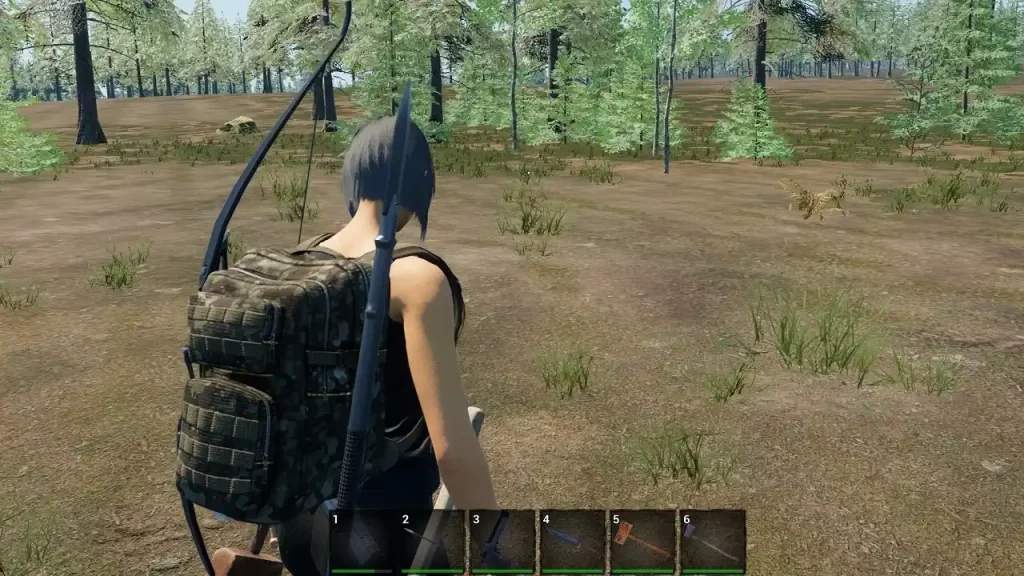
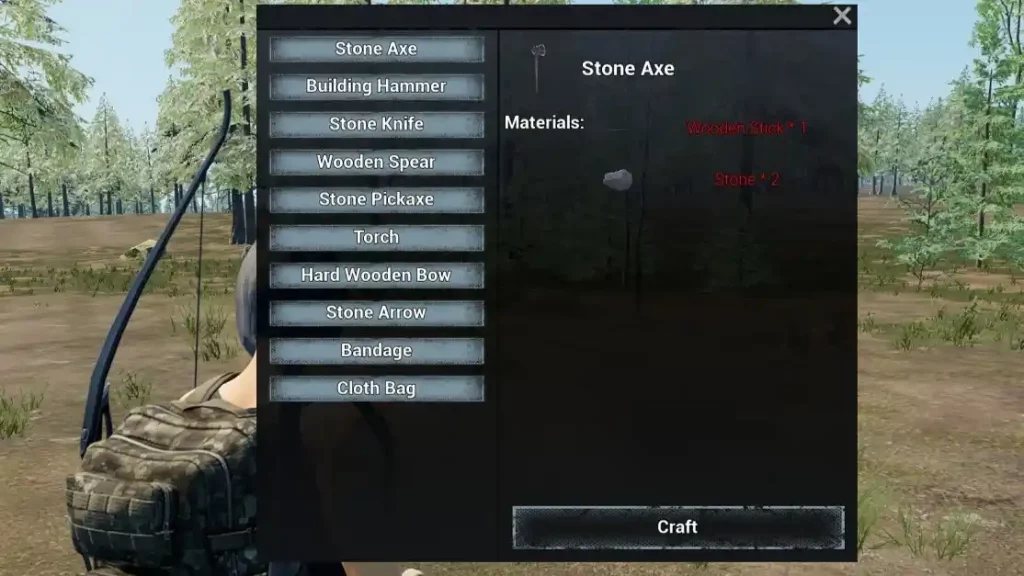 After selecting your destination, gather as many resources as possible along the way. Then, use those materials to craft your starting equipment. The items to focus on at this point in the game are the Stone Axe, Stone Knife, Spear, and Bow and Arrow.
Thankfully, crafting by hand in this game is a reasonably straightforward process. Open your inventory and click the Crafting button at the top. Then, click the Craft button and wait for the process to complete.
Note: Crafting by hand doesn’t have a queue, unlike making items from crafting stations.
Remember, your character’s inventory space at the start is fairly small. Additionally, you have a very limited carry weight threshold. So, managing your weight and inventory space while looting as many resources as possible is crucial.
After selecting your destination, gather as many resources as possible along the way. Then, use those materials to craft your starting equipment. The items to focus on at this point in the game are the Stone Axe, Stone Knife, Spear, and Bow and Arrow.
Thankfully, crafting by hand in this game is a reasonably straightforward process. Open your inventory and click the Crafting button at the top. Then, click the Craft button and wait for the process to complete.
Note: Crafting by hand doesn’t have a queue, unlike making items from crafting stations.
Remember, your character’s inventory space at the start is fairly small. Additionally, you have a very limited carry weight threshold. So, managing your weight and inventory space while looting as many resources as possible is crucial.
Increasing Inventory Size
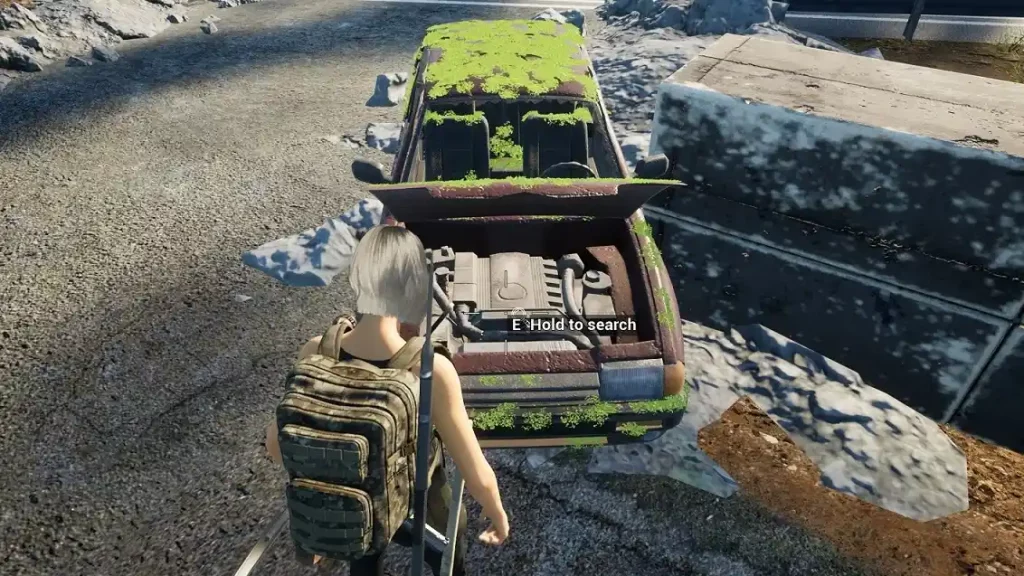
 Inspect houses and places of interest while you’re making your way to your preferred campsite location. If you’re lucky, you can find a backpack in one of the wardrobes, cupboards, or containers.
If you’re unlucky, and can't find a bag on your travels, you can craft a Cloth Bag. It only needs 8x Fabric, which you can get by dismantling some pieces of clothing.
Inspect houses and places of interest while you’re making your way to your preferred campsite location. If you’re lucky, you can find a backpack in one of the wardrobes, cupboards, or containers.
If you’re unlucky, and can't find a bag on your travels, you can craft a Cloth Bag. It only needs 8x Fabric, which you can get by dismantling some pieces of clothing.
Loot Priorities
 It can be tempting to loot every item you come across while exploring the map. But, again, you’re not carrying a massive inventory space from the get-go.
At this point, focus on a few item types to help increase survivability. Some notable items are a Cooking Pot, Tool Box, Water Bottles, and one or two Canned Foods.
It can be tempting to loot every item you come across while exploring the map. But, again, you’re not carrying a massive inventory space from the get-go.
At this point, focus on a few item types to help increase survivability. Some notable items are a Cooking Pot, Tool Box, Water Bottles, and one or two Canned Foods.
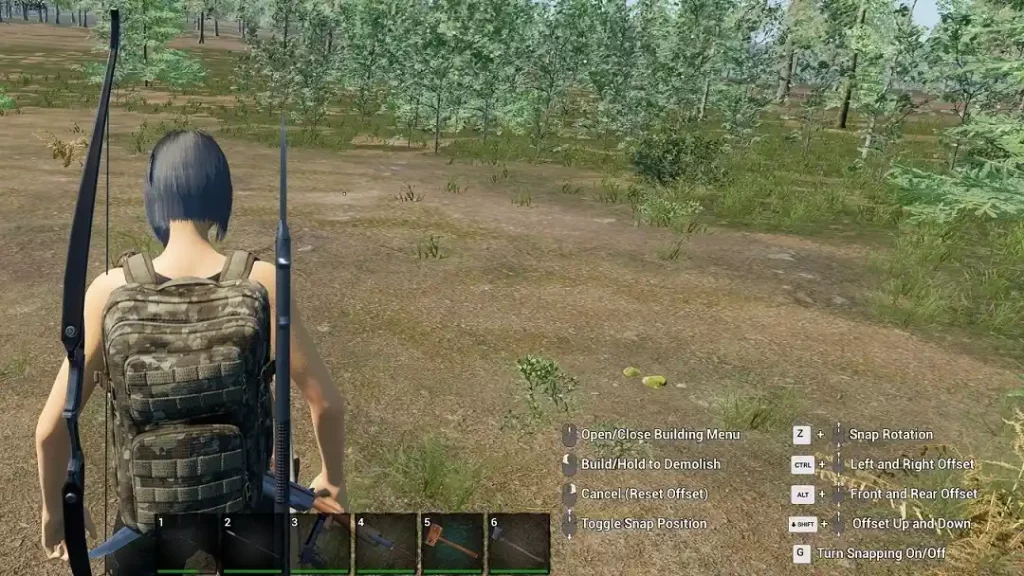
Building Basics
 The Building Hammer is your go-to tool to build anything in No One Survived. Craft this tool by chopping down a tree with your Stone Axe. Then, gather the fallen log and use it to craft the Building Hammer.
Next, equip the Building Hammer and press the middle mouse button to open the crafting menu. At this point, you might want to build a bed since it’ll be your respawn point.
The Building Hammer is your go-to tool to build anything in No One Survived. Craft this tool by chopping down a tree with your Stone Axe. Then, gather the fallen log and use it to craft the Building Hammer.
Next, equip the Building Hammer and press the middle mouse button to open the crafting menu. At this point, you might want to build a bed since it’ll be your respawn point.
Tech Tree
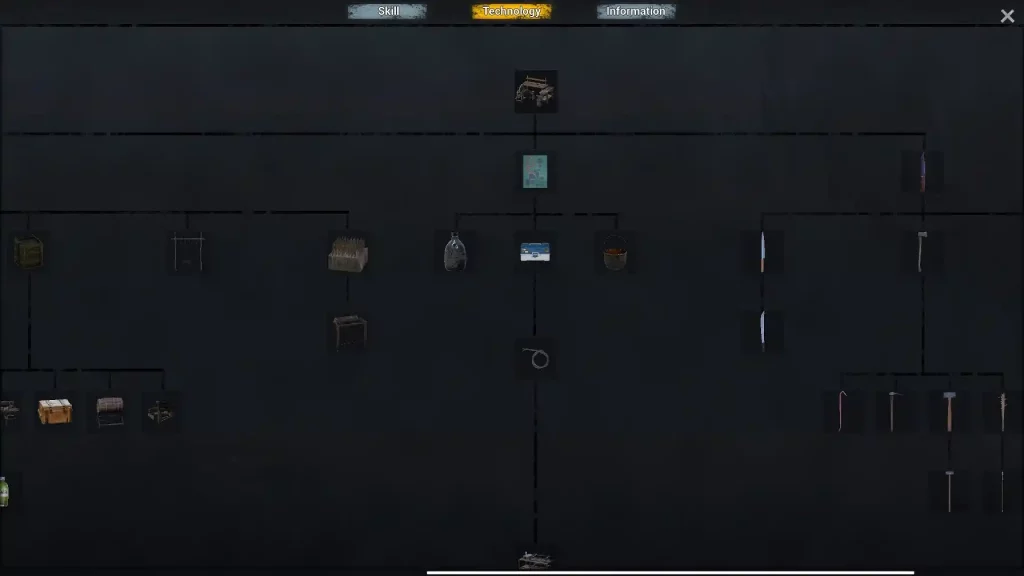 With the bed placed and your respawn point set, it’s time to start unlocking tech from the Tech Tree. Open the Tech Tree by pressing the “TAB” keyboard key. Here, you’ll find the different unlockables the game has to offer.
During the early stages, it’s ideal to use two logs to unlock two items from the Tech Tree. Use one log to unlock the Workbench recipe. Then, use the other log to unlock the ability to make planks.
With the bed placed and your respawn point set, it’s time to start unlocking tech from the Tech Tree. Open the Tech Tree by pressing the “TAB” keyboard key. Here, you’ll find the different unlockables the game has to offer.
During the early stages, it’s ideal to use two logs to unlock two items from the Tech Tree. Use one log to unlock the Workbench recipe. Then, use the other log to unlock the ability to make planks.
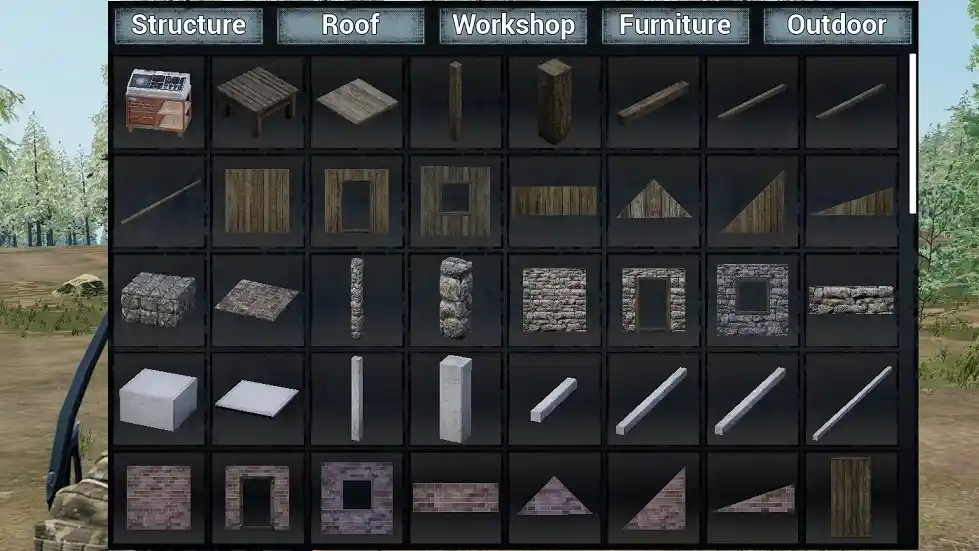
Building a Base
 Once you reach your preferred location for your base, and assuming you have sufficient resources, it’s time to build your initial settlement.
Start by laying down two pieces of foundation. Next, build walls and place a roof above your base. Craft the Workbench and make a Storage Chest for your items afterward.
Then, craft a campfire, which you’ll need for cooking. You can also start cooking items you recently gathered at this point.
With your base built, you can now prepare for the defenses for the zombie wave attacks and have a rock-solid foundation for your adventures in No One Survived.
Once you reach your preferred location for your base, and assuming you have sufficient resources, it’s time to build your initial settlement.
Start by laying down two pieces of foundation. Next, build walls and place a roof above your base. Craft the Workbench and make a Storage Chest for your items afterward.
Then, craft a campfire, which you’ll need for cooking. You can also start cooking items you recently gathered at this point.
With your base built, you can now prepare for the defenses for the zombie wave attacks and have a rock-solid foundation for your adventures in No One Survived.
Tips & Tricks
 Aside from the details already mentioned, here are some tips and tricks to help improve your overall No One Survived gaming experience:
- Dying isn't the end: No One Survived doesn’t punish you for dying. If you make a mistake, jump off a cliff to return to your spawn point. It’s also a quick way to travel back to your base.
- Travel fast: Immediately purchase the car from the NPC merchant whenever it’s in stock. Driving helps you get to different locations faster than on foot.
- Distract zombies in a pinch: While you’re in a multiplayer server, and if you have allies, drive a car to distract nearby zombies. Use this opportunity to loot places undisturbed.
- Read at home: Only read skill books at your base to prevent getting interrupted by the undead or hostile players.
- Only use clean water: Cleaning yourself with dirty water can cause malaria.
- Stay away from animals: Chasing a wild boar while still getting used to the game, and especially in early gear, is a recipe for disaster. Resist the urge to pet until you're properly armed.
Create your own
No One Survived server
No One Survived server
Choose a plan, pick a game, and play with your friends!
Join our Newsletter
Subscribe for the latest updates on all things gaming!
How would you rate this blog?
Share your opinion and help us make our blogs even better!
Didn't like
Neutral
Liked
Need a game server?
Rent a game server where you and your friends can play privately with low latency and custom settings. Choose from 100+ games, invite people from around the globe, and enjoy private matches, or build your own online community with your own rules.

Relevant Blogs


GET THE INSIDE SCOOP!
Join our email for updates on our hosted games, company news and exclusive deals. Stay in the loop!