Summary
Minecraft Bedrock server worlds can be modified to include a resource pack or 'shader'. This pack can be added to existing worlds, but it is best done on completely new ones. These packs can drastically change the graphics for Minecraft and require users to enable the new vibrant visuals option. Shaders vary slightly from addons/behavior packs; they don't add mechanics or items, only visuals, to the game.
| Note | Make a backup of the existing world before installing a shader pack. |
How to Install Shaders on a Minecraft Bedrock Server
1. Log in to the BisectHosting Starbase panel.
2. Stop the server.![]()
3. Go to the Files tab.![]()
4. Find the following directory: /home/container/worlds .![]()
5. Right-click the desired world folder and choose Download.
6. Extract the world into an empty folder. 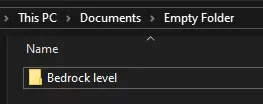
7. Open the folder, highlight all files, and press Right Click > Send to Compressed (zipped) folder.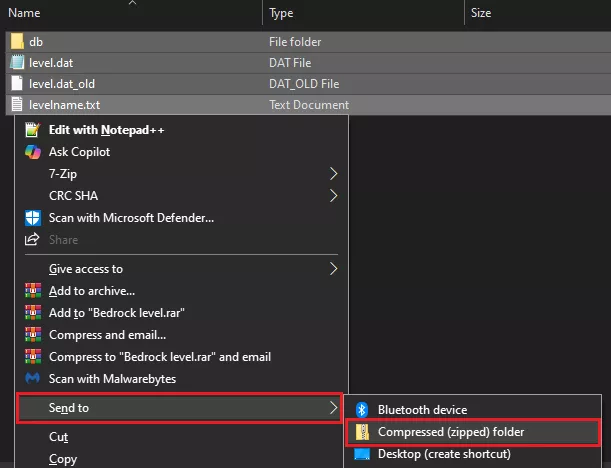
8. Rename the .zip at the end to .mcworld and confirm to rename.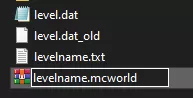
9. Open the .mcworld file to import the world.
10. Download the desired pack from CurseForge or a similar site.
11. Open the .mcpack file to install the shader.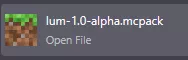
12. Open Minecraft, and select Edit under the imported world.
13. Open the Experiments menu.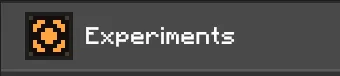
14. Toggle On the Vibrant Visuals setting.
15. Select Turn on Experiments Anyway if prompted.
16. Go to the Resource Packs menu.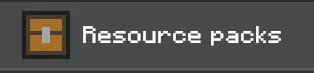
17. Under Activated and Owned, select Activate next to the pack.
18. Load the world by pressing Play.![]()
19. Open the Settings menu.![]()
20. Select the Resource Pack's Settings.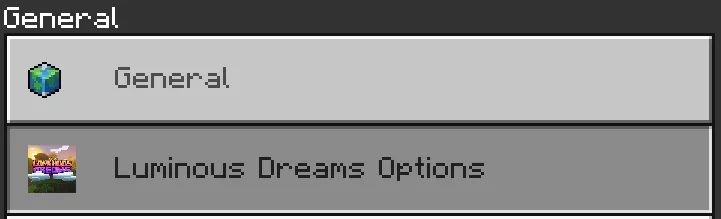
21. Select Vibrant Visuals from the Graphics Mode dropdown menu.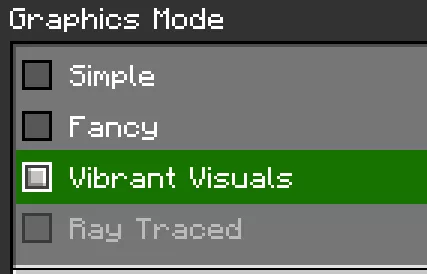
| Note | If the setting does not appear, double-check that Vibrant Visuals is enabled in the world settings. |
22. Save and Quit the world.![]()
23. Go into the world's Edit menu.
24. Choose Export World, confirm, and save the file.
25. Locate the .mcworld file, and rename the extension to .zip .![]()
26. From the worlds folder on the server, rename the old world file.
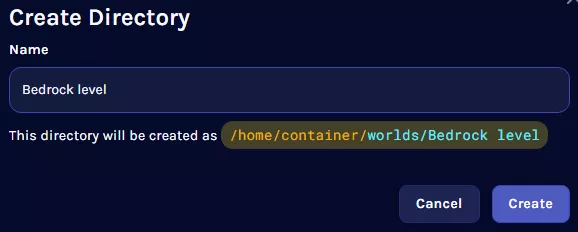
27. Choose Create > Create Folder and name it the same as the original folder.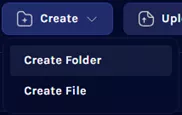
28. Upload the .zip file inside the newly created folder.
29. Unzip the file by pressing Right Click > Unarchive.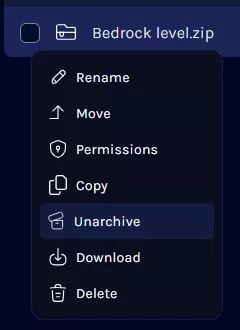
30. Return to the container directory and open the resource_packs folder.![]()

31. Choose Create > Create Folder and give it a name related to the pack.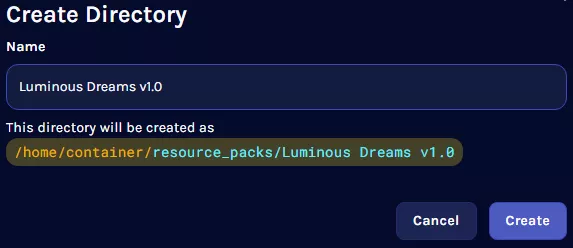
32. Locate the shader's .mcpack file from Steps 10-11, and rename the extension to .zip .![]()
33. Upload the file inside the newly created folder.
34. Unzip the file by pressing Right Click > Unarchive.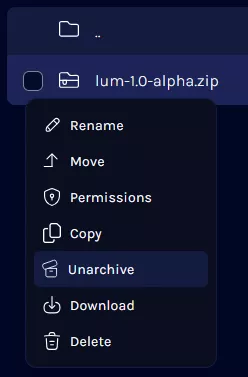
35. Open the manifest.json file and take note of the "uuid" section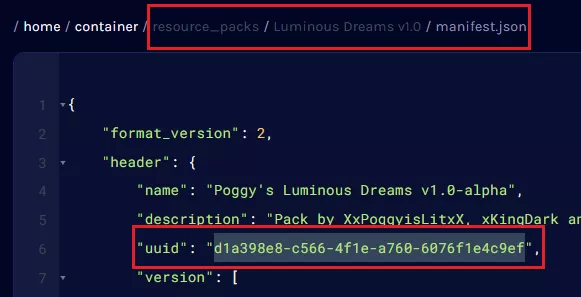
36. Open the world_resource_packs.json file from the /worlds/Levelname directory and ensure that "pack_id" is the same as the other file's "uuid" .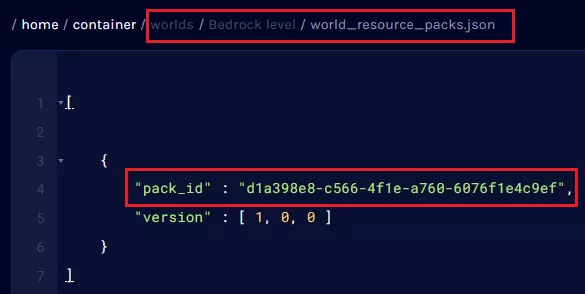
37. Go to Config Files > Server Properties from the left sidebar.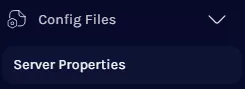
38. Set Require Texture Pack to True .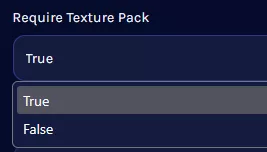
39. Start the server. ![]()

