7 Days to Die 2.0 Base Building Guide: Tips, Tricks, & Best Base Designs
Posted on by
Share:
Share on X
Share on Facebook
Share on Threads
Share on Bluesky
Copy to Clipboard
Share via email
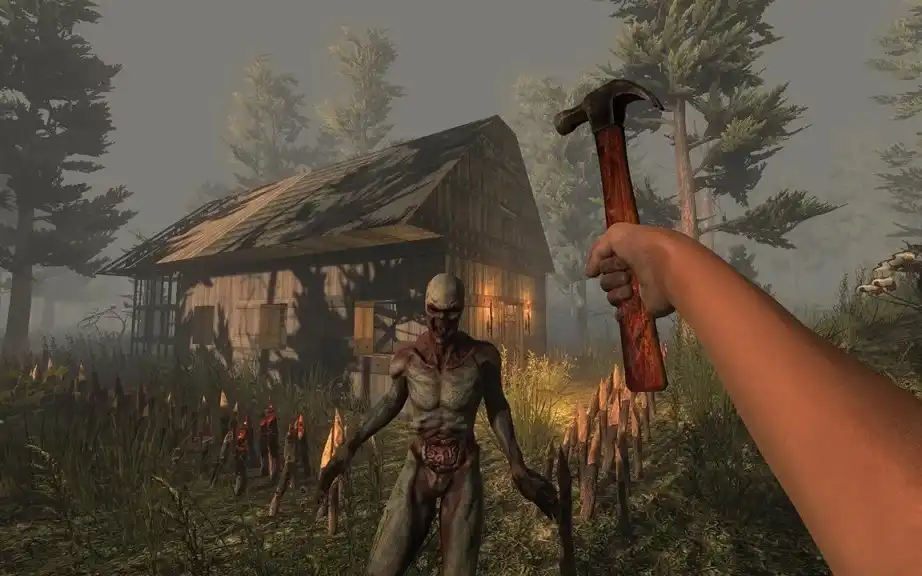
With the release of 7 Days to Die 2.0, developer The Fun Pimps is adding more challenges survivors have to face in Navezgane, including four new types of stronger zombies. So, building a proper base is even more of a requirement to survive the undead, especially during the weekly Blood Moon hordes. With that in mind, we’re here to help you learn how to build a home you can feel safe in, and look over some of the best base designs in 7 Days to Die 2.0!
 Like many sandbox games, 7 Days to Die has unique building systems that separate it from the rest. Understanding these mechanics deeply can turn you into a pro-builder, increasing your chances of surviving the dangerous undead hordes coming your way.
 Generally, 7 Days to Die has five main materials players can work with when building structures. These materials and their respective stats are as follows:
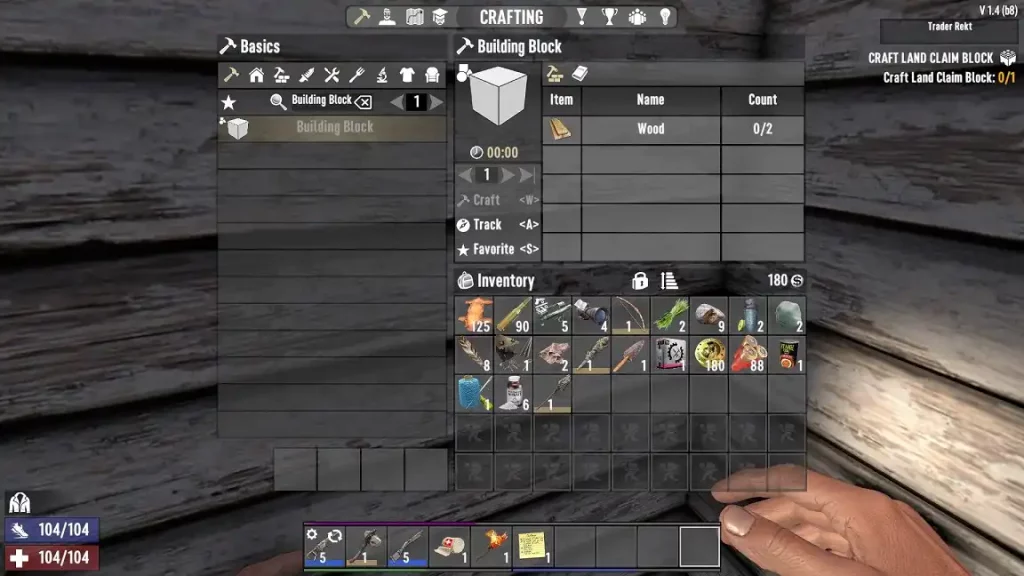
 By default, players can place cube versions of each building material in 7 Days to Die. However, choosing a material to place and holding "R" brings up the radial menu. Then, select the top option, which opens the window to choose over 2,000 shapes for that particular material.
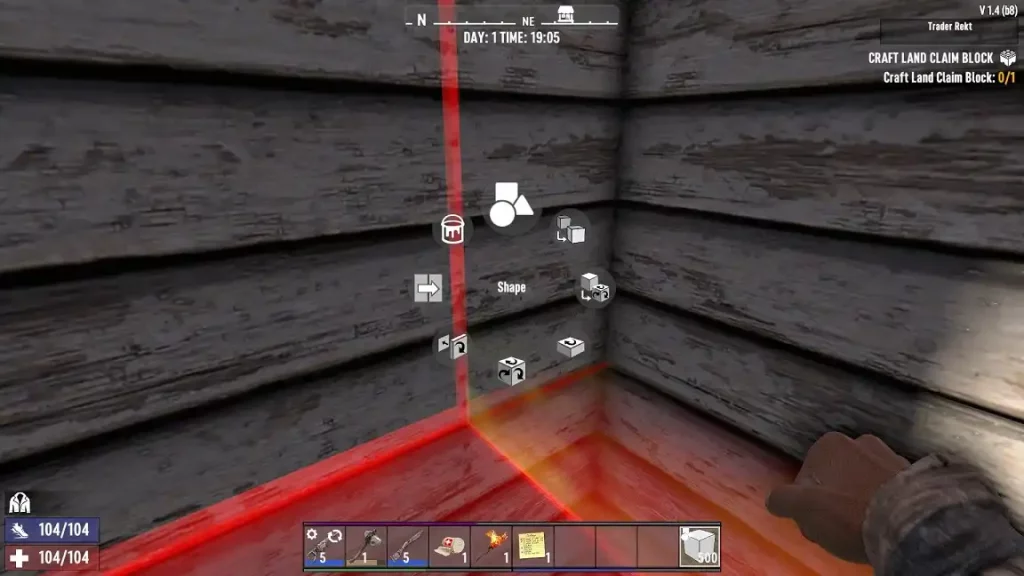
Once selected, players can rotate the block by pressing the left mouse button or the “R” keyboard key. Alternatively, hold "R" and select "Advanced Rotation" to unlock additional rotation options. Highlighting a particular material and holding "R" to open the radial menu allows players to access advanced placement options, such as copy shape and copy rotation. These actions reduce the effort needed to place materials and speed up base-building operations.
By default, players can place cube versions of each building material in 7 Days to Die. However, choosing a material to place and holding "R" brings up the radial menu. Then, select the top option, which opens the window to choose over 2,000 shapes for that particular material.
Once selected, players can rotate the block by pressing the left mouse button or the “R” keyboard key. Alternatively, hold "R" and select "Advanced Rotation" to unlock additional rotation options. Highlighting a particular material and holding "R" to open the radial menu allows players to access advanced placement options, such as copy shape and copy rotation. These actions reduce the effort needed to place materials and speed up base-building operations.
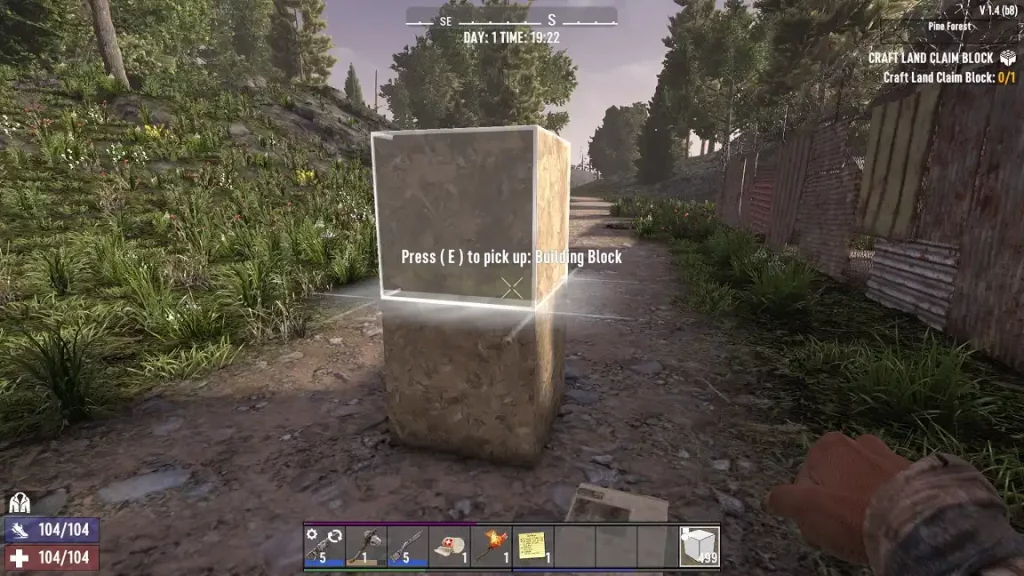 Each material has stats, particularly Mass and Horizontal Support. The latter is the weight a material can support. For example, a block has a Horizontal Support value of 40, which means it can support eight blocks with a Mass value of 5. Adding more materials than the support can carry makes the structure crumble.
Thankfully, players don’t need to calculate each material’s maximum Horizontal Support. Instead, the game lets you know when the structure will crumble if the cursor turns red.
However, Steel has a different property from other materials. In particular, a steel structure doesn't crumble when a player overloads its Horizontal Support value but only the exceeded materials at the end of the structure. But the entire Steel structure will still collapse if you add extra Mass in the middle of the assembly.
Each material has stats, particularly Mass and Horizontal Support. The latter is the weight a material can support. For example, a block has a Horizontal Support value of 40, which means it can support eight blocks with a Mass value of 5. Adding more materials than the support can carry makes the structure crumble.
Thankfully, players don’t need to calculate each material’s maximum Horizontal Support. Instead, the game lets you know when the structure will crumble if the cursor turns red.
However, Steel has a different property from other materials. In particular, a steel structure doesn't crumble when a player overloads its Horizontal Support value but only the exceeded materials at the end of the structure. But the entire Steel structure will still collapse if you add extra Mass in the middle of the assembly.
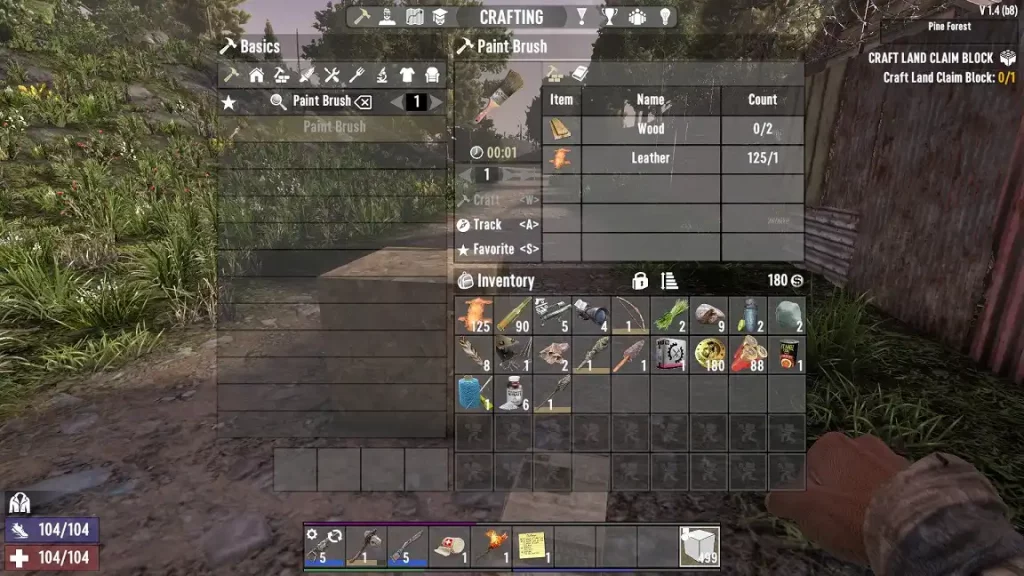 Painting lets a player’s creativity shine through their base. With a Paint Brush in hand and buckets of Paint in the inventory, hold "R" to open the radial menu. Then, select "Materials." With the Materials window opened, select the color or texture you want for the material. Next, click on a material block's face with the Paint Brush to color it.
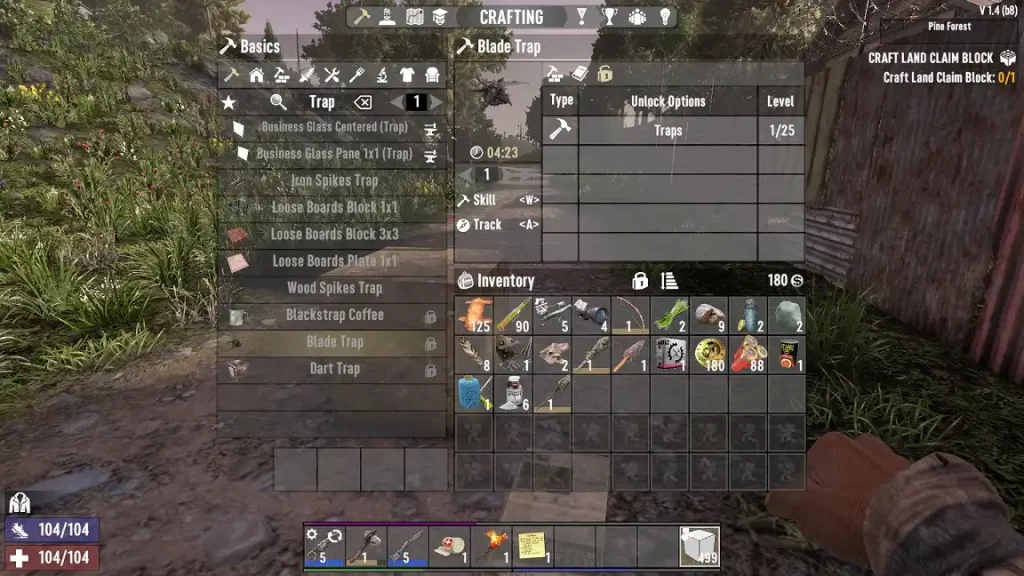 Unless you’re working in the Prefab Editor, your 7 Days to Die base should have defenses to combat weekly undead hordes. Thankfully, the game has various traps to choose from, including the following:
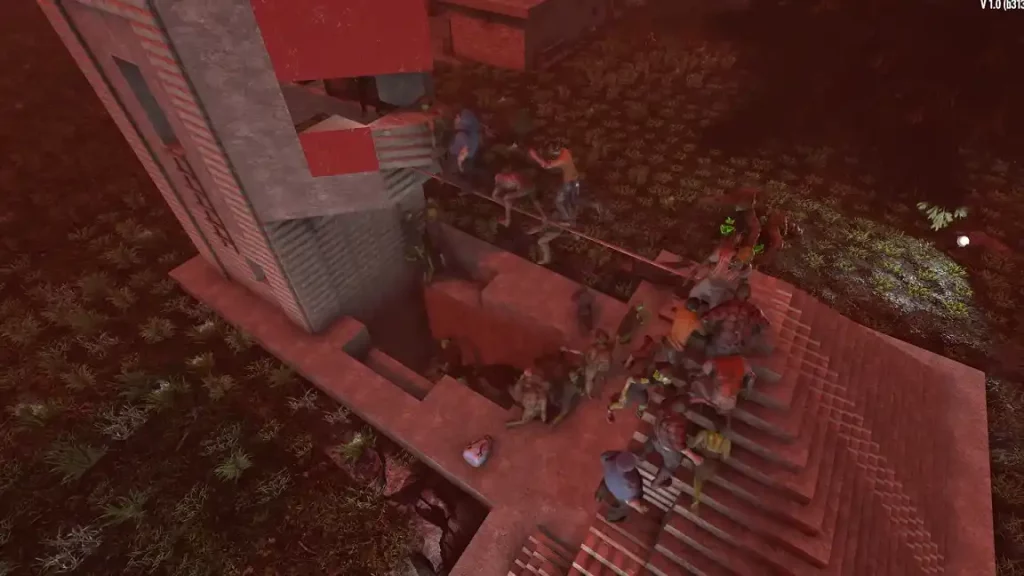
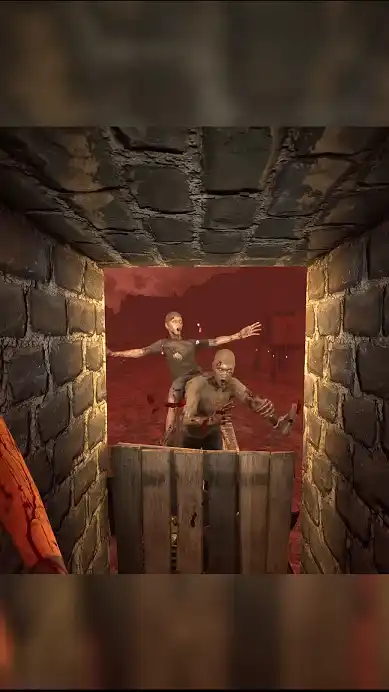 The first two Blood Moon hordes are typically the easiest, provided that you’ve gathered sufficient materials at this point. YouTube user JaWoodle posted a beginner-friendly horde base to fend off nasty zombies during the game’s early stages.
Start farming as much Clay, Stone, and Cobblestone as possible during your first week in Navezgane. Then, use Cobblestone to create a wall that's seven blocks high, three blocks wide, and ten blocks long. Build an enclosed room while you’re at the top of the structure, then use any additional Cobblestone blocks to build a flight of stairs on one end but leave a one-block gap between it and the doorway.
Place Wood Spikes on the roof, two bars in the gap between the stairs and the doorway, and wooden barricades by the door. Now, stay by the doorway when the Blood Moon horde arrives and pick the zombies off individually.
The first two Blood Moon hordes are typically the easiest, provided that you’ve gathered sufficient materials at this point. YouTube user JaWoodle posted a beginner-friendly horde base to fend off nasty zombies during the game’s early stages.
Start farming as much Clay, Stone, and Cobblestone as possible during your first week in Navezgane. Then, use Cobblestone to create a wall that's seven blocks high, three blocks wide, and ten blocks long. Build an enclosed room while you’re at the top of the structure, then use any additional Cobblestone blocks to build a flight of stairs on one end but leave a one-block gap between it and the doorway.
Place Wood Spikes on the roof, two bars in the gap between the stairs and the doorway, and wooden barricades by the door. Now, stay by the doorway when the Blood Moon horde arrives and pick the zombies off individually.
 Eventually, the Blood Moon horde becomes stronger as players progress through the game. So, by Day 21, you generally must have a stronger stronghold than a small elevated hallway. The base built by WaywardEko can solve that concern, as this fortress is akin to an upgraded version of the beginner-friendly one mentioned previously.
This time, prepare a lot of blocks, about 23 x 8. The design is fairly similar to the beginner-friendly model, but this time, the location can house your workstations and additional traps. However, this time, remove the wooden door and replace it with Cobblestone blocks with a small opening. This gap allows you to shoot zombies that climb up the staircase.
Additionally, you can dig a hole beneath the gap between the staircase and the hole in the wall. Then, fill the hole with traps, further reducing the number of Blood Moon undead.
Eventually, the Blood Moon horde becomes stronger as players progress through the game. So, by Day 21, you generally must have a stronger stronghold than a small elevated hallway. The base built by WaywardEko can solve that concern, as this fortress is akin to an upgraded version of the beginner-friendly one mentioned previously.
This time, prepare a lot of blocks, about 23 x 8. The design is fairly similar to the beginner-friendly model, but this time, the location can house your workstations and additional traps. However, this time, remove the wooden door and replace it with Cobblestone blocks with a small opening. This gap allows you to shoot zombies that climb up the staircase.
Additionally, you can dig a hole beneath the gap between the staircase and the hole in the wall. Then, fill the hole with traps, further reducing the number of Blood Moon undead.
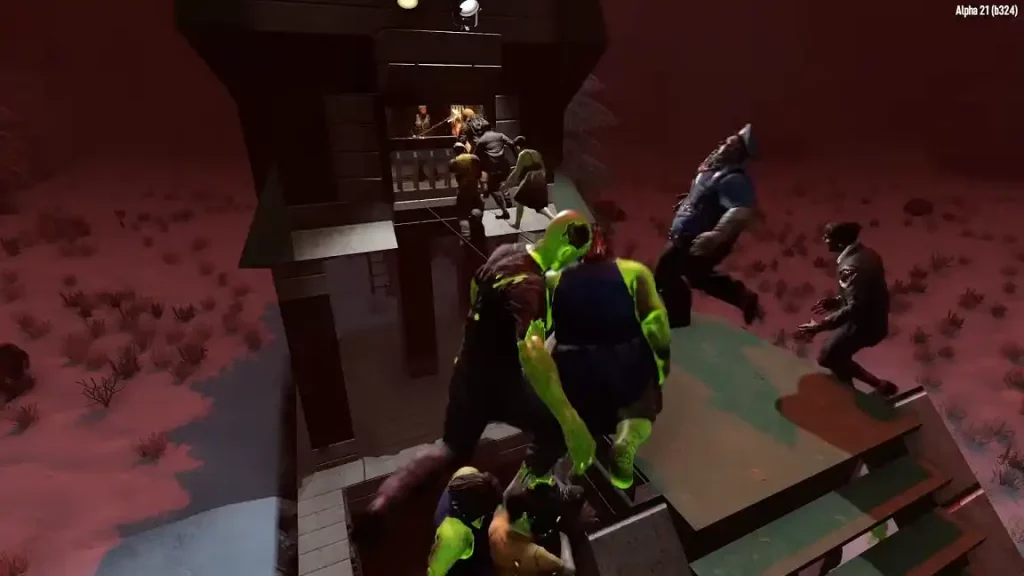
 The base blueprint of letting Zeds cross a thin pole to reach a small hole on top of an elevated room still holds strong during the game’s late stages. However, some modifications are generally required to keep up with the stronger Blood Mood horde. The base built by YouTube user Man Atop Pillars answers that distress.
This time, consider upgrading the materials to Steel to increase the base’s overall health, especially with the new zombies in Update 2.0. Albeit you can repair the blocks, it’s better to focus on defeating the zombies instead of fixing the fortress.
Additionally, consider making the hole in the floor deeper to allow the zombies more time to climb back up. Also, create a hole in the room where you’ll be staying. This cavity should give you a clear look at the Zeds that fall into the hole, allowing you to throw items like Molotovs and Grenades.
Again, consider placing traps in and around the base to help cull the number of zombies attempting to reach you. Over time, add more traps and other challenges for the zombies to make it more difficult for them to get to your position.
The base blueprint of letting Zeds cross a thin pole to reach a small hole on top of an elevated room still holds strong during the game’s late stages. However, some modifications are generally required to keep up with the stronger Blood Mood horde. The base built by YouTube user Man Atop Pillars answers that distress.
This time, consider upgrading the materials to Steel to increase the base’s overall health, especially with the new zombies in Update 2.0. Albeit you can repair the blocks, it’s better to focus on defeating the zombies instead of fixing the fortress.
Additionally, consider making the hole in the floor deeper to allow the zombies more time to climb back up. Also, create a hole in the room where you’ll be staying. This cavity should give you a clear look at the Zeds that fall into the hole, allowing you to throw items like Molotovs and Grenades.
Again, consider placing traps in and around the base to help cull the number of zombies attempting to reach you. Over time, add more traps and other challenges for the zombies to make it more difficult for them to get to your position.
How to Build a Base in 7 Days to Die 2.0
Like many sandbox games, 7 Days to Die has unique building systems that separate it from the rest. Understanding these mechanics deeply can turn you into a pro-builder, increasing your chances of surviving the dangerous undead hordes coming your way.
Core Materials
Generally, 7 Days to Die has five main materials players can work with when building structures. These materials and their respective stats are as follows:
- Building Blocks: 100 health
- Wood: 500 health
- Cobblestone: 1,500 health
- Concrete: 5,000 health
- Steel: 10,000 health
Shapes and Advanced Placement
By default, players can place cube versions of each building material in 7 Days to Die. However, choosing a material to place and holding "R" brings up the radial menu. Then, select the top option, which opens the window to choose over 2,000 shapes for that particular material.
Once selected, players can rotate the block by pressing the left mouse button or the “R” keyboard key. Alternatively, hold "R" and select "Advanced Rotation" to unlock additional rotation options. Highlighting a particular material and holding "R" to open the radial menu allows players to access advanced placement options, such as copy shape and copy rotation. These actions reduce the effort needed to place materials and speed up base-building operations.
Building Stability
Each material has stats, particularly Mass and Horizontal Support. The latter is the weight a material can support. For example, a block has a Horizontal Support value of 40, which means it can support eight blocks with a Mass value of 5. Adding more materials than the support can carry makes the structure crumble.
Thankfully, players don’t need to calculate each material’s maximum Horizontal Support. Instead, the game lets you know when the structure will crumble if the cursor turns red.
However, Steel has a different property from other materials. In particular, a steel structure doesn't crumble when a player overloads its Horizontal Support value but only the exceeded materials at the end of the structure. But the entire Steel structure will still collapse if you add extra Mass in the middle of the assembly.
Painting
Painting lets a player’s creativity shine through their base. With a Paint Brush in hand and buckets of Paint in the inventory, hold "R" to open the radial menu. Then, select "Materials." With the Materials window opened, select the color or texture you want for the material. Next, click on a material block's face with the Paint Brush to color it.
Traps
Unless you’re working in the Prefab Editor, your 7 Days to Die base should have defenses to combat weekly undead hordes. Thankfully, the game has various traps to choose from, including the following:
- Barbed Fence Wire
- Blade Trap
- Cooking Pot Mine
- Dart Trap
- Electric Fence Post
- Hub Cap Land Mine
- Iron Spikes
- SMG Auto Turret
- Shotgun Auto Turret
- Tin Land Mine
- Wood Spikes
Best Base Designs
Early Game (Day 7 to 14)
The first two Blood Moon hordes are typically the easiest, provided that you’ve gathered sufficient materials at this point. YouTube user JaWoodle posted a beginner-friendly horde base to fend off nasty zombies during the game’s early stages.
Start farming as much Clay, Stone, and Cobblestone as possible during your first week in Navezgane. Then, use Cobblestone to create a wall that's seven blocks high, three blocks wide, and ten blocks long. Build an enclosed room while you’re at the top of the structure, then use any additional Cobblestone blocks to build a flight of stairs on one end but leave a one-block gap between it and the doorway.
Place Wood Spikes on the roof, two bars in the gap between the stairs and the doorway, and wooden barricades by the door. Now, stay by the doorway when the Blood Moon horde arrives and pick the zombies off individually.
Midgame (Day 21 to 28)
Eventually, the Blood Moon horde becomes stronger as players progress through the game. So, by Day 21, you generally must have a stronger stronghold than a small elevated hallway. The base built by WaywardEko can solve that concern, as this fortress is akin to an upgraded version of the beginner-friendly one mentioned previously.
This time, prepare a lot of blocks, about 23 x 8. The design is fairly similar to the beginner-friendly model, but this time, the location can house your workstations and additional traps. However, this time, remove the wooden door and replace it with Cobblestone blocks with a small opening. This gap allows you to shoot zombies that climb up the staircase.
Additionally, you can dig a hole beneath the gap between the staircase and the hole in the wall. Then, fill the hole with traps, further reducing the number of Blood Moon undead.
Endgame (Day 35 & Beyond)
The base blueprint of letting Zeds cross a thin pole to reach a small hole on top of an elevated room still holds strong during the game’s late stages. However, some modifications are generally required to keep up with the stronger Blood Mood horde. The base built by YouTube user Man Atop Pillars answers that distress.
This time, consider upgrading the materials to Steel to increase the base’s overall health, especially with the new zombies in Update 2.0. Albeit you can repair the blocks, it’s better to focus on defeating the zombies instead of fixing the fortress.
Additionally, consider making the hole in the floor deeper to allow the zombies more time to climb back up. Also, create a hole in the room where you’ll be staying. This cavity should give you a clear look at the Zeds that fall into the hole, allowing you to throw items like Molotovs and Grenades.
Again, consider placing traps in and around the base to help cull the number of zombies attempting to reach you. Over time, add more traps and other challenges for the zombies to make it more difficult for them to get to your position.Create your own
7 Days to Die server
7 Days to Die server
Choose a plan, pick a game, and play with your friends!
Join our Newsletter
Subscribe for the latest updates on all things gaming!
How would you rate this blog?
Share your opinion and help us make our blogs even better!
Didn't like
Neutral
Liked

Need a game server?
Rent a game server where you and your friends can play privately with low latency and custom settings. Choose from 110+ games, invite people from around the globe, and enjoy private matches, or build your own online community with your own rules.

Relevant Blogs


GET THE INSIDE SCOOP!
Join our email for updates on our hosted games, company news and exclusive deals. Stay in the loop!