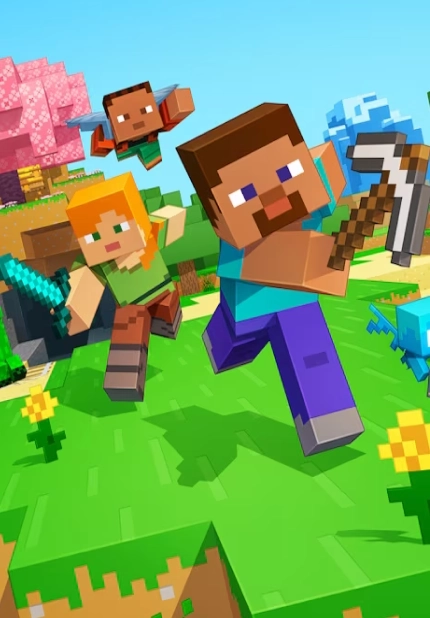
StarRupture Beginner’s Guide: Characters, Early Unlocks, & More
Publicado em por
Compartilhar:
Compartilhar no X
Compartilhar no Facebook
Compartilhar no Threads
Compartilhar no Bluesky
Copiar para a área de transferência
Compartilhar por e-mail
Some unwritten rules lie hidden beneath StarRupture’s basic tutorials. Here, we reveal these seemingly unseen intricacies, such as survival stats and corporate progression, allowing you to navigate this alien world with confidence from the time you awaken from your Regeneration Chamber. So, learn how to kick-start your new adventure by reading through this StarRupture Beginner’s Guide.
 Although the tutorial in StarRupture does a good job of highlighting the game’s basic features and mechanics, some elements are left unsaid for players to discover. The following StarRupture Beginner’s Guide focuses on some of the game’s unspoken components, such as character selection and rupture cycles. Here, you’ll navigate beyond the manual, minimizing early-game risks in the process.
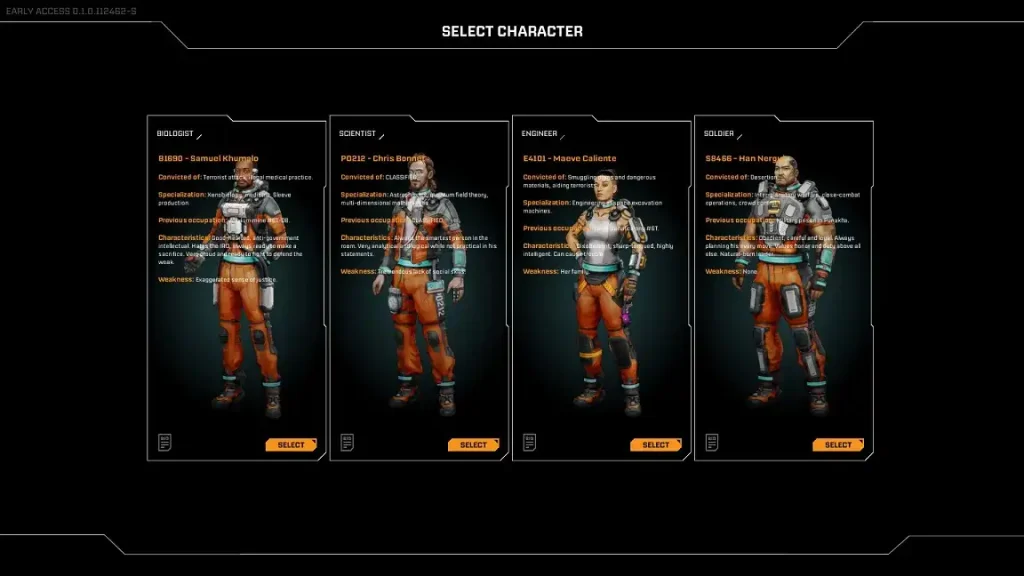 StarRupture asks you to select a character before starting a new game. However, your choice won’t significantly affect your playthrough, as all characters have access to every blueprint, building, and item in the game. Nonetheless, each character can grant a unique experience, as each option has a distinct appearance, backstory, and voice actor. That also means that your chosen character is simply an aesthetic choice.
Four characters are available to choose from, as of the game’s Early Access release:
StarRupture asks you to select a character before starting a new game. However, your choice won’t significantly affect your playthrough, as all characters have access to every blueprint, building, and item in the game. Nonetheless, each character can grant a unique experience, as each option has a distinct appearance, backstory, and voice actor. That also means that your chosen character is simply an aesthetic choice.
Four characters are available to choose from, as of the game’s Early Access release:
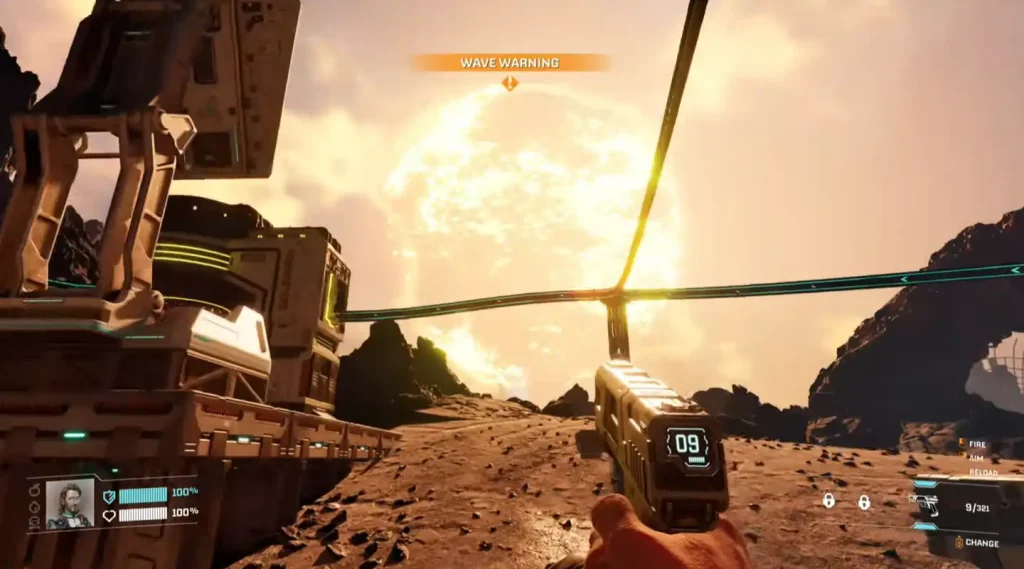
Rupture cycles, ruptures, or heat waves are non-negotiable extreme weather events, as failure to search for shelter in a timely manner means certain death. So, pay attention to on-screen messages to know when these instances occur.
In particular, you’ll know a rupture is about to make landfall by following two on-screen texts. First, a Wave Warning appears, telling you that a rupture is about to manifest at your location. The next message is a 15-second countdown. Remember, instant death comes to anyone who’s not inside a Habitat when the rupture arrives.
So, always carry at least 1x Meteor Heart and over 100x Basic Building Materials to build a Base Core, Emergency Habitat, and Airlock on the fly. That way, you don’t have to run and pray to the heavens to reach your faraway base while you’re exploring the map and the rupture is about to land.
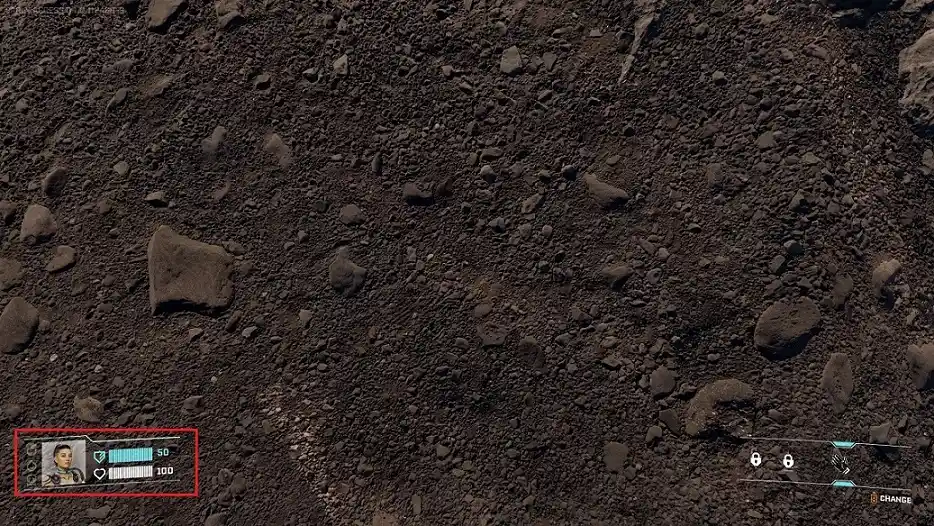 The tutorial does a good job of introducing you to the game’s base-building features and mechanics. However, it doesn’t hold your hand when it comes to survival. So, pay attention to the three gauges at the lower left of your screen. These meters are as follows:
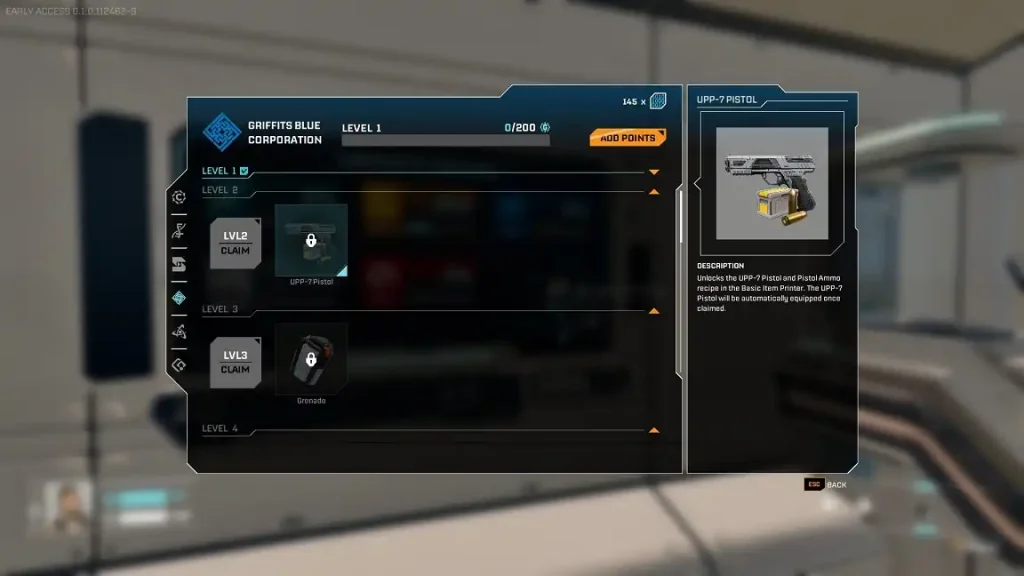 Some essential tools are locked behind certain levels of different corporations in StarRupture. So which of these unlockables should you unlock first?
Consider aiming to unlock the Map by achieving Level 3 with the Moon Energy Corporation. Do so to open it any time by pressing the “M” keyboard key (by default). That way, you can get your bearings more easily than by looking at the lay of the land.
Next is the Pistol, which helps you slay Vermin faster than the standard-issue Mining Tool. Unlock it by achieving Level 2 with the Griffits Blue Corporation. Then, craft ammo using Basic Building Materials at the Basic Item Printer.
Remember, the Mining Tool can still damage and kill Vermin. However, it can overheat, and it takes a while to let it cool down. So, using a gun or other firearm in StarRupture is a faster and safer way to deal with these pests.
Some essential tools are locked behind certain levels of different corporations in StarRupture. So which of these unlockables should you unlock first?
Consider aiming to unlock the Map by achieving Level 3 with the Moon Energy Corporation. Do so to open it any time by pressing the “M” keyboard key (by default). That way, you can get your bearings more easily than by looking at the lay of the land.
Next is the Pistol, which helps you slay Vermin faster than the standard-issue Mining Tool. Unlock it by achieving Level 2 with the Griffits Blue Corporation. Then, craft ammo using Basic Building Materials at the Basic Item Printer.
Remember, the Mining Tool can still damage and kill Vermin. However, it can overheat, and it takes a while to let it cool down. So, using a gun or other firearm in StarRupture is a faster and safer way to deal with these pests.
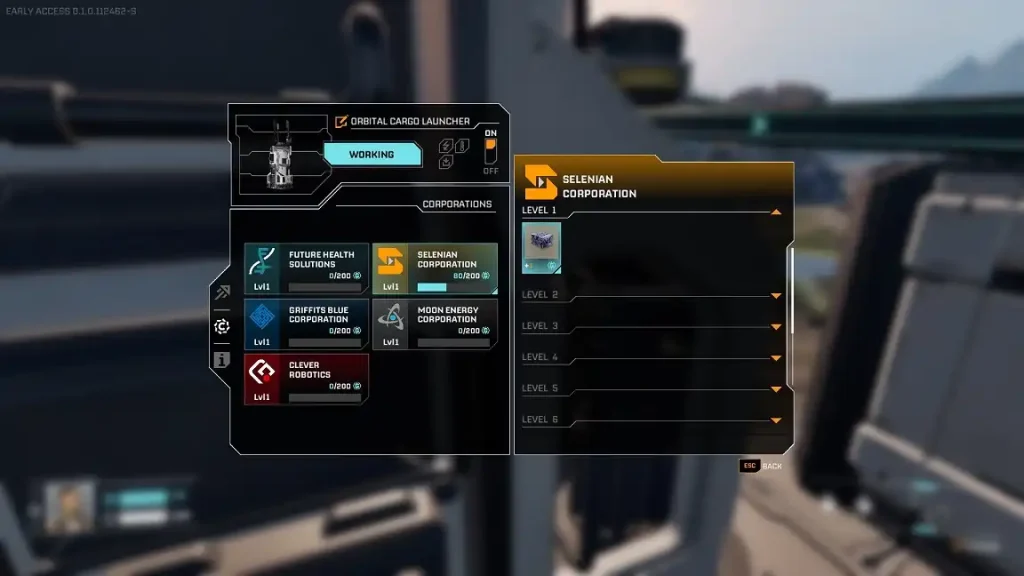 One of the key gameplay loops in StarRupture is meeting the requests of different corporations. As of the game’s Early Access release, six corporations exist, and each company has a unique set of leveling requirements and unlockables.
To help you with progression, the corporations and their respective commissions and unlockables are as follows:
One of the key gameplay loops in StarRupture is meeting the requests of different corporations. As of the game’s Early Access release, six corporations exist, and each company has a unique set of leveling requirements and unlockables.
To help you with progression, the corporations and their respective commissions and unlockables are as follows:


StarRupture Beginner’s Guide
Although the tutorial in StarRupture does a good job of highlighting the game’s basic features and mechanics, some elements are left unsaid for players to discover. The following StarRupture Beginner’s Guide focuses on some of the game’s unspoken components, such as character selection and rupture cycles. Here, you’ll navigate beyond the manual, minimizing early-game risks in the process.
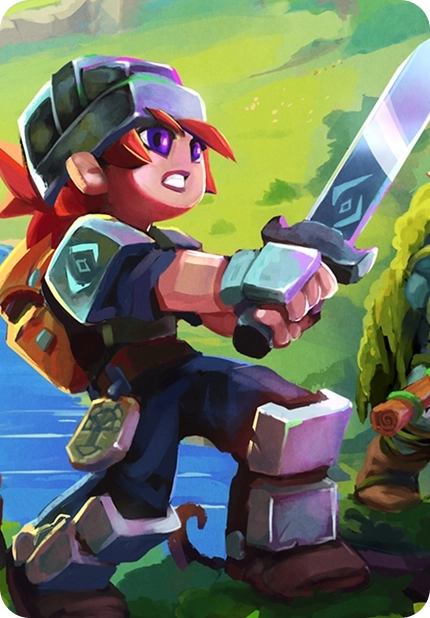
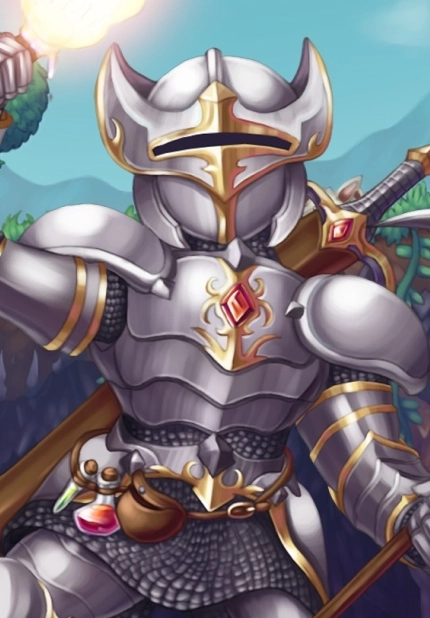
Characters
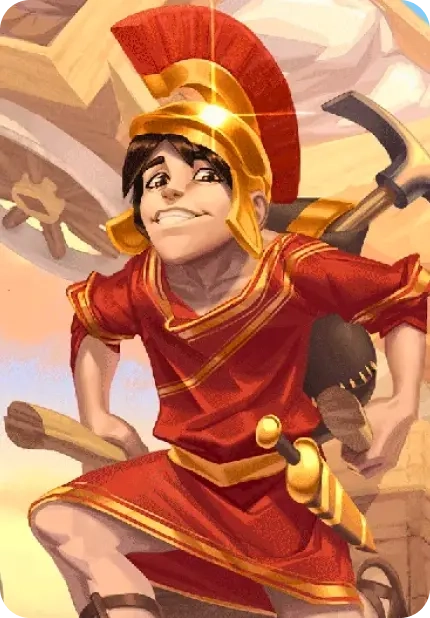
StarRupture asks you to select a character before starting a new game. However, your choice won’t significantly affect your playthrough, as all characters have access to every blueprint, building, and item in the game. Nonetheless, each character can grant a unique experience, as each option has a distinct appearance, backstory, and voice actor. That also means that your chosen character is simply an aesthetic choice.
Four characters are available to choose from, as of the game’s Early Access release:
- Samuel Khumalo (Biologist): A convicted terrorist with a history of xenobiology, sleeve production, and illegal medical practices. Nonetheless, he’s a good-hearted individual who’s willing to make sacrifices to fuel his hate for the IRO.
- Chris Bonnet (Scientist): Although little is known about the reason why this character is a convicted criminal, Chris Bonnet is a proud man of science. He leverages his expertise in various math and science fields, particularly in astrophysics, quantum field theory, and multi-dimensional mathematics.
- Maeve Caliente (Engineer): A defiant, sharp-tongued individual with the smarts used for drug smuggling. As a convicted engineer, Maeve Caliente’s history included aiding terrorists and smuggling drugs.
- Han Nergui (Soldier): This character has been charged with desertion, yet he maintains his obedience, loyalty, and honor. Han Nergui shows no weakness, and this trait is apparent during his conversations.
Rupture Cycles (Heat Wave)
Survival Stats
The tutorial does a good job of introducing you to the game’s base-building features and mechanics. However, it doesn’t hold your hand when it comes to survival. So, pay attention to the three gauges at the lower left of your screen. These meters are as follows:
- Calories: Also called Hunger, can be refilled with food.
- Hydration: Also called Thirst, can be refilled by drinking water.
- Toxicity: Increases when eating certain foods or being exposed to environmental hazards. Reaching 100% toxicity results in vomiting and loss of calories and hydration.
Early Unlocks
Some essential tools are locked behind certain levels of different corporations in StarRupture. So which of these unlockables should you unlock first?
Consider aiming to unlock the Map by achieving Level 3 with the Moon Energy Corporation. Do so to open it any time by pressing the “M” keyboard key (by default). That way, you can get your bearings more easily than by looking at the lay of the land.
Next is the Pistol, which helps you slay Vermin faster than the standard-issue Mining Tool. Unlock it by achieving Level 2 with the Griffits Blue Corporation. Then, craft ammo using Basic Building Materials at the Basic Item Printer.
Remember, the Mining Tool can still damage and kill Vermin. However, it can overheat, and it takes a while to let it cool down. So, using a gun or other firearm in StarRupture is a faster and safer way to deal with these pests.
Corporations and Commissions
One of the key gameplay loops in StarRupture is meeting the requests of different corporations. As of the game’s Early Access release, six corporations exist, and each company has a unique set of leveling requirements and unlockables.
To help you with progression, the corporations and their respective commissions and unlockables are as follows:
ClayWood (Training Corporation)
Commissions and Leveling Requirements
- Level 1: Free
- Level 2: 5x Titanium Ore
- Level 3: 20x Titanium Ore
- Level 4: 50x Data Points
- Level 5: 20x Titanium Bars and 200x Data Points
Unlockables
- Level 1: Orbital Cargo Launcher, Solar Generator V1, and Basic Platforms
- Level 2: Ore Excavator, Rail V1, Rail Support, and Rail Connector
- Level 3: Analyzing Station
- Level 4: Smelter
- Level 5: Platform Modules
Health Solutions Corporation
Commissions and Leveling Requirements
- Level 1: Free
- Level 2: Wolfram Bar
- Level 3: Wolfram Bar or Wolfram Wire
- Level 4: Titanium Sheet or Titanium Rod
- Level 5: Wolfram Powder or Titanium Powder
- Level 6: Ceramics
- Level 7: Glass
- Level 8: Chemicals
- Level 9: Hardening Agent or Pressurized Helium
- Level 10: Liquid Helium
- Level 11: Ion Injector
Unlockables
- Level 1: Advanced Habitat Modules and Advanced Platforms
- Level 2: Regeneration Chamber
- Level 3: Medtool
- Level 4: LEM Station
- Level 5: LEM Augments (Dietician, Irrigator)
- Level 6: Food Station
- Level 7: +8 Inventory Slots
- Level 8: Advanced LEM Augments (Dietician, Irrigator)
- Level 9: Compounder
- Level 10: Resister LEM Augment
- Level 11: Greater LEM Augments (Dietician, Irrigator)
Selenian Corporation
Commissions and Leveling Requirements
- Level 1: Free
- Level 2: Titanium Bar
- Level 3: Titanium Bar or Titanium Rod
- Level 4: Titanium Sheet or Titanium Rod
- Level 5: Titanium Sheet or Titanium Rod
- Level 6: Tube
- Level 7: Glass or Synthetic Silicon
- Level 8: Electronics or Synthetic Silicon
- Level 9: Impeller
- Level 10: Turbine
- Level 11: Scanner
Unlockables
- Level 1: Base Core, Item Printer, Ore Excavator, Smelter, and Habitat
- Level 2: Fabricator
- Level 3: +8 Inventory Slots
- Level 4: Furnace
- Level 5: Miner LEM Augment (Miner)
- Level 6: Helium-3 Extractor
- Level 7: Large Habitat
- Level 8: Mega Press
- Level 9: Refinery and Sulfur Extractor
- Level 10: Assembler
- Level 11: Greater LEM Augments (Endurancegiver, Lifegiver)
Griffits Blue Corporation
Commissions and Leveling Requirements
- Level 1: Free
- Level 2: Titanium Bar
- Level 3: Wolfram Wire or Titanium Rod
- Level 4: Titanium Sheet or Wolfram Plate
- Level 5: Titanium Sheet or Titanium Housing
- Level 6: Stabilizer
- Level 7: Inductor or Stabilizer
- Level 8: Applicator
- Level 9: Battery or Nozzle
- Level 10: Lens
- Level 11: Condenser
Unlockables
- Level 1: Platforms and Platform Modules
- Level 2: UPP-7 Pistol and Pistol Ammo
- Level 3: Grenade
- Level 4: Equipment Upgrade Station
- Level 5: 60x War Bonds
- Level 6: Defense Turret
- Level 7: 80x War Bonds
- Level 8: +8 Inventory Slots
- Level 9: Defense Tower
- Level 10: 100x War Bonds
- Level 11: Greater LEM Augments (Shieldgiver, Lifegiver)
Moon Energy Corporation
Commissions and Leveling Requirements
- Level 1: Free
- Level 2: Wolfram Bar
- Level 3: Calcium Ore
- Level 4: Calcium Sheet or Calcium Block
- Level 5: Rotor
- Level 6: Heat-Resistant Sheet
- Level 7: Chemicals or Helium-3
- Level 8: Valve
- Level 9: Electromagnetic Coil
- Level 10: Generator
- Level 11: Laser Emitter
Unlockables
- Level 1: Solar Generator V1 and Analysis Station
- Level 2: Recipe Station
- Level 3: Map
- Level 4: LEM Lesser Infiltrator
- Level 5: Wind Turbine v1
- Level 6: Base Core Amplifier v1
- Level 7: LEM Augment Greater Infiltrator
- Level 8: Solar Generator v2
- Level 9: Base Core Amplifier v2
- Level 10: Wind Turbine v2
- Level 11: +8 Inventory Slots
Clever Robotics Corporation
Commissions and Leveling Requirements
- Level 1: Free
- Level 2: Wolfram Bar
- Level 3: Wolfram Wire or Wolfram Bar
- Level 4: Wolfram Wire or Wolfram Plate
- Level 5: Titanium Housing, Wolfram Plate
- Level 6: Heat-Resistant Sheet or Titanium Housing
- Level 7: Stator
- Level 8: Supermagnet or Nozzle
- Level 9: Hardening Agent or Electronics
- Level 10: Pump or Pressurized Helium
- Level 11: Electromagnet
- Level 12: Pressure Tank
- Level 13: Superconductor
Unlockables
- Level 1: Corporate Terminal, Orbital Cargo Launcher, Rail, Rail Support, and Rail Connector
- Level 2: Personal Storage
- Level 3: Storage Depot V1
- Level 4: Building Drone
- Level 5: Multirail and Rail Modulator
- Level 6: Rail V2
- Level 7: Cargo Dispatcher and Cargo Receiver
- Level 8: Storage Depot v2
- Level 9: Large Personal Storage
- Level 10: Multirail 5 and Rail Modulator 5
- Level 11: Rail v3
- Level 12: Multistorage
- Level 13: Expandable Storage
Crie seu próprio
servidor Game
servidor Game
Escolha um plano, selecione um jogo e jogue com seus amigos!
Assine nosso boletim informativo
Assine para receber as novidades mais recentes do mundo dos jogos!
Entre no nosso Discord
Faça parte da nossa comunidade com mais de 20.000 membros com os mesmos interesses!
Como você avaliaria este blog?
Compartilhe sua opinião e nos ajude a melhorar ainda mais nossos blogs!
Não curti
Neutro
Curti
Precisa de um servidor de jogo?
Alugue um servidor de jogos onde você e seus amigos podem jogar em privacidade, com baixa latência e configurações personalizadas. Escolha entre 100+ jogos, convide pessoas de todo o mundo e desfrute de partidas privadas ou construa sua comunidade on-line com suas próprias regras.

Blogs relevantes


FIQUE POR DENTRO!
Assine nosso boletim informativo para receber novidades sobre nossos jogos hospedados, notícias sobre a empresa e ofertas exclusivas. Fique por dentro!