WARDOGS Mortar Guide: How to Build, Use, & Master the L81 Mortar
Publicado em por

Partilhar:

Partilhar no X

Partilhar no Facebook

Partilhar no Threads

Partilhar no Bluesky

Copiar para a Área de Transferência

Partilhar por e-mail
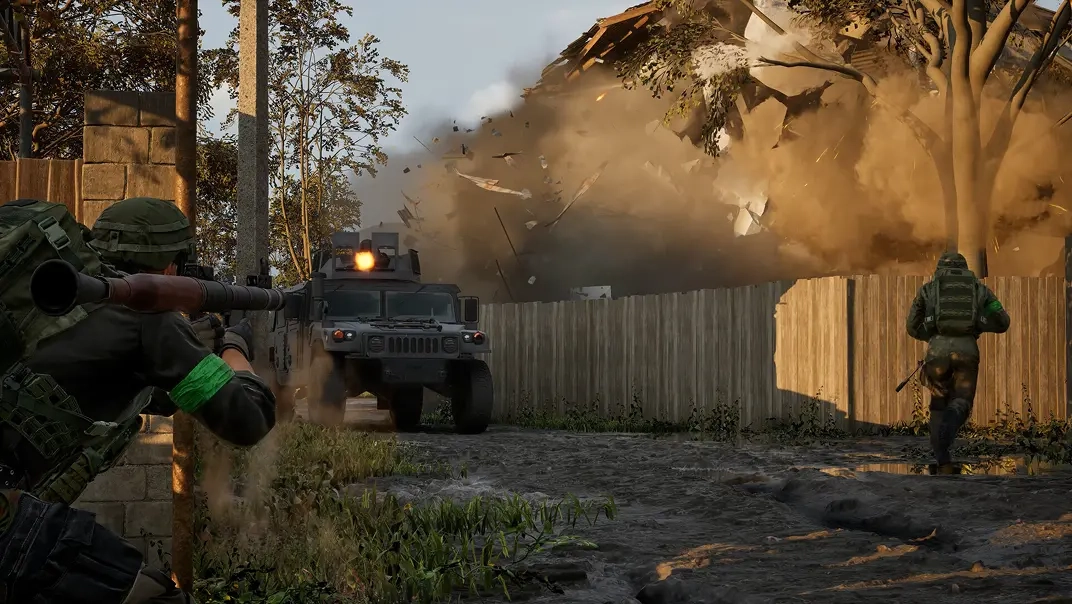
With dozens of enemies at your doorstep, and more attacking from a distance, fighting back from within is an excellent and necessary tool on the battlefield in WARDOGS. That's why mortars are so important, and here, we'll cover how you can build an L81 mortar in WARDOGS, how to make the best use of it, and tips along the way.
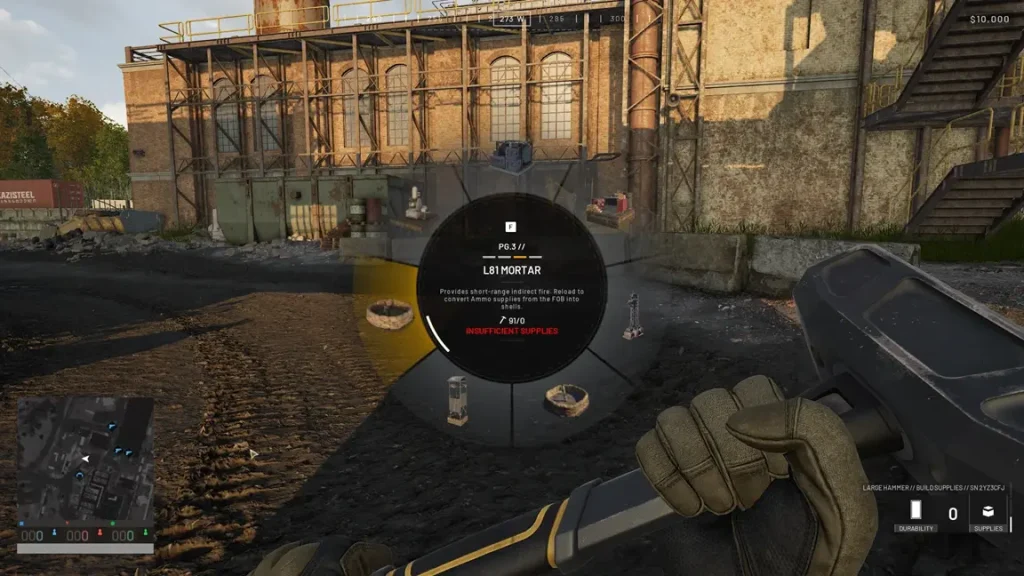 To build an L81 Mortar in WARDOGS, you'll first need to bring the Large Hammer, as the building devices in WARDOGS come with inherent recipes, for instance, the Small Hammer only lets you build basic objects, such as sandbags and barbed wire. On the other hand, the Medium Hammer allows you to build bigger objects, like doors and gates. But the Large Hammer is where things get exciting: instead of just building stronger fortifications, you can build massive defensive weapons and win conditions like the Drill and the L81 Mortar.
With the Large Hammer equipped, select the Mortar from the building menu, and use 91x Building Supplies or Building Materials to place its blueprint at an appropriate location. Then, interact with the schematic to start building it. Remember, aim your hammer strikes at the yellow X’s, as doing so lets you build faster than normal. As of the time of writing, you can also animation-cancel the hammer swings to hit much faster than waiting for the full animation by clicking quickly at the right time.
Remember that building the L81 Mortar requires more building supplies for each swing of the process than just the initial placement cost. It's also important your connected FOB is supplied with Ammo Supplies as well, as each shell takes up 30 Ammo Supplies, and your full 3-shot barrages thus take a whopping 90 units!
Note: If you need to move your L81 Mortar spot, press “V” (by default) on your keyboard to toggle Dismantle mode, and then strike the placed Mortar with your hammer to disassemble it. WARNING: Dismantling objects in WARDOGS doesn’t refund you the materials used to make them.
To build an L81 Mortar in WARDOGS, you'll first need to bring the Large Hammer, as the building devices in WARDOGS come with inherent recipes, for instance, the Small Hammer only lets you build basic objects, such as sandbags and barbed wire. On the other hand, the Medium Hammer allows you to build bigger objects, like doors and gates. But the Large Hammer is where things get exciting: instead of just building stronger fortifications, you can build massive defensive weapons and win conditions like the Drill and the L81 Mortar.
With the Large Hammer equipped, select the Mortar from the building menu, and use 91x Building Supplies or Building Materials to place its blueprint at an appropriate location. Then, interact with the schematic to start building it. Remember, aim your hammer strikes at the yellow X’s, as doing so lets you build faster than normal. As of the time of writing, you can also animation-cancel the hammer swings to hit much faster than waiting for the full animation by clicking quickly at the right time.
Remember that building the L81 Mortar requires more building supplies for each swing of the process than just the initial placement cost. It's also important your connected FOB is supplied with Ammo Supplies as well, as each shell takes up 30 Ammo Supplies, and your full 3-shot barrages thus take a whopping 90 units!
Note: If you need to move your L81 Mortar spot, press “V” (by default) on your keyboard to toggle Dismantle mode, and then strike the placed Mortar with your hammer to disassemble it. WARNING: Dismantling objects in WARDOGS doesn’t refund you the materials used to make them.
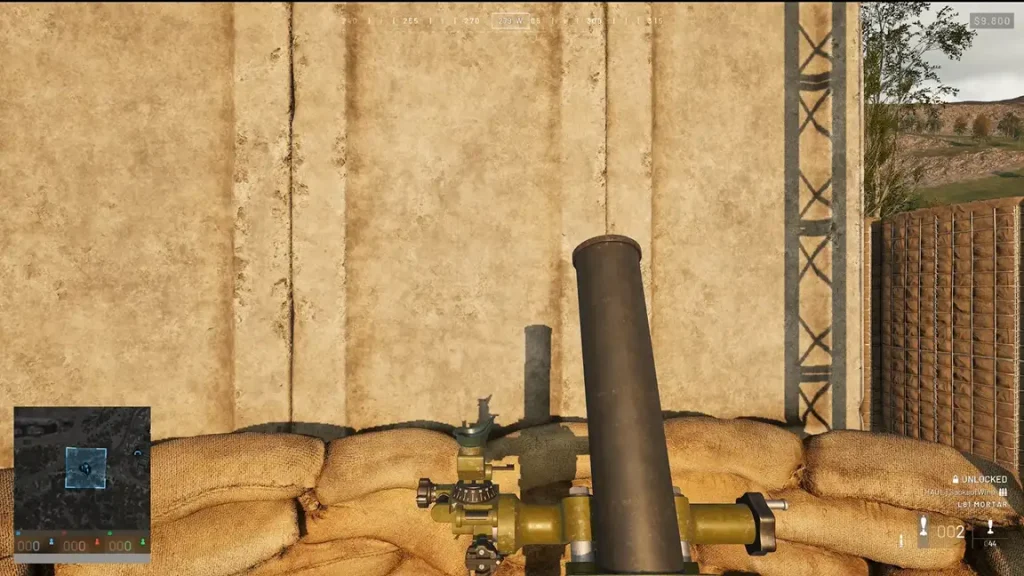 After building the Mortar, enter its “pit” and interact with the firearm to mount it. The default controls to use the Mortar are as follows: use the “W” and “A” keys (by default) to move the Mortar’s barrel up and down, while pressing the “S” and “D” keys (by default) to rotate the firearm around the pit’s center.
It's also possible to use the mouse to move the Mortar’s barrel, albeit the movements are slower compared to using the WASD keys. However, entering aiming mode and using the mouse to move the reticle should help improve accuracy, which is ideal for making corrections between strikes.
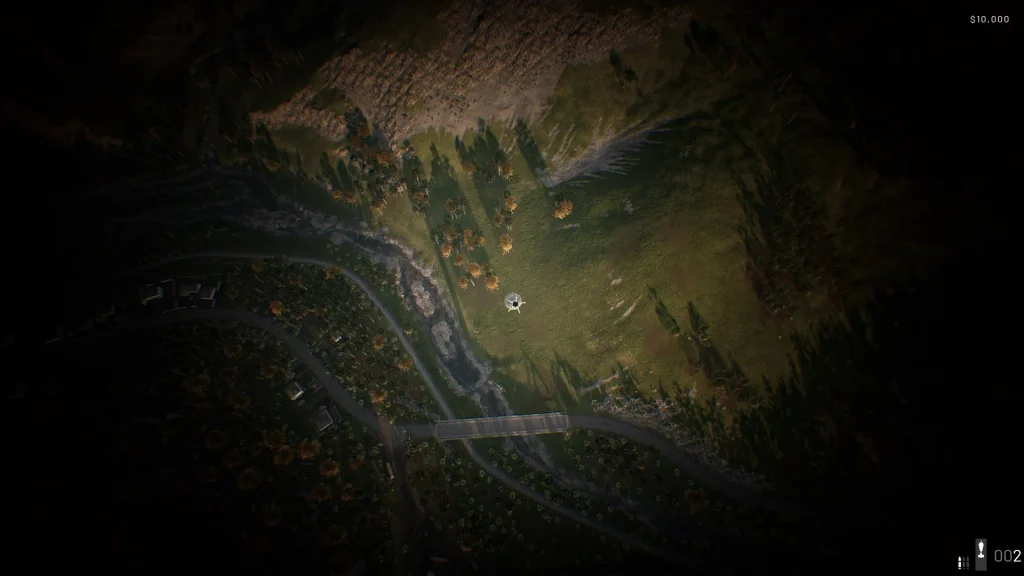
After you fire a mortar shot, your camera will follow it until it lands unless you cancel out of the camera yourself, which you can do with the C key on default controls. This is an extremely useful keybind you'll want to remember, as you can quickly turn the mortar from a single-shot threat to a carpet bomber with little delay by maximizing its use and preloading 3 shells at a time.
After building the Mortar, enter its “pit” and interact with the firearm to mount it. The default controls to use the Mortar are as follows: use the “W” and “A” keys (by default) to move the Mortar’s barrel up and down, while pressing the “S” and “D” keys (by default) to rotate the firearm around the pit’s center.
It's also possible to use the mouse to move the Mortar’s barrel, albeit the movements are slower compared to using the WASD keys. However, entering aiming mode and using the mouse to move the reticle should help improve accuracy, which is ideal for making corrections between strikes.
After you fire a mortar shot, your camera will follow it until it lands unless you cancel out of the camera yourself, which you can do with the C key on default controls. This is an extremely useful keybind you'll want to remember, as you can quickly turn the mortar from a single-shot threat to a carpet bomber with little delay by maximizing its use and preloading 3 shells at a time.
 Mastering the mortar in WARDOGS can be one of the most effective jobs on the battlefield. Mortars are primarily great for taking out high-value targets like spawn vehicle APCs, supply vehicles or groups of supply crates, tanks and other armored vehicles, sniper nests, drills, and other important buildables. Or, if you're especially accurate and the hotzone is especially populated, taking some shots at the hotzone as it roams can be effective as well. Just try to avoid any teammates!
Good teammates can help remove the guesswork from aiming with the Mortar by marking and spotting high-value targets for you via Recon devices and pings. While you may not always get a perfect marker on your target that shows exact distance, you can also use existing markers around the map to help you approximate distance. Regular pings from others or even your own pings on the minimap can help you easily determine left or right direction. Then, when you fire, if you're still trying to locate your target, keep your camera on your shot and adjust based on what you see as it lands.
Once you do locate your target and find the right spot, make sure you memorize it, as it can still be useful info throughout the game. If you have enough ammo supplies, you can get much more use out of your mortar shots by preloading 3 shells, exiting out of the mortar camera immediately after shooting, and firing the next two as soon as the firing cooldown is complete. This camera exit is accomplished with the C key if you're using default controls. This one trick will up your firerate, and thus your damage per second, massively.
It's also good to slightly adjust your shot between firings, especially left and right, as this creates a wave of mortar fire that's fast and hard to react to when firing in multiples, and otherwise creates uncertainty and makes avoiding the blasts harder for foes when single-shotting. If you're regularly killing enemies, you can also mix in hitting the same area twice with a slight delay in order to catch brave medics reviving your fallen foes.
In WARDOGS, mortars reach roughly 700m as a maximum distance, which means targets beyond this marker will be impossible to take out directly, though in some cases, firing in the direction of useful targets like spawn vehicle APCs or bases can help you catch out infantry or buildables in the surrounding area.
Note that it takes about two hits to destroy common vehicles and buildables. Human targets, on the other hand, only need one good hit from a mortar round to get the kill.
Mastering the mortar in WARDOGS can be one of the most effective jobs on the battlefield. Mortars are primarily great for taking out high-value targets like spawn vehicle APCs, supply vehicles or groups of supply crates, tanks and other armored vehicles, sniper nests, drills, and other important buildables. Or, if you're especially accurate and the hotzone is especially populated, taking some shots at the hotzone as it roams can be effective as well. Just try to avoid any teammates!
Good teammates can help remove the guesswork from aiming with the Mortar by marking and spotting high-value targets for you via Recon devices and pings. While you may not always get a perfect marker on your target that shows exact distance, you can also use existing markers around the map to help you approximate distance. Regular pings from others or even your own pings on the minimap can help you easily determine left or right direction. Then, when you fire, if you're still trying to locate your target, keep your camera on your shot and adjust based on what you see as it lands.
Once you do locate your target and find the right spot, make sure you memorize it, as it can still be useful info throughout the game. If you have enough ammo supplies, you can get much more use out of your mortar shots by preloading 3 shells, exiting out of the mortar camera immediately after shooting, and firing the next two as soon as the firing cooldown is complete. This camera exit is accomplished with the C key if you're using default controls. This one trick will up your firerate, and thus your damage per second, massively.
It's also good to slightly adjust your shot between firings, especially left and right, as this creates a wave of mortar fire that's fast and hard to react to when firing in multiples, and otherwise creates uncertainty and makes avoiding the blasts harder for foes when single-shotting. If you're regularly killing enemies, you can also mix in hitting the same area twice with a slight delay in order to catch brave medics reviving your fallen foes.
In WARDOGS, mortars reach roughly 700m as a maximum distance, which means targets beyond this marker will be impossible to take out directly, though in some cases, firing in the direction of useful targets like spawn vehicle APCs or bases can help you catch out infantry or buildables in the surrounding area.
Note that it takes about two hits to destroy common vehicles and buildables. Human targets, on the other hand, only need one good hit from a mortar round to get the kill.
How to Build an L81 Mortar in WARDOGS
To build an L81 Mortar in WARDOGS, you'll first need to bring the Large Hammer, as the building devices in WARDOGS come with inherent recipes, for instance, the Small Hammer only lets you build basic objects, such as sandbags and barbed wire. On the other hand, the Medium Hammer allows you to build bigger objects, like doors and gates. But the Large Hammer is where things get exciting: instead of just building stronger fortifications, you can build massive defensive weapons and win conditions like the Drill and the L81 Mortar.
With the Large Hammer equipped, select the Mortar from the building menu, and use 91x Building Supplies or Building Materials to place its blueprint at an appropriate location. Then, interact with the schematic to start building it. Remember, aim your hammer strikes at the yellow X’s, as doing so lets you build faster than normal. As of the time of writing, you can also animation-cancel the hammer swings to hit much faster than waiting for the full animation by clicking quickly at the right time.
Remember that building the L81 Mortar requires more building supplies for each swing of the process than just the initial placement cost. It's also important your connected FOB is supplied with Ammo Supplies as well, as each shell takes up 30 Ammo Supplies, and your full 3-shot barrages thus take a whopping 90 units!
Note: If you need to move your L81 Mortar spot, press “V” (by default) on your keyboard to toggle Dismantle mode, and then strike the placed Mortar with your hammer to disassemble it. WARNING: Dismantling objects in WARDOGS doesn’t refund you the materials used to make them.
WARDOGS Mortar Controls & How to Use
After building the Mortar, enter its “pit” and interact with the firearm to mount it. The default controls to use the Mortar are as follows: use the “W” and “A” keys (by default) to move the Mortar’s barrel up and down, while pressing the “S” and “D” keys (by default) to rotate the firearm around the pit’s center.
It's also possible to use the mouse to move the Mortar’s barrel, albeit the movements are slower compared to using the WASD keys. However, entering aiming mode and using the mouse to move the reticle should help improve accuracy, which is ideal for making corrections between strikes.
After you fire a mortar shot, your camera will follow it until it lands unless you cancel out of the camera yourself, which you can do with the C key on default controls. This is an extremely useful keybind you'll want to remember, as you can quickly turn the mortar from a single-shot threat to a carpet bomber with little delay by maximizing its use and preloading 3 shells at a time.
WARDOGS Mortar Guide: Tips & Tricks to Master Mortars
Mastering the mortar in WARDOGS can be one of the most effective jobs on the battlefield. Mortars are primarily great for taking out high-value targets like spawn vehicle APCs, supply vehicles or groups of supply crates, tanks and other armored vehicles, sniper nests, drills, and other important buildables. Or, if you're especially accurate and the hotzone is especially populated, taking some shots at the hotzone as it roams can be effective as well. Just try to avoid any teammates!
Good teammates can help remove the guesswork from aiming with the Mortar by marking and spotting high-value targets for you via Recon devices and pings. While you may not always get a perfect marker on your target that shows exact distance, you can also use existing markers around the map to help you approximate distance. Regular pings from others or even your own pings on the minimap can help you easily determine left or right direction. Then, when you fire, if you're still trying to locate your target, keep your camera on your shot and adjust based on what you see as it lands.
Once you do locate your target and find the right spot, make sure you memorize it, as it can still be useful info throughout the game. If you have enough ammo supplies, you can get much more use out of your mortar shots by preloading 3 shells, exiting out of the mortar camera immediately after shooting, and firing the next two as soon as the firing cooldown is complete. This camera exit is accomplished with the C key if you're using default controls. This one trick will up your firerate, and thus your damage per second, massively.
It's also good to slightly adjust your shot between firings, especially left and right, as this creates a wave of mortar fire that's fast and hard to react to when firing in multiples, and otherwise creates uncertainty and makes avoiding the blasts harder for foes when single-shotting. If you're regularly killing enemies, you can also mix in hitting the same area twice with a slight delay in order to catch brave medics reviving your fallen foes.
In WARDOGS, mortars reach roughly 700m as a maximum distance, which means targets beyond this marker will be impossible to take out directly, though in some cases, firing in the direction of useful targets like spawn vehicle APCs or bases can help you catch out infantry or buildables in the surrounding area.
Note that it takes about two hits to destroy common vehicles and buildables. Human targets, on the other hand, only need one good hit from a mortar round to get the kill.Cria o teu próprio servidor de
WARDOGS
WARDOGS
Escolhe um plano, seleciona um jogo e joga com os teus amigos!
Subscreve a nossa Newsletter
Subscreve para receber as últimas atualizações sobre tudo do mundo dos jogos!

Junta-te ao nosso Discord
Entra na nossa comunidade com mais de 20.000 membros com os mesmos interesses!
Como avaliarias este blog?
Partilha a tua opinião e ajuda-nos a tornar os nossos blogs ainda melhores!
Não gostei
Neutro
Gostei

Precisas de um servidor de jogo?
Aluga um servidor de jogo onde tu e os teus amigos podem jogar em privado com baixa latência e definições personalizadas. Escolhe entre 110+ jogos, convida pessoas de todo o mundo e desfruta de partidas privadas, ou constrói a tua própria comunidade online com as tuas próprias regras.

Blogs Relevantes






FICA A PAR DE TUDO!
Junta-te ao nosso e-mail para receberes atualizações sobre os nossos jogos alojados, notícias da empresa e promoções exclusivas. Fica a par!