Enshrouded 1.0 Best Builds Guide: Five Powerful Builds to Try
Publicado em por

Partilhar:

Partilhar no X

Partilhar no Facebook

Partilhar no Threads

Partilhar no Bluesky

Copiar para a Área de Transferência

Partilhar por e-mail
Embervale has evolved with the release of Enshrouded 1.0, giving Flameborns the best builds to survive the Shroud and beyond. Ranging from lightning spells to hard-hitting melee attacks, certain builds let you approach danger that coincides with your unique playstyle. Keep reading as we highlight five builds to consider as you venture into Embervale in Version 1.0.
 The full release of Enshrouded expanded the game’s combat options significantly. Version 1.0 raised the maximum character level to 50, and increased equipment progression to level 55. More importantly for character building, the update introduced new spells, skills, and other combat features for different build types.
Remember, Enshrouded has no fixed class selection. Each build is a route through one connected skill tree, and players can mix branches to suit their weapons and preferred combat style. There’s no single setup that excels in every situation, but certain paths are better suited to particular roles.
The following five builds provide distinct approaches to combat, with recommendations for attributes, skills, armor, weapons, and more. Treat each order as a priority path. Pick up connected attribute nodes along the way, and adjust the route to your current level and available skill points when opportunity presents itself. Also keep in mind, Enshrouded has many viable build paths and deviations along those paths that can still be extremely successful. Don't take these builds as the end all be all meta and only options - feel free to mix, match, and customize to get the best results for you and your playstyle!
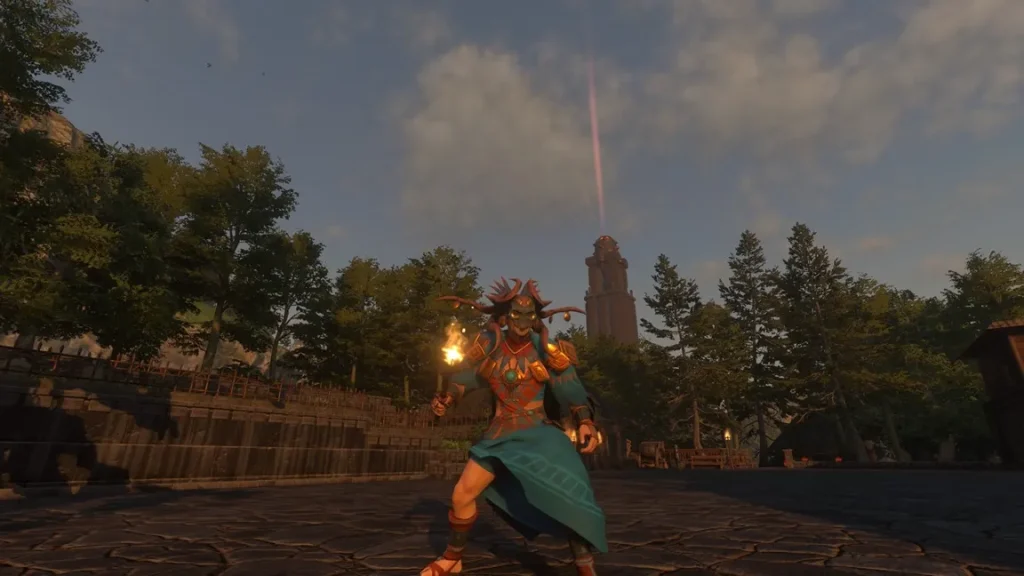 Are you a new Flameborn who recently spawned into Embervale? Perhaps you’re a veteran player who decided to start a fresh file with the release of Enshrouded 1.0. Either way, this Battlemage build is an excellent starting point for early- to mid-game, and even to endgame.
It's a flexible, magic-focused build that doesn't depend entirely on long staff-casting animations. It also combines a wand for sustained attacks and a shield for additional defense.
This build also benefits from the wand improvements introduced in Enshrouded Version 1.0. For starters, this weapon’s heavy attacks can now pierce enemies and interrupt weaker opponents. There’s also a new Aerial Wand Attack and Wand Evasion Attack that adds area damage and increases player mobility.
 Intelligence remains important because it increases magic damage, but this wand-first Battlemage benefits from Constitution earlier than a pure Wizard. Invest in Intelligence for reliable damage, Constitution for close-range safety, and enough Spirit to keep spells and mobility skills available. Add Endurance if blocking, parrying, and dodging regularly drain your stamina.
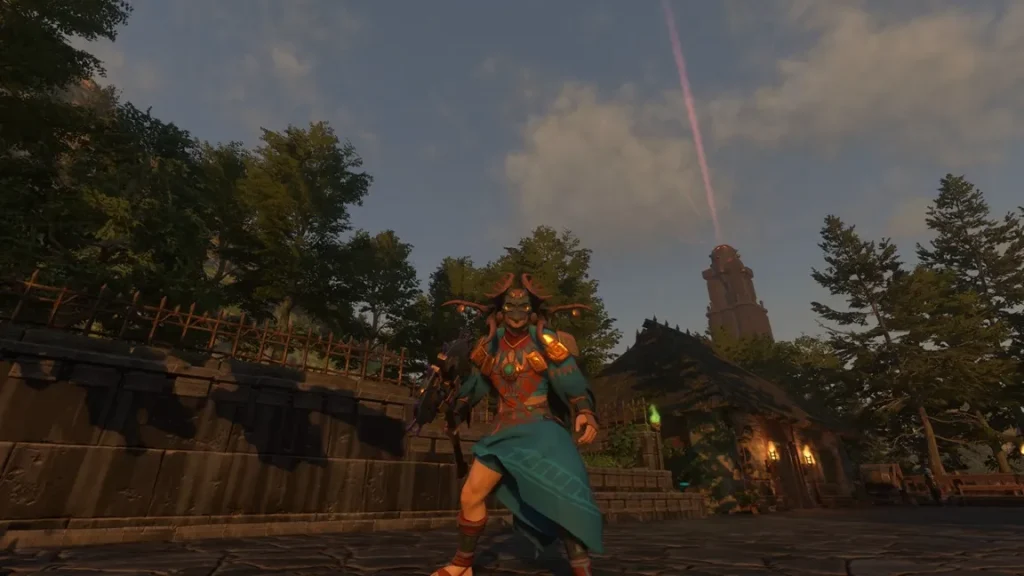 Some spell-casting Flameborns may have trouble dealing with the groups of enemies coming from every direction in the Hollow Halls. This Lightning Wizard build is the answer to that concern, as it specializes in eliminating clustered foes in one fell swoop.
Instead of building around a defensive wand combat style like the previously mentioned build, the Lightning Wizard focuses on raw, unbridled magic power. Use gear and consumables that scale with Intelligence, critical hits, and lightning effects.
 Like the Battlemage, the Lightning Wizard should prioritize Intelligence to raise magical damage, then Spirit to expand the mana pool for charged spells and repeated casts. Add Constitution before the late game so a missed dodge or interrupted cast does not immediately end the encounter. A few Endurance nodes can help with repositioning, but they should not displace your core magic attributes.
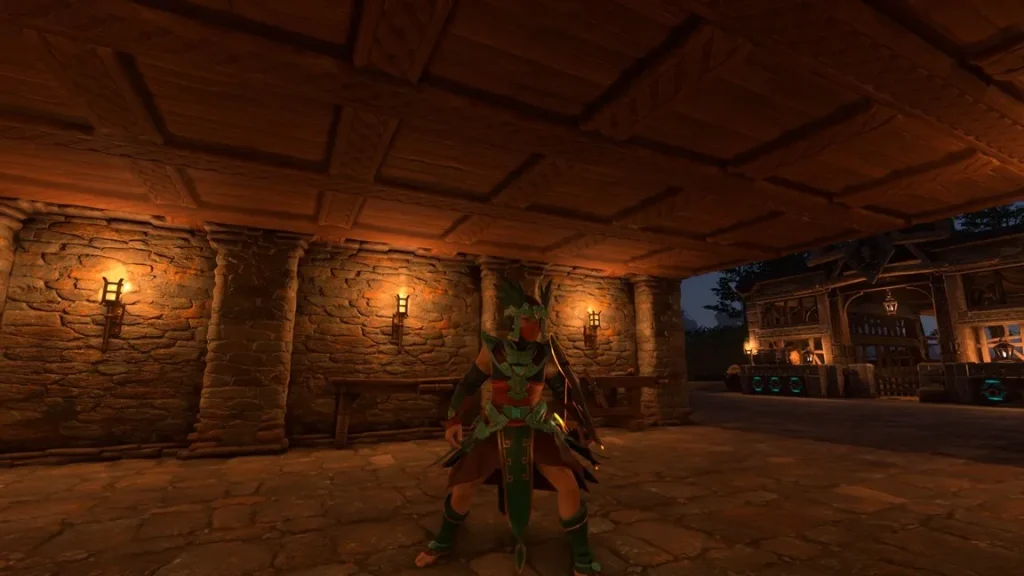 Some Flameborns may not want to work in groups in co-op Enshrouded servers. Those who prefer solo play while practicing the art of accurate ranged combat can do well with this Ranger build.
The Ranger in Enshrouded 1.0 excels at removing threats before they can reach melee range. A well-developed bow master prioritizes careful positioning, accurate shots, and a willingness to exploit enemy weak points.
Perhaps the greatest advantage of becoming a Ranger in Enshrouded 1.0 is your control over engagements. You can establish a sightline, eliminate a dangerous enemy first, and reposition before the remaining group can overwhelm you. Wielding a bow also makes you highly mobile, and you have strong single-target potential.
 Dexterity is the Ranger’s primary attribute because it improves bow damage. Constitution provides a safety margin when enemies reach melee range, while Endurance supports dodging, sprinting, and gliding between shots. Keep Dexterity first, then balance Constitution and Endurance to match how aggressively you reposition.
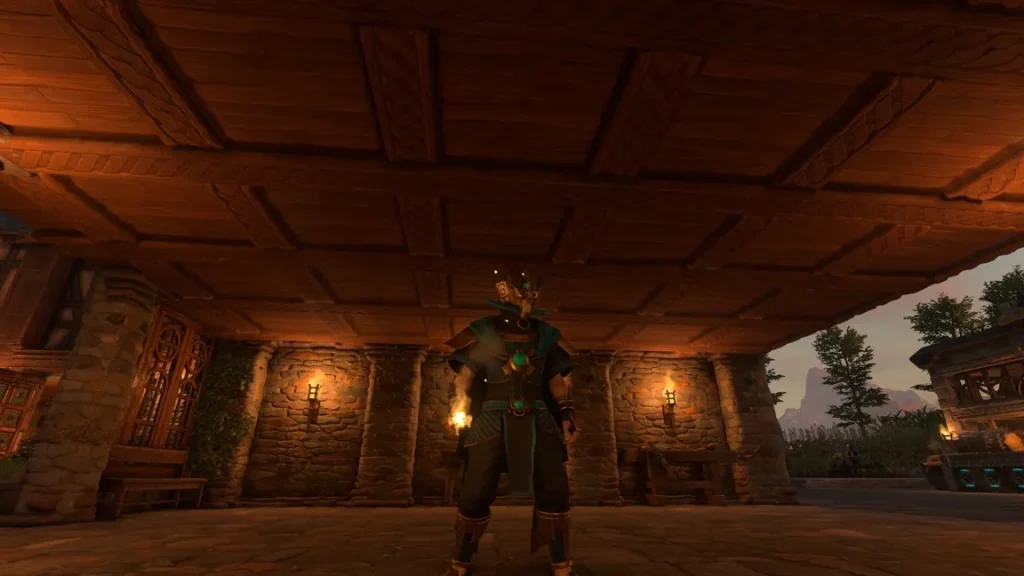 Also known as the Summoner, the Necromancer is one of the best builds in Enshrouded 1.0 for good reason. It uses summoned creatures to create a frontline, allowing you to deal damage from behind your allies rather than face-tanking every enemy attack.
With the release of Version 1.0, Keen Games now allows Necromancers to use Advanced Necromancy, a new skill node that lets you summon Hollow Skeletons. Doing so gives this build a different rhythm from the conventional spellcaster.
 Prioritize Intelligence for wand and spell damage, followed by Spirit to support the mana-hungry summon rotation. Constitution is the third priority: skeletons can draw enemy attention, but area attacks can still reach you. Take a few Endurance nodes for basic movement rather than investing heavily in stamina.
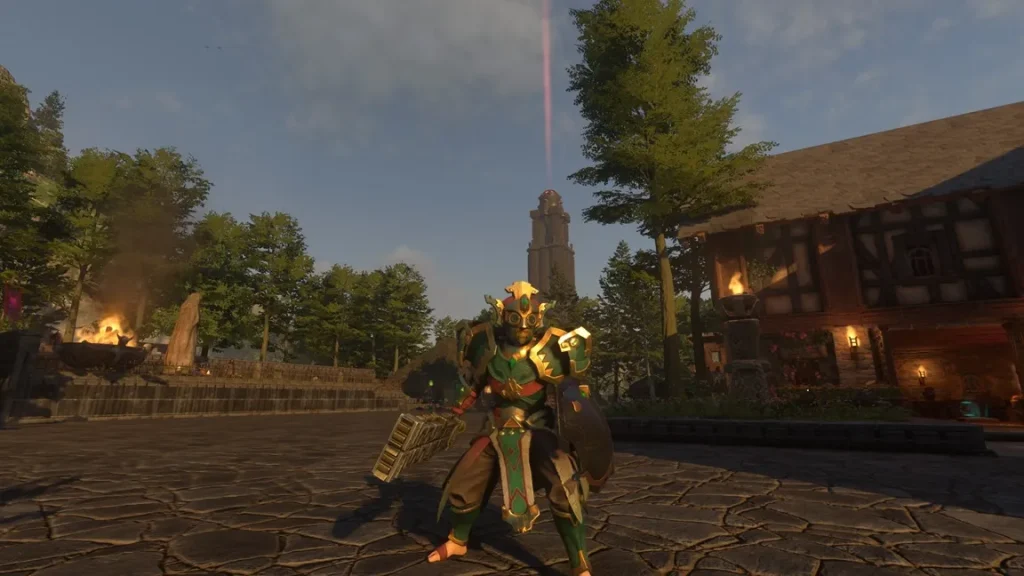 New players who are trying to learn the ropes of Enshrouded 1.0 can follow this Warrior build. It focuses on direct combat that mixes offense with blocking and parrying.
Arguably one of the best builds in Enshrouded 1.0, the Warrior offers a straightforward approach when dealing with enemies. Rather than managing a large mana pool or an extensive supply of arrows, you’ll only need to swing your melee weapon at the enemy while practicing defensive timing.
While this build may not offer the same long-range burst as a specialized wizard or ranger, it’s easy to understand from early to late-game. Also, it’s important to note that this particular Warrior build uses a one-handed weapon and shield, offering a useful balance between damage and defense.
 Strength is the Warrior’s main attribute, improving the damage of one-handed axes, clubs, and swords. Constitution comes next because this build fights at close range, while Endurance helps sustain dodges, blocks, and follow-up attacks. Pick up these attributes as you travel through the skill tree instead of spending every point on damage alone.
Enshrouded 1.0 Best Builds Guide: Five Powerful Builds to Try
The full release of Enshrouded expanded the game’s combat options significantly. Version 1.0 raised the maximum character level to 50, and increased equipment progression to level 55. More importantly for character building, the update introduced new spells, skills, and other combat features for different build types.
Remember, Enshrouded has no fixed class selection. Each build is a route through one connected skill tree, and players can mix branches to suit their weapons and preferred combat style. There’s no single setup that excels in every situation, but certain paths are better suited to particular roles.
The following five builds provide distinct approaches to combat, with recommendations for attributes, skills, armor, weapons, and more. Treat each order as a priority path. Pick up connected attribute nodes along the way, and adjust the route to your current level and available skill points when opportunity presents itself. Also keep in mind, Enshrouded has many viable build paths and deviations along those paths that can still be extremely successful. Don't take these builds as the end all be all meta and only options - feel free to mix, match, and customize to get the best results for you and your playstyle!
Build #1: The Battlemage
Are you a new Flameborn who recently spawned into Embervale? Perhaps you’re a veteran player who decided to start a fresh file with the release of Enshrouded 1.0. Either way, this Battlemage build is an excellent starting point for early- to mid-game, and even to endgame.
It's a flexible, magic-focused build that doesn't depend entirely on long staff-casting animations. It also combines a wand for sustained attacks and a shield for additional defense.
This build also benefits from the wand improvements introduced in Enshrouded Version 1.0. For starters, this weapon’s heavy attacks can now pierce enemies and interrupt weaker opponents. There’s also a new Aerial Wand Attack and Wand Evasion Attack that adds area damage and increases player mobility.
Pros
- Strong sustained damage using a wand
- Reliable mana recovery through parries and the Unity skill
- Offers more room for defensive mistakes than a pure spell-casting Wizard
Cons
- Its burst damage is lower than a staff-focused Wizard
- Melee combatants that can achieve close combat can punish the Battlemage
- The player must remain focused on the encounter to survive, as one mistake can be lethal
Build Attributes and Skills
Intelligence remains important because it increases magic damage, but this wand-first Battlemage benefits from Constitution earlier than a pure Wizard. Invest in Intelligence for reliable damage, Constitution for close-range safety, and enough Spirit to keep spells and mobility skills available. Add Endurance if blocking, parrying, and dodging regularly drain your stamina.
Recommended Skill Progression
Early Game
- Double Jump: Requires 2 skill points to unlock. Unlocks a second jump while airborne.
- Wand Specialization: Requires 3 skill points to unlock. Generates Focus when attacking with a wand, and unlocks a special ability when using the aforementioned weapon type.
- Wand Mastery: Requires 1 skill point to unlock. Increases damage using the Wand by at least 5%.
- Intelligence: Requires 1 skill point to unlock. Increases the Intelligence attribute by 1.
Mid-Game
- Arcane Proliferation: Requires 3 skill points to unlock. Grants the user a 30% chance to spawn additional projectiles when using wand attacks. However, the additional projectiles deal 50% less damage.
- Sting: Requires 3 skill points to unlock. Increases repeated wand damage by 20%.
- Unity: Requires 1 skill point to unlock. Hitting enemies with wand attacks has a minimum 2% chance to restore at least 10% of the user’s maximum mana.
- Arcane Deflection: Requires 1 skill point to unlock. Each successful parry restores at least 10 mana.
- Constitution: Requires 1 skill point to unlock. Increases the Constitution attribute by 1.
Endgame
- Wand Evasion Attack: Requires 4 skill points to unlock. Unlocks the Wand Evasion Attack move, allowing the wielder to use a special wand attack when evading enemy attacks.
- Aerial Wand Attack: Requires 3 skill points to unlock. Perform an airborne special attack during a jump while equipped with a wand.
- Blink: Requires 4 skill points to unlock. Replaces the Dodge Roll ability with a short-range teleport.
- Chain Hit: Requires 3 skill points to unlock. Deals 5 shock damage to a nearby random enemy upon hitting a foe with a critical strike with a magic weapon.
- Life Burst: Requires 4 skill points to unlock. Restores all nearby players’ health equal to 5x the user’s Intelligence attribute upon defeating an enemy with a magic weapon.
- Blast and Cast: Requires 3 skill points to unlock. Temporarily increases the base damage of the next staff attack after dealing a critical strike with a wand.
- Quick Charge: Requires 1 skill point to unlock. Reduces the charge time of spells by at least 10%.
Best Armor
For the budding Battlemage, prioritize current-region caster armor with useful mana, magic-damage, or survival bonuses. However, the Tidecaller armor set is the go-to late-game set designed for magic characters who prioritize spell damage. Wearing the complete Tidecaller set lets the wearer take advantage of the following benefits:- Physical Defense: 251
- Magical Defense: 503
- Effects: +18% Magical Critical Strike Chance +15% Critical Strike Damage +10:00-minute Wet Duration Reduction +180 Health +198 Mana +18% Staff Damage +13% Damage against Magical enemies +36 Mana Regeneration -0.4s Mana Regeneration Delay
Best Weapons
For the Battlemage, prioritize Polymath’s Wand as your primary weapon. Its fire-damage bonuses and critical-strike damage make it a strong choice for a fire-focused setup, particularly when paired with the Gem of Burning and equipment that increases fire damage. Then, switch to the Staff of Guidance when you’re able. Do so to access powerful fire spells, especially if you need to clear a large mob fast. As for the off-hand, use Prismatic Ward for the increased mana regeneration, along with the additional Ice and Shock resistance.Tips & Tricks
Wearing the best armor and weapons, and using the best skills, are only some parts of being the best Battlemage in Enshrouded 1.0. Consider the following tips and tricks to ensure optimal DPS and survival:- Maintain pressure while moving with the wand. Then, switch to the staff when enemies cluster together or a target becomes vulnerable.
- Cast Entangle for dangerous melee opponents. Create distance, and then follow up with another spell.
- Cook and consume food that improves magic damage. Some notable examples include the Grilled Penny Bun, Roasted Shiitake Mushroom, and Cabbage Mushroom Rice.
Build #2: Lightning Wizard
Some spell-casting Flameborns may have trouble dealing with the groups of enemies coming from every direction in the Hollow Halls. This Lightning Wizard build is the answer to that concern, as it specializes in eliminating clustered foes in one fell swoop.
Instead of building around a defensive wand combat style like the previously mentioned build, the Lightning Wizard focuses on raw, unbridled magic power. Use gear and consumables that scale with Intelligence, critical hits, and lightning effects.
Pros
- Excellent AoE damage against clustered enemies
- Skills like Chain Hit and Mass Destruction yield significant rewards
- Various available elemental spells, including lightning-focused ones, offer flexible crowd control
Cons
- Charged spells consume time and mana
- The Lightning Wizard typically has a lower maximum health than other builds
- Optimal spell damage generally depends on the element used
Build Attributes and Skills
Like the Battlemage, the Lightning Wizard should prioritize Intelligence to raise magical damage, then Spirit to expand the mana pool for charged spells and repeated casts. Add Constitution before the late game so a missed dodge or interrupted cast does not immediately end the encounter. A few Endurance nodes can help with repositioning, but they should not displace your core magic attributes.
Recommended Skill Progression
Early Game
- Double Jump: Requires 2 skill points to unlock. Unlocks a second jump while airborne.
- Wizard: Requires 2 skill points to unlock. Increases critical strike chance using wands and staves by at least 2%.
- Mage Apprentice: Requires 1 skill point to unlock. Increases the damage dealt with wands and staves by at least 5%.
- Intelligence: Requires 1 skill point to unlock. Increases the Intelligence attribute by 1.
Mid-Game
- Blink: Requires 4 skill points to unlock. Replaces the Dodge Roll ability with a short-range teleport.
- Wand Specialization: Requires 3 skill points to unlock. Generates Focus when attacking with a wand, and unlocks a special ability when using the aforementioned weapon type.
- Wand Mastery: Requires 1 skill point to unlock. Increases damage using the Wand by at least 5%.
- Unity: Requires 1 skill point to unlock. Hitting enemies with wand attacks has a minimum of a 2% chance to restore at least 10% of the user’s maximum mana.
- Arcane Deflection: Requires 1 skill point to unlock. Each successful parry restores at least 10 mana.
- Chain Hit: Requires 3 skill points to unlock. Deals 5 shock damage to a nearby random enemy upon hitting a foe with a critical strike with a magic weapon.
- Thunder: Requires 2 skill points to unlock. Increases all shock damage dealt to enemies.
Endgame
- Mass Destruction: Requires 3 skill points to unlock. Critical strikes with magic weapons deal 2 Shock damage per point of Intelligence to all nearby enemies.
- Quick Charge: Requires 1 skill point to unlock. Reduces the charge time of spells by at least 10%.
- Blast and Cast: Requires 3 skill points to unlock. Temporarily increases the base damage of the next staff attack after dealing a critical strike with a wand.
Best Armor
Arguably, the Tidecaller set fits well with the Lightning Wizard build, as it does with the Battlemage. It offers strong endgame benefits, particularly for magic users that focus on dealing magical critical strikes. Wear this armor set to use the following bonuses:- Physical Defense: 251
- Magical Defense: 503
- Effects: +18% Magical Critical Strike Chance +15% Critical Strike Damage +10:00-minute Wet Duration Reduction +180 Health +198 Mana +18% Staff Damage +13% Damage against Magical enemies +36 Mana Regeneration -0.4s Mana Regeneration Delay
Best Weapons
Violet Storm is the recommended staff for this lightning-focused Wizard. Its Shock, Ruthless, and Opportunistic traits complement Chain Lightning, particularly when enemies are affected by the Soaked status. Combine it with Eternal Chain Lightning for repeatable lightning damage without consuming spell ammunition. If you need faster attacks, use the Mythic Wand or the Ancient Drak Wand. The latter is great for the extra Shock damage, especially if you’re building this build around the Soaked interaction. Alternatively, use the Staff of the Moor if you need more resource sustain through mana, stamina, and health leech rather than maximum lightning specialization.Tips & Tricks
Remember, significantly relying on gear and magic damage can be a recipe for disaster, especially when dealing with multiple enemy waves in the Hollow Halls. Use these tips and tricks to help ensure each lightning spell hits hard and without you dying by getting surrounded by foes:- Take advantage of Soaked status. With this build you'll want to take advantage of the Soaked status effect whenever possible, making enemies vulnerable to Shock damage.
- Positioning is critical. Allow enemies to approach a controllable position before unleashing your area spells. Doing so makes your damage output more efficient than attacking scattered enemies individually.
- Always bring mana-restoring consumables. The last thing you’d want is to run out of mana while dealing with enemy hordes.
- Check your resources. Don’t wait until the last drop of mana before restoring it.
Build #3: The Ranger
Some Flameborns may not want to work in groups in co-op Enshrouded servers. Those who prefer solo play while practicing the art of accurate ranged combat can do well with this Ranger build.
The Ranger in Enshrouded 1.0 excels at removing threats before they can reach melee range. A well-developed bow master prioritizes careful positioning, accurate shots, and a willingness to exploit enemy weak points.
Perhaps the greatest advantage of becoming a Ranger in Enshrouded 1.0 is your control over engagements. You can establish a sightline, eliminate a dangerous enemy first, and reposition before the remaining group can overwhelm you. Wielding a bow also makes you highly mobile, and you have strong single-target potential.
Pros
- Strong single-target damage
- Excellent control over engagement distance
- Less dependence on crafted ammunition once upgraded Eternal arrows are available
Cons
- Accuracy-dependent build
- Reliant on stamina management and repositioning
- Enemies that reach melee range expose the Ranger’s limited defenses
Best Attribute and Skills
Dexterity is the Ranger’s primary attribute because it improves bow damage. Constitution provides a safety margin when enemies reach melee range, while Endurance supports dodging, sprinting, and gliding between shots. Keep Dexterity first, then balance Constitution and Endurance to match how aggressively you reposition.
Recommended Skill Progression
Early Game
- Double Jump: Requires 2 skill points to unlock. Unlocks a second jump while airborne.
- Ranger: Requires 2 skill points to unlock. Increases the user’s Dexterity and Endurance attributes.
- Marksman: Requires 1 skill point to unlock. Increases the damage of using bows by at least 5%.
- Bow Specialization: Requires 3 skill points to unlock. Generates Focus when attacking with a bow, and unlocks a special ability when using the aforementioned weapon type.
- Dexterity: Requires 1 skill point to unlock. Increases the Dexterity attribute by 1.
Mid-Game
- Skill Shot: Requires 1 skill point to unlock. Increases skill shot damage by at least 20%.
- Sniper: Requires 2 skill points to unlock. Increases critical strike chance using bows by at least 2%.
- Puncture: Requires 2 skill points to unlock. Increases ranged piercing damage by at least 10%.
- Blessed Arrows: Requires 1 skill point to unlock. Critical strikes using bows restore the user’s mana by at least 8 points.
- Constitution: Requires 1 skill point to unlock. Increases the Constitution attribute by 1.
- Endurance: Requires 1 skill point to unlock. Increases the Endurance attribute by 1.
Endgame
- Fatal Precision: Requires 1 skill point to unlock. Increases critical strike chance by at least 5% and critical strike damage by at least 1%.
- Multi Shot: Requires 4 skill points to unlock. Shooting regular arrows has a 20% chance of firing extra arrows. These additional arrows don’t subtract from the user’s ammunition pool.
- Barrage: Requires 1 skill point to unlock. Bow & arrow hits provide a base 15% chance of restoring 1 durability point to the equipped weapon.
- Survival Instinct: Requires 1 skill point to unlock. Defeating a Shroud-infested enemy with a Bow or Dagger restores some Time in the Shroud.
Best Armor
The Quetzal Hunter Set is a strong late-game armor choice for rangers. Its intended role is ranged combat, and its helmet provides ranged critical-strike chance and critical-strike damage bonuses. The set also includes stamina and health benefits across its pieces. Wearing this armor set grants the user the following bonuses:- Physical Defense: 377
- Magical Defense: 377
- Effects: +18% Ranged Critical Strike Chance +15% Critical Strike Damage +180 Health +94 Stamina +9% Ranged Damage +9% Damage against Ranged enemies +12% Sprint Speed +18 Stamina Regeneration +10:00-minute Wet Duration Reduction -0.4s Stamina Regeneration Delay
Best Weapons
For the Ranger, use the Firefeather Bow as your primary weapon, and explosive arrows as your primary ammunition. Its fire-damage, critical-strike, and health-leech bonuses make it a compelling choice for an explosive-arrow setup. The Ignited Bow is a strong alternative if you acquire one with useful fire-damage and critical-strike bonuses. Equip the Solstice Daggers as backup weapons for close-range encounters. These daggers offer bonuses to critical strike, backstab, and piercing damage, making them useful when an enemy gets past your ranged attacks.Tips & Tricks
Don’t rely on the power of your equipment while fighting as a Ranger in Enshrouded 1.0. Here are some useful tips and tricks to help you become a master marksman in Embervale:- Start fights from an elevated position. Alternatively, hide behind cover whenever possible. Focus on enemies that can disrupt your ranged attacks.
- Avoid standing still. Keep moving even when you have a clear shot. Move between attacks while conserving stamina for emergencies.
- Swap to a dagger when enemies get too close for comfort. Conserve your arrows when dealing with melee combatants.
Build #4: The Necromancer
Also known as the Summoner, the Necromancer is one of the best builds in Enshrouded 1.0 for good reason. It uses summoned creatures to create a frontline, allowing you to deal damage from behind your allies rather than face-tanking every enemy attack.
With the release of Version 1.0, Keen Games now allows Necromancers to use Advanced Necromancy, a new skill node that lets you summon Hollow Skeletons. Doing so gives this build a different rhythm from the conventional spellcaster.
Pros
- Summoned minions can draw aggro
- Totems add elemental damage, increasing overall DPS
- Ideal for solo players and those in co-op Enshrouded servers
Cons
- Summoning and recasting spells put steady pressure on your mana pool
- Minions need time and space to engage
- Mobile enemies or sudden area attacks can force the Necromancer to reposition frequently
Build Attributes and Skills
Prioritize Intelligence for wand and spell damage, followed by Spirit to support the mana-hungry summon rotation. Constitution is the third priority: skeletons can draw enemy attention, but area attacks can still reach you. Take a few Endurance nodes for basic movement rather than investing heavily in stamina.
Recommended Skill Progression
Early Game
- Double Jump: Requires 2 skill points to unlock. Unlocks a second jump while airborne.
- Wizard: Requires 2 skill points to unlock. Increases critical strike chance using wands and staves by at least 2%.
- Mage Apprentice: Requires 1 skill point to unlock. Increases the damage dealt with wands and staves by at least 5%.
- Wand Mastery: Requires 1 skill point to unlock. Increases damage using the Wand by at least 5%.
- Intelligence: Requires 1 skill point to unlock. Increases the Intelligence attribute by 1.
- Spirit: Requires 1 skill point to unlock. Increases the Spirit attribute by 1.
Mid-Game
- Advanced Necromancy: Requires 2 skill points to unlock. Increases the maximum number of summoned Hollow minions.
- Totem Mastery: Requires 2 skill points to unlock. Increases the maximum number of summoned totems.
- Necromancer: Requires 1 skill point to unlock. Killing an enemy has a 5% chance (at least) to summon a friendly Skull Companion.
- Quick Charge: Requires 1 skill point to unlock. Reduces the charge time of spells by at least 10%.
- Mana Currents: Requires 1 skill point to unlock. Increases base mana regeneration by at least 5 points.
Endgame
- Unity: Requires 1 skill point to unlock. Hitting enemies with wand attacks has a minimum of a 2% chance to restore at least 10% of the user’s maximum mana.
- Life Burst: Requires 4 skill points to unlock. Restores all nearby players’ health equal to 5x the user’s Intelligence attribute upon defeating an enemy with a magic weapon.
- Chain Hit: Requires 3 skill points to unlock. Deal 5 shock damage to a nearby random enemy upon landing a critical strike with a magic weapon.
- Constitution: Requires 1 skill point to unlock. Increases the Constitution attribute by 1.
Best Armor
Unlike other builds, the Necromancer’s best-in-slot (BiS) endgame armor is a mixed setup. Those interested in taking advantage of this build should use the Vorgoth’s Soulbound Crown and Vorgoth’s Soulbound Pants, and then pair these items with the Flame Arcanist Chest, Gloves, and Boots. This setup combines perks and stats that directly support summons, spellcasting, and mana sustain. In particular, wearing this combination of armor components grants the Necromancer the following effects:- Physical Defense: 252
- Magical Defense: 447
- Effects: +210 Health +231 Mana +31% Staff Damage +10% Wand Damage +10:00-minute Wet Duration Reduction +11 Frost Resistance +14% Magical Critical Strike Chance +16% Damage Against Magical Enemies +17% Critical Strike Damage +28 Mana Regeneration -0.5 second Mana Regeneration Delay
Best Weapons
The Necromancer needs a weapon that complements summoned allies rather than competing with them for the spotlight. The Candlelight Wand paired with the Staff of Reeds is a recommended starting combination for this build. If you don’t or can’t use the Candlelight Wand, the Mythic Wand is a great alternative. Its critical strike bonuses make it an all-around choice for casting different spells.Tips & Tricks
While it’s easy to sit and let your summoned minions do your “dirty work,” follow these tips and tricks to increase the chances of winning every encounter, including those with tough bosses:- Let summons engage enemies before committing to an attack. While your summoned minions attract attention and create opportunities, use your wand or staff to damage enemies from a safe position.
- Monitor your mana continuously. A summoner without enough resources to maintain their abilities loses a major advantage, especially during longer encounters.
- Work with a group. A Necromancer in a multiplayer Enshrouded server can help turn the tide of battle in your favor by controlling threats with your summons.
Build #5: The Warrior
New players who are trying to learn the ropes of Enshrouded 1.0 can follow this Warrior build. It focuses on direct combat that mixes offense with blocking and parrying.
Arguably one of the best builds in Enshrouded 1.0, the Warrior offers a straightforward approach when dealing with enemies. Rather than managing a large mana pool or an extensive supply of arrows, you’ll only need to swing your melee weapon at the enemy while practicing defensive timing.
While this build may not offer the same long-range burst as a specialized wizard or ranger, it’s easy to understand from early to late-game. Also, it’s important to note that this particular Warrior build uses a one-handed weapon and shield, offering a useful balance between damage and defense.
Pros
- Straightforward weapon handling
- Dependable close-range sustain using skills like Battle Heal
- Strong defensive options from blocks and parries
Cons
- This build requires closing the distance before dealing damage
- Although powerful, the Warrior can’t match a Wizard’s area burst or a Ranger’s range
- The biggest damage windows often depend on opening weaknesses and managing stamina
Build Attributes and Skills
Strength is the Warrior’s main attribute, improving the damage of one-handed axes, clubs, and swords. Constitution comes next because this build fights at close range, while Endurance helps sustain dodges, blocks, and follow-up attacks. Pick up these attributes as you travel through the skill tree instead of spending every point on damage alone.
Recommended Skill Progression
Early Game
- Double Jump: Requires 2 skill points to unlock. Unlocks a second jump while airborne.
- The Warrior’s Path: Requires 2 skill points to unlock. Increases all melee weapon damage by 10%.
- Battle Heal: Requires 2 skill points to unlock. Heal at least 3% of the user’s maximum health when dealing a critical hit.
- Merciless Attack: Requires 2 skill points to unlock. Press “E” (by default) to deal massive damage to a stunned enemy.
- Strength: Requires 1 skill point to unlock. Increases the Strength attribute by 1.
Mid-Game
- Veteran: Requires 2 skill points to unlock. Increases critical hit chance with One- or Two-Handed Axes, Clubs, Hammers, Swords, Greatswords, and Daggers by at least 6%.
- Swift Blades: Requires 4 skill points to unlock. One-handed melee weapon attack speed increases by 15%.
- Vigorous Deflection: Requires 1 skill point to unlock. Recover at least 45 stamina points upon a successful parry.
- Earth Aura: Requires 2 skill points to unlock. Reduces all incoming damage by 10% for you and nearby allies.
- Constitution: Requires 1 skill point to unlock. Increases the Constitution attribute by 1.
Endgame
- Blood Rage: Requires 2 skill points to unlock. Killing an enemy within 10 meters with a melee weapon increases melee damage by 20% for 10 seconds.
- Endurance: Requires 1 skill point to unlock. Increases the Endurance attribute by 1.
- Shiny Plates: Requires 2 skill points to unlock. Increases Physical Armor by 10%.
Best Armor
For a defensive endgame melee build, the Golden Bulwark Set offers a useful combination of protection, health, regeneration, and blocking benefits. This Level 43 armor set grants the following bonuses to its user:- Physical Defense: 503
- Magical Defense: 251
- Effects: +44% Merciless Attack Damage +83 Parry Power +315 Health +36 Health Regeneration +5% Melee Damage +6 Block +18 Stamina Regeneration +10:00-minute Wet Duration Reduction
Best Weapons
For the Warrior, Vesztah’s Mace is a strong named weapon for a one-handed melee setup focused on survivability. It has two health-leech bonuses alongside blunt-damage and Shock-damage bonuses, making it useful for sustaining pressure in close combat. Pair it with the Crestflame Shield for a defensive loadout. An alternate option is the Guard of the North Sword. Choose this weapon if you prefer a sword-based setup with critical-strike and Shock-damage bonuses. However, make sure your skill investment supports cutting damage rather than relying on mace-specific synergies.Tips & Tricks
Pay attention to enemy movement as a Warrior in Enshrouded. Learning enemy movements is crucial for survival as a melee user. Additionally, follow these tips and tricks for a better chance at winning each encounter:- Practice parrying. A well-timed parry can help fill an enemy's stun bar, creating an opportunity for Merciless Attack. Use this opening to deal substantial damage before returning to a defensive stance.
- Take advantage of Battle Heal. This skill supports your sustain when critical strikes connect.
- Do not ignore ranged threats. Keep a backup weapon accessible and invest in enough mobility to reach enemies or escape dangerous attacks.
Cria o teu próprio servidor de
Enshrouded
Enshrouded
Escolhe um plano, seleciona um jogo e joga com os teus amigos!
Subscreve a nossa Newsletter
Subscreve para receber as últimas atualizações sobre tudo do mundo dos jogos!

Junta-te ao nosso Discord
Entra na nossa comunidade com mais de 20.000 membros com os mesmos interesses!
Como avaliarias este blog?
Partilha a tua opinião e ajuda-nos a tornar os nossos blogs ainda melhores!
Não gostei
Neutro
Gostei

Precisas de um servidor de jogo?
Aluga um servidor de jogo onde tu e os teus amigos podem jogar em privado com baixa latência e definições personalizadas. Escolhe entre 110+ jogos, convida pessoas de todo o mundo e desfruta de partidas privadas, ou constrói a tua própria comunidade online com as tuas próprias regras.

Blogs Relevantes






FICA A PAR DE TUDO!
Junta-te ao nosso e-mail para receberes atualizações sobre os nossos jogos alojados, notícias da empresa e promoções exclusivas. Fica a par!