DayZ Deer Isle Map Guide: POI Locations, How to Complete the Questline, & More
Publicado em por
Partilhar:
Partilhar no X
Partilhar no Facebook
Partilhar no Threads
Partilhar no Bluesky
Copiar para a Área de Transferência
Partilhar por e-mail
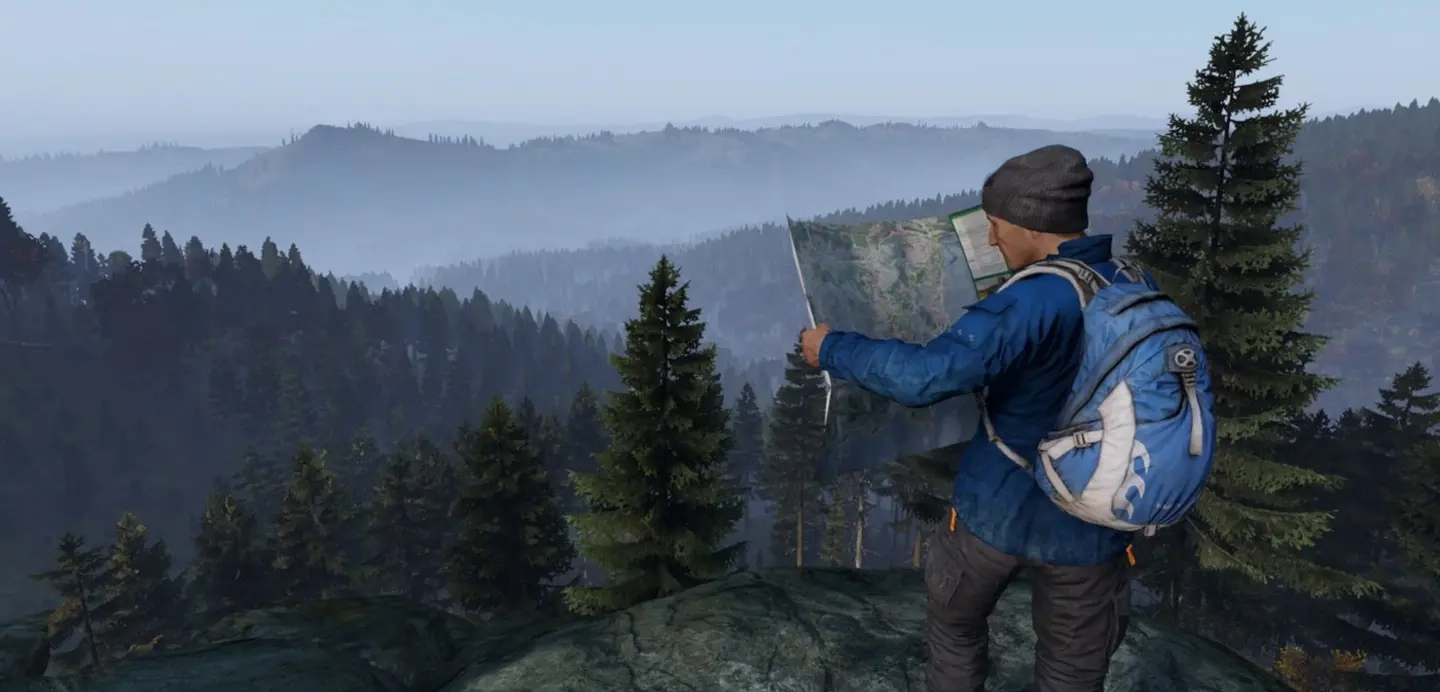
There are plenty of maps to conquer in the post-apocalyptic world of DayZ. Deer Isle, for example, is a particularly popular player-made destination. Like any DayZ map, you'll be doing your best to explore, hunt for loot, and put down enemy players. However, Deer Isle is filled with POIs and an entire questline that you won't find anywhere else. We've got the info you need to know right here.
 Unlike the freezing map of Namalsk, Deer Isle has less of a loot and food scarcity issue. Yes, you'll still need food to survive, but you won't necessarily be fighting against storms on Deer Isle. You will, however, be in a constant fight against the land itself. Whether that's packing enough food to travel across the enormous and diverse stretches of land or diving underwater for forgotten loot, there's plenty to see and do.
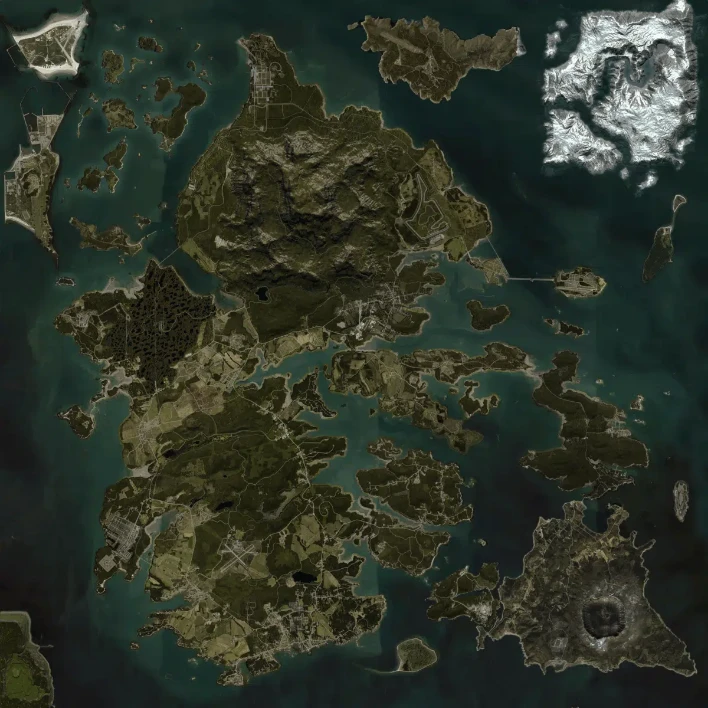
Deer Isle is absolutely massive. At roughly 256 km2, this map is even larger than the Chernarus map. Scattered around every corner of the land are points of interest, loot caches, underground systems, and hidden areas. While most DayZ maps expect you to spawn in, grab loot, and fight for your life, Deer Isle wants you to really explore every nook and cranny. The longer you survive, the more you'll uncover.
Like any DayZ map, Deer Isle has a tiered loot system. As expected, the loot closer to where you spawn is lower, while endgame zones have much more powerful gear. All of the spawns for Deer Isle are along the south. Move north, and throughout the mid-section of the map, you'll find mid-tier gear. Finally, the northernmost reaches of Deer Isle are where you can find the rarest and most sought-after equipment.
You can always find loot in the typical DayZ locations: houses, military bases, hospitals, etc. However, Deer Isle also emphasizes underwater loot accessible only by diving. Despite the map's name, there are multiple islands scattered throughout the area, and hopping between them by boat or jet ski is often necessary just to get around. As you zip from place to place, do your best to make sure you have Air Tanks, Compressors, and Diving Gear. With these, you can head beneath the waves to underwater points of interest and acquire high-value loot. Luckily, everything you need for diving can often be found along the coastline of almost any island. Keep an eye out for diving schools or buildings along the shore.
Unlike the freezing map of Namalsk, Deer Isle has less of a loot and food scarcity issue. Yes, you'll still need food to survive, but you won't necessarily be fighting against storms on Deer Isle. You will, however, be in a constant fight against the land itself. Whether that's packing enough food to travel across the enormous and diverse stretches of land or diving underwater for forgotten loot, there's plenty to see and do.
Deer Isle is absolutely massive. At roughly 256 km2, this map is even larger than the Chernarus map. Scattered around every corner of the land are points of interest, loot caches, underground systems, and hidden areas. While most DayZ maps expect you to spawn in, grab loot, and fight for your life, Deer Isle wants you to really explore every nook and cranny. The longer you survive, the more you'll uncover.
Like any DayZ map, Deer Isle has a tiered loot system. As expected, the loot closer to where you spawn is lower, while endgame zones have much more powerful gear. All of the spawns for Deer Isle are along the south. Move north, and throughout the mid-section of the map, you'll find mid-tier gear. Finally, the northernmost reaches of Deer Isle are where you can find the rarest and most sought-after equipment.
You can always find loot in the typical DayZ locations: houses, military bases, hospitals, etc. However, Deer Isle also emphasizes underwater loot accessible only by diving. Despite the map's name, there are multiple islands scattered throughout the area, and hopping between them by boat or jet ski is often necessary just to get around. As you zip from place to place, do your best to make sure you have Air Tanks, Compressors, and Diving Gear. With these, you can head beneath the waves to underwater points of interest and acquire high-value loot. Luckily, everything you need for diving can often be found along the coastline of almost any island. Keep an eye out for diving schools or buildings along the shore.
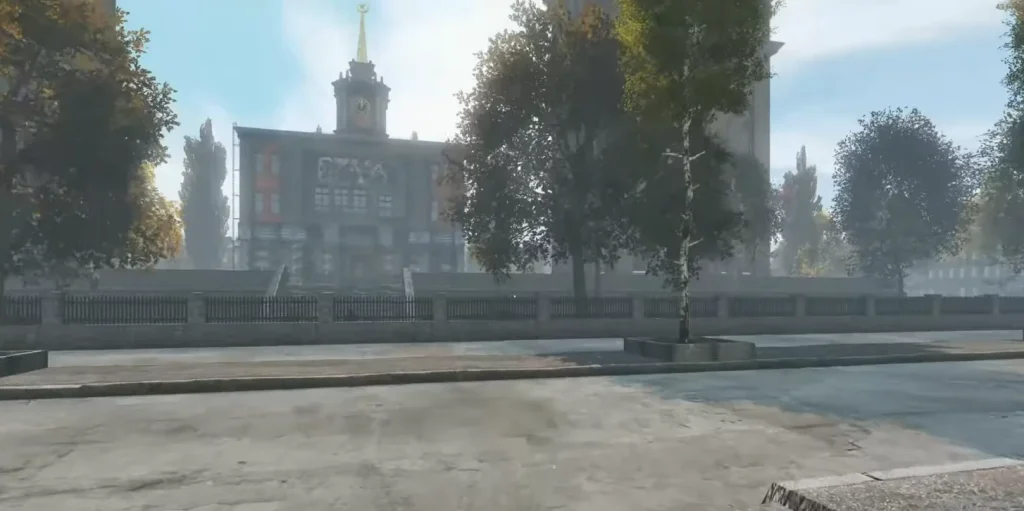 Located on the southeastern coastline of Deer Isle, Stonington can be a busy town. This is a common spawn area, and, as a result, plenty of early-game fights can break out here. In fact, it's not uncommon for players who spawn outside of Stonington to make their way here before venturing toward the rest of the map. Stonington's position makes it a strong staging ground. It's surrounded by a variety of smaller points of interest, such as towns and military bases that serve as good stopping points before heading to higher-tier loot zones.
Within Stonington itself, you can find a hospital, a school, and an intricate series of underground tunnels. These tunnels can hold some of the town's best loot, but they can also be pitch black. Unfortunately, Night Vision Goggles (NVG) are a high-tier military find. The chances of finding them in Stonington are slim to none. So, if you're eager to see what awaits in the dark depths beneath Stonington, your best bet is to craft some torches or tweak your game's brightness settings.
Located on the southeastern coastline of Deer Isle, Stonington can be a busy town. This is a common spawn area, and, as a result, plenty of early-game fights can break out here. In fact, it's not uncommon for players who spawn outside of Stonington to make their way here before venturing toward the rest of the map. Stonington's position makes it a strong staging ground. It's surrounded by a variety of smaller points of interest, such as towns and military bases that serve as good stopping points before heading to higher-tier loot zones.
Within Stonington itself, you can find a hospital, a school, and an intricate series of underground tunnels. These tunnels can hold some of the town's best loot, but they can also be pitch black. Unfortunately, Night Vision Goggles (NVG) are a high-tier military find. The chances of finding them in Stonington are slim to none. So, if you're eager to see what awaits in the dark depths beneath Stonington, your best bet is to craft some torches or tweak your game's brightness settings.
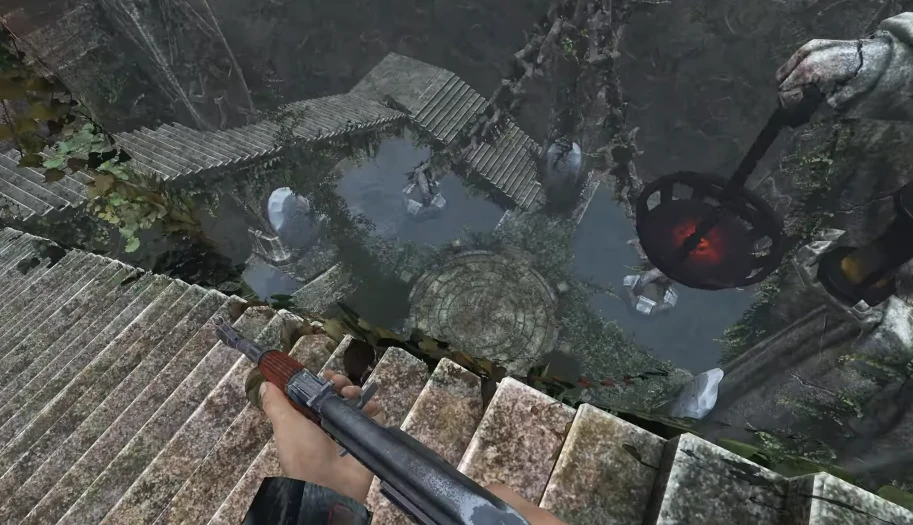
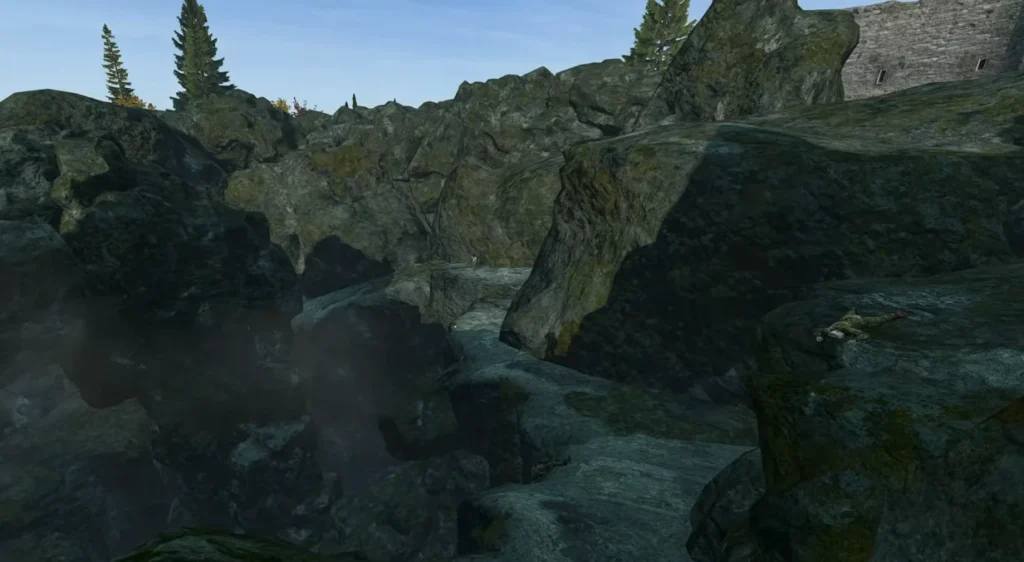 Speaking of underground exploration, the Devil's Eye is a strong choice for early-game military loot once you're done with Stonington. It's located near the city along the southern coast, and, again, is a common point of interest for PvP. That risk might be worth the reward, however, as it's a fantastic way to get from lower-tier loot to mid-tier loot without having to cross the entire continent.
Probably the most dangerous aspect of Devil's Eye, as shown in the picture above, is navigating its variety of ledges. You need to ensure you hop from one to the other carefully. Take too much of a fall, and it's all over. It is a cave system, so torches and NVGs would make the whole thing easier. However, it's not too difficult to navigate thanks to more linear pathways.
Speaking of underground exploration, the Devil's Eye is a strong choice for early-game military loot once you're done with Stonington. It's located near the city along the southern coast, and, again, is a common point of interest for PvP. That risk might be worth the reward, however, as it's a fantastic way to get from lower-tier loot to mid-tier loot without having to cross the entire continent.
Probably the most dangerous aspect of Devil's Eye, as shown in the picture above, is navigating its variety of ledges. You need to ensure you hop from one to the other carefully. Take too much of a fall, and it's all over. It is a cave system, so torches and NVGs would make the whole thing easier. However, it's not too difficult to navigate thanks to more linear pathways.
 Now, we're finally leaving the south. Far to the west, roughly halfway up the map, is Paris Island. This is another mid-tier loot area, but it has the potential for even more rare gear. Highly sought-after weapons such as AR9s or M60s have a chance of being found here. Additionally, Deer Isle's exclusive loot, known as S.T.A.G. equipment, has a chance of spawning here. This loot can include the following:
 Arguably one of the most dangerous spots on Deer Isle, the Crater is a massive contaminated zone located squarely in the center of the large island to the southwest. Due to its noxious gases, the only way to survive the Crater is if you have a full set of NBC gear. The best places to find this are hospitals, medical centers, military areas, and even fire stations. Or, as mentioned above, the Bio Lab at Paris Island.
Loot at the Crater can vary wildly. Sometimes, you can find high-tier loot such as body armor and AR A1s, but it can also be close to empty. The main point of visiting the Crater is for the Deer Isle questline, which we'll discuss in more detail below.
Arguably one of the most dangerous spots on Deer Isle, the Crater is a massive contaminated zone located squarely in the center of the large island to the southwest. Due to its noxious gases, the only way to survive the Crater is if you have a full set of NBC gear. The best places to find this are hospitals, medical centers, military areas, and even fire stations. Or, as mentioned above, the Bio Lab at Paris Island.
Loot at the Crater can vary wildly. Sometimes, you can find high-tier loot such as body armor and AR A1s, but it can also be close to empty. The main point of visiting the Crater is for the Deer Isle questline, which we'll discuss in more detail below.
 Finally, one of the most infamous locations on Deer Isle: Alcatraz. This is the top of the loot pile. Here, you'll find all of the best gear that Deer Isle has to offer. But this is also the most dangerous area on the map. Loads of heavily-armed AI bandits are patrolling Alcatraz. If you don't arrive here with plenty of gear to keep yourself fighting, you'll be dead before you know it.
Naturally, as a zone with heaps of high-tier loot, plenty of rival players will be drawn to Alcatraz as well. However, the sheer number of AI enemies could bring you and other players together. Try communicating with players and proposing alliances. The enemy of my enemy is my friend, right?
Finally, one of the most infamous locations on Deer Isle: Alcatraz. This is the top of the loot pile. Here, you'll find all of the best gear that Deer Isle has to offer. But this is also the most dangerous area on the map. Loads of heavily-armed AI bandits are patrolling Alcatraz. If you don't arrive here with plenty of gear to keep yourself fighting, you'll be dead before you know it.
Naturally, as a zone with heaps of high-tier loot, plenty of rival players will be drawn to Alcatraz as well. However, the sheer number of AI enemies could bring you and other players together. Try communicating with players and proposing alliances. The enemy of my enemy is my friend, right?
 Unlike other DayZ maps, Deer Isle features a full questline. Here, we'll walk you through the steps you need to complete, but we won't spoil the ending. To complete the quest, you'll also need the following gear:
 To begin the quest, head to Alcatraz in the southeast. Yes, the incredibly dangerous late-game location. What you're looking for is a Purple Keycard. It can spawn in various locations on Alcatraz, but is most commonly found on desks. Next stop is the Crater. Make sure you have your NBC suit equipped, and climb the tower in the center. Up there, you need to grab the S.T.A.G. Quantum Isolation Sphere.
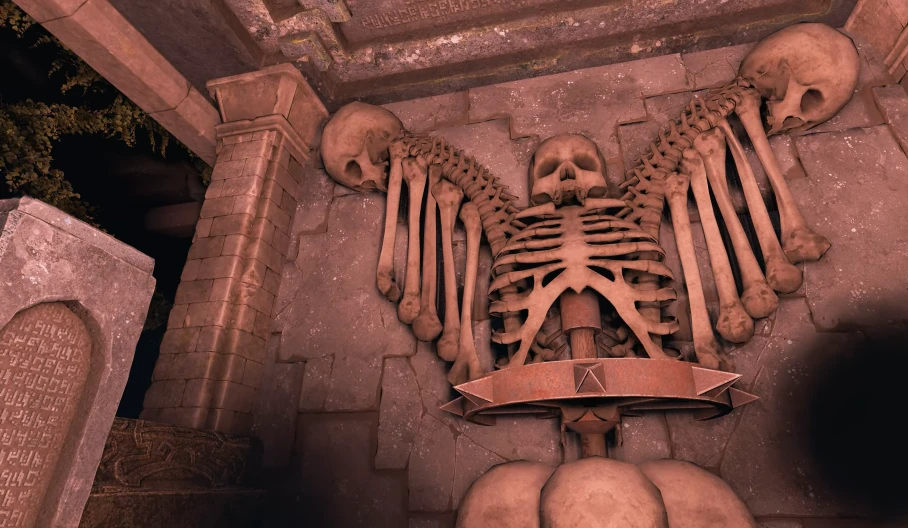
Next, head to the center of the map to a location called K.M.U.C. Here, you'll head into an underground bunker where you can use the Purple Keycard to open a specific, purple door. You'll then need to continue to head down until you find a crashed helicopter and a strange staff with an animal skull at the top. That's what you're here for. Grab it, and head back to the surface.
To begin the quest, head to Alcatraz in the southeast. Yes, the incredibly dangerous late-game location. What you're looking for is a Purple Keycard. It can spawn in various locations on Alcatraz, but is most commonly found on desks. Next stop is the Crater. Make sure you have your NBC suit equipped, and climb the tower in the center. Up there, you need to grab the S.T.A.G. Quantum Isolation Sphere.
Next, head to the center of the map to a location called K.M.U.C. Here, you'll head into an underground bunker where you can use the Purple Keycard to open a specific, purple door. You'll then need to continue to head down until you find a crashed helicopter and a strange staff with an animal skull at the top. That's what you're here for. Grab it, and head back to the surface.
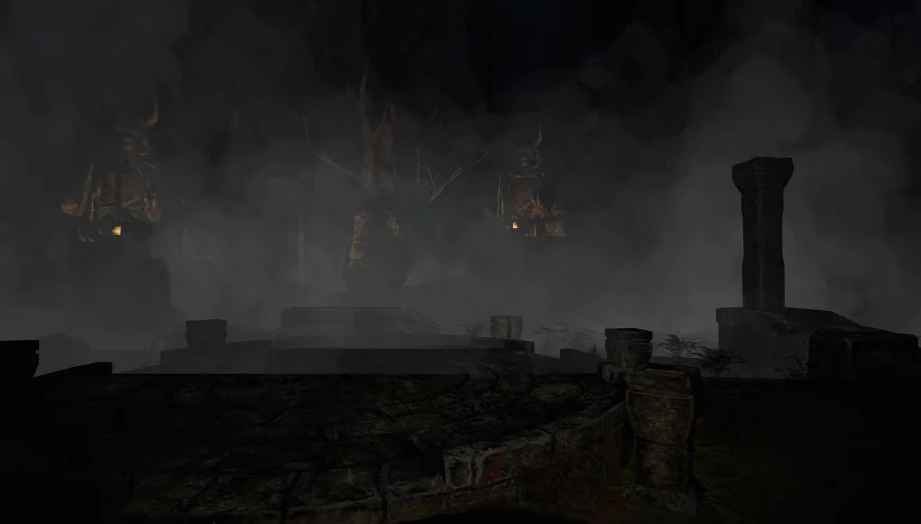 Next, you'll head to the swamp directly to the southwest of K.M.U.C. Along the way, do your best to find and fill an oxygen diving tank. These can be found along coastlines. In the center of the swamp, you can find some large ruins made from stone. This is actually a teleporter, and you need to step on it while bleeding at night. The easiest way to do this is to give yourself a cut by walking on sticks barefoot or without gloves.
The teleporter will then send you to a temple. It's a linear path until you need to jump off the edge into some water. Equip your diving tank, and head underwater. Here, you're looking for a tunnel. All the way at the end of the tunnel, you'll find a punch card you need for the quest. Return underwater and take the tunnel you didn't arrive through. Continue onward, reemerge, and ensure you grab the nearby Hammer's Head. Then, head northeast to another teleporter. This will send you back to the swamp.
Next, you'll head to the swamp directly to the southwest of K.M.U.C. Along the way, do your best to find and fill an oxygen diving tank. These can be found along coastlines. In the center of the swamp, you can find some large ruins made from stone. This is actually a teleporter, and you need to step on it while bleeding at night. The easiest way to do this is to give yourself a cut by walking on sticks barefoot or without gloves.
The teleporter will then send you to a temple. It's a linear path until you need to jump off the edge into some water. Equip your diving tank, and head underwater. Here, you're looking for a tunnel. All the way at the end of the tunnel, you'll find a punch card you need for the quest. Return underwater and take the tunnel you didn't arrive through. Continue onward, reemerge, and ensure you grab the nearby Hammer's Head. Then, head northeast to another teleporter. This will send you back to the swamp.
 Next, you need a particularly famous Hammer's Head. Make sure you have your skull staff handy, and throw the S.T.A.G. Quantum Isolation Sphere at the ground. This will create a portal you can pass through if you have the staff. The new location is a linear challenge filled with zombies. Run through, and at the end, you'll find the Hammer's Handle. Continue past it, and you'll find a teleporter to take you home.
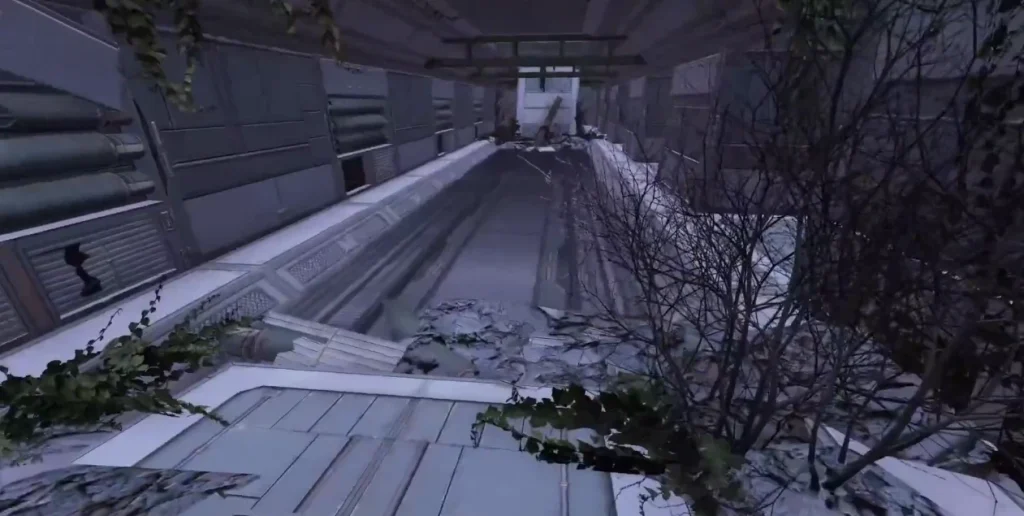
 Now, equip your Bear Ghillie Suit to keep you warm, hop on a boat, and head toward the northeastern Arctic island. Here, you can find a massive temple. However, you can only enter with the now-completed Hammer you've collected. Once inside, you'll explore the area moving downwards. You're looking for a Green Keycard in a room with a futuristic-looking contraption.
From this room, you'll exit, head up some stairs, and find a large statue with a strange glowing flame beneath it. You need to equip your skull staff and ignite it on this flame. This will not destroy the staff, and the flame will persist if you unequip it.
You don't need the Green Keycard for the questline, but here on the Arctic Isle is a massive Carrier ship. With the Green Keycard, you can loot this ship and prepare yourself for the rest of your questline with some high-tier loot. Now, to continue your journey, you need to head all the way back to the swamp teleporter and to the spot where you originally found the Hammer's Head.
Now, equip your Bear Ghillie Suit to keep you warm, hop on a boat, and head toward the northeastern Arctic island. Here, you can find a massive temple. However, you can only enter with the now-completed Hammer you've collected. Once inside, you'll explore the area moving downwards. You're looking for a Green Keycard in a room with a futuristic-looking contraption.
From this room, you'll exit, head up some stairs, and find a large statue with a strange glowing flame beneath it. You need to equip your skull staff and ignite it on this flame. This will not destroy the staff, and the flame will persist if you unequip it.
You don't need the Green Keycard for the questline, but here on the Arctic Isle is a massive Carrier ship. With the Green Keycard, you can loot this ship and prepare yourself for the rest of your questline with some high-tier loot. Now, to continue your journey, you need to head all the way back to the swamp teleporter and to the spot where you originally found the Hammer's Head.
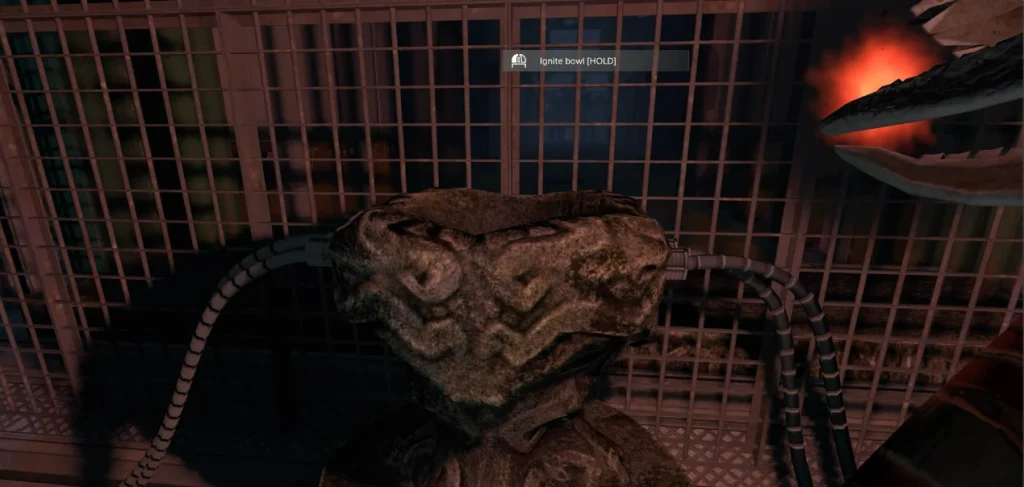
 Once you've arrived, head down the only set of stairs in the large room with statues. You can see another teleporter on the floor here. Again, it's only active at night. But first, you need to drop down carefully into the brazier being held by the statue above the teleporter. You need to light this brazier in order for the teleporter to work. With the brazier lit, wait until night, and use the teleporter.
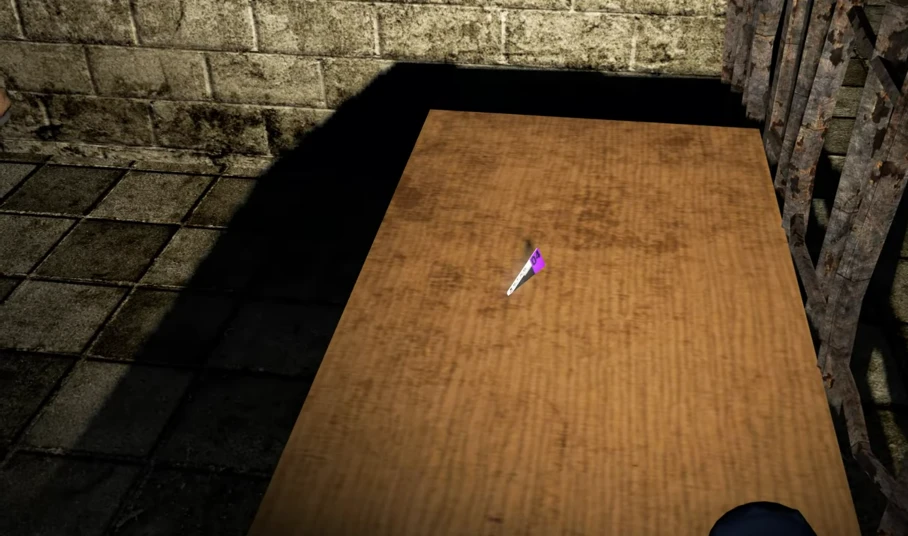
 Almost there! Now, in this linear area, you need to cross gaps with invisible flooring. The best way to see which steps are correct is to throw some small items and watch them land on the invisible pathway. Once you're across, you'll find a door that requires the Purple Keycard. Swipe it, and start following the hallways labeled A12. Now, swipe your punchcard when you find a small device on the wall. This will open a massive bunker, and inside is an ancient bowl hooked up with wires. Smack this bowl with your flame-wielding skull staff, and the quest will come to an end.
What is the DayZ Deer Isle Map?
Unlike the freezing map of Namalsk, Deer Isle has less of a loot and food scarcity issue. Yes, you'll still need food to survive, but you won't necessarily be fighting against storms on Deer Isle. You will, however, be in a constant fight against the land itself. Whether that's packing enough food to travel across the enormous and diverse stretches of land or diving underwater for forgotten loot, there's plenty to see and do.
Deer Isle is absolutely massive. At roughly 256 km2, this map is even larger than the Chernarus map. Scattered around every corner of the land are points of interest, loot caches, underground systems, and hidden areas. While most DayZ maps expect you to spawn in, grab loot, and fight for your life, Deer Isle wants you to really explore every nook and cranny. The longer you survive, the more you'll uncover.
Like any DayZ map, Deer Isle has a tiered loot system. As expected, the loot closer to where you spawn is lower, while endgame zones have much more powerful gear. All of the spawns for Deer Isle are along the south. Move north, and throughout the mid-section of the map, you'll find mid-tier gear. Finally, the northernmost reaches of Deer Isle are where you can find the rarest and most sought-after equipment.
You can always find loot in the typical DayZ locations: houses, military bases, hospitals, etc. However, Deer Isle also emphasizes underwater loot accessible only by diving. Despite the map's name, there are multiple islands scattered throughout the area, and hopping between them by boat or jet ski is often necessary just to get around. As you zip from place to place, do your best to make sure you have Air Tanks, Compressors, and Diving Gear. With these, you can head beneath the waves to underwater points of interest and acquire high-value loot. Luckily, everything you need for diving can often be found along the coastline of almost any island. Keep an eye out for diving schools or buildings along the shore.
Major Points of Interest on Deer Isle
Stonington
Located on the southeastern coastline of Deer Isle, Stonington can be a busy town. This is a common spawn area, and, as a result, plenty of early-game fights can break out here. In fact, it's not uncommon for players who spawn outside of Stonington to make their way here before venturing toward the rest of the map. Stonington's position makes it a strong staging ground. It's surrounded by a variety of smaller points of interest, such as towns and military bases that serve as good stopping points before heading to higher-tier loot zones.
Within Stonington itself, you can find a hospital, a school, and an intricate series of underground tunnels. These tunnels can hold some of the town's best loot, but they can also be pitch black. Unfortunately, Night Vision Goggles (NVG) are a high-tier military find. The chances of finding them in Stonington are slim to none. So, if you're eager to see what awaits in the dark depths beneath Stonington, your best bet is to craft some torches or tweak your game's brightness settings.
Devil's Eye
Speaking of underground exploration, the Devil's Eye is a strong choice for early-game military loot once you're done with Stonington. It's located near the city along the southern coast, and, again, is a common point of interest for PvP. That risk might be worth the reward, however, as it's a fantastic way to get from lower-tier loot to mid-tier loot without having to cross the entire continent.
Probably the most dangerous aspect of Devil's Eye, as shown in the picture above, is navigating its variety of ledges. You need to ensure you hop from one to the other carefully. Take too much of a fall, and it's all over. It is a cave system, so torches and NVGs would make the whole thing easier. However, it's not too difficult to navigate thanks to more linear pathways.
Paris Island
Now, we're finally leaving the south. Far to the west, roughly halfway up the map, is Paris Island. This is another mid-tier loot area, but it has the potential for even more rare gear. Highly sought-after weapons such as AR9s or M60s have a chance of being found here. Additionally, Deer Isle's exclusive loot, known as S.T.A.G. equipment, has a chance of spawning here. This loot can include the following:
- NBC Hazard Suits
- Plate Carriers
- Specialized Ammunition
- Chemical Heaters
- S.T.A.G. Crossbow
- S.T.A.G. X-65 Grenade
- Specialized Storage Items
Crater
Arguably one of the most dangerous spots on Deer Isle, the Crater is a massive contaminated zone located squarely in the center of the large island to the southwest. Due to its noxious gases, the only way to survive the Crater is if you have a full set of NBC gear. The best places to find this are hospitals, medical centers, military areas, and even fire stations. Or, as mentioned above, the Bio Lab at Paris Island.
Loot at the Crater can vary wildly. Sometimes, you can find high-tier loot such as body armor and AR A1s, but it can also be close to empty. The main point of visiting the Crater is for the Deer Isle questline, which we'll discuss in more detail below.
Alcatraz
Finally, one of the most infamous locations on Deer Isle: Alcatraz. This is the top of the loot pile. Here, you'll find all of the best gear that Deer Isle has to offer. But this is also the most dangerous area on the map. Loads of heavily-armed AI bandits are patrolling Alcatraz. If you don't arrive here with plenty of gear to keep yourself fighting, you'll be dead before you know it.
Naturally, as a zone with heaps of high-tier loot, plenty of rival players will be drawn to Alcatraz as well. However, the sheer number of AI enemies could bring you and other players together. Try communicating with players and proposing alliances. The enemy of my enemy is my friend, right?
How to Complete the Deer Isle 6.0 Quest
Unlike other DayZ maps, Deer Isle features a full questline. Here, we'll walk you through the steps you need to complete, but we won't spoil the ending. To complete the quest, you'll also need the following gear:
- A Full NBC Suit & Gas Mask
- NBC Hood
- NBC Jacket
- NBC Pants
- NBC Gloves
- NBC Boots
- Bear Ghillie Suit
- Can be found or crafted.
- Crafted by combining a standard Ghillie Suit with two Bear Pelts using a Leather Sewing Kit.
- A normal Ghillie Suit can be crafted with 10 Burlap Strips & 4 pieces of Netting
Beginning the Quest
To begin the quest, head to Alcatraz in the southeast. Yes, the incredibly dangerous late-game location. What you're looking for is a Purple Keycard. It can spawn in various locations on Alcatraz, but is most commonly found on desks. Next stop is the Crater. Make sure you have your NBC suit equipped, and climb the tower in the center. Up there, you need to grab the S.T.A.G. Quantum Isolation Sphere.
Next, head to the center of the map to a location called K.M.U.C. Here, you'll head into an underground bunker where you can use the Purple Keycard to open a specific, purple door. You'll then need to continue to head down until you find a crashed helicopter and a strange staff with an animal skull at the top. That's what you're here for. Grab it, and head back to the surface.
Teleportation & Diving
Next, you'll head to the swamp directly to the southwest of K.M.U.C. Along the way, do your best to find and fill an oxygen diving tank. These can be found along coastlines. In the center of the swamp, you can find some large ruins made from stone. This is actually a teleporter, and you need to step on it while bleeding at night. The easiest way to do this is to give yourself a cut by walking on sticks barefoot or without gloves.
The teleporter will then send you to a temple. It's a linear path until you need to jump off the edge into some water. Equip your diving tank, and head underwater. Here, you're looking for a tunnel. All the way at the end of the tunnel, you'll find a punch card you need for the quest. Return underwater and take the tunnel you didn't arrive through. Continue onward, reemerge, and ensure you grab the nearby Hammer's Head. Then, head northeast to another teleporter. This will send you back to the swamp.
Grabbing the Hammer's Handle
Next, you need a particularly famous Hammer's Head. Make sure you have your skull staff handy, and throw the S.T.A.G. Quantum Isolation Sphere at the ground. This will create a portal you can pass through if you have the staff. The new location is a linear challenge filled with zombies. Run through, and at the end, you'll find the Hammer's Handle. Continue past it, and you'll find a teleporter to take you home.
An Arctic Temple
Now, equip your Bear Ghillie Suit to keep you warm, hop on a boat, and head toward the northeastern Arctic island. Here, you can find a massive temple. However, you can only enter with the now-completed Hammer you've collected. Once inside, you'll explore the area moving downwards. You're looking for a Green Keycard in a room with a futuristic-looking contraption.
From this room, you'll exit, head up some stairs, and find a large statue with a strange glowing flame beneath it. You need to equip your skull staff and ignite it on this flame. This will not destroy the staff, and the flame will persist if you unequip it.
You don't need the Green Keycard for the questline, but here on the Arctic Isle is a massive Carrier ship. With the Green Keycard, you can loot this ship and prepare yourself for the rest of your questline with some high-tier loot. Now, to continue your journey, you need to head all the way back to the swamp teleporter and to the spot where you originally found the Hammer's Head.
More Teleportation
Once you've arrived, head down the only set of stairs in the large room with statues. You can see another teleporter on the floor here. Again, it's only active at night. But first, you need to drop down carefully into the brazier being held by the statue above the teleporter. You need to light this brazier in order for the teleporter to work. With the brazier lit, wait until night, and use the teleporter.
The Final Stretch
Almost there! Now, in this linear area, you need to cross gaps with invisible flooring. The best way to see which steps are correct is to throw some small items and watch them land on the invisible pathway. Once you're across, you'll find a door that requires the Purple Keycard. Swipe it, and start following the hallways labeled A12. Now, swipe your punchcard when you find a small device on the wall. This will open a massive bunker, and inside is an ancient bowl hooked up with wires. Smack this bowl with your flame-wielding skull staff, and the quest will come to an end.Cria o teu próprio servidor de
DayZ
DayZ
Escolhe um plano, seleciona um jogo e joga com os teus amigos!
Subscreve a nossa Newsletter
Subscreve para receber as últimas atualizações sobre tudo do mundo dos jogos!
Junta-te ao nosso Discord
Entra na nossa comunidade com mais de 20.000 membros com os mesmos interesses!
Como avaliarias este blog?
Partilha a tua opinião e ajuda-nos a tornar os nossos blogs ainda melhores!
Não gostei
Neutro
Gostei

Precisas de um servidor de jogo?
Aluga um servidor de jogo onde tu e os teus amigos podem jogar em privado com baixa latência e definições personalizadas. Escolhe entre 100+ jogos, convida pessoas de todo o mundo e desfruta de partidas privadas, ou constrói a tua própria comunidade online com as tuas próprias regras.

Blogs Relevantes


FICA A PAR DE TUDO!
Junta-te ao nosso e-mail para receberes atualizações sobre os nossos jogos alojados, notícias da empresa e promoções exclusivas. Fica a par!