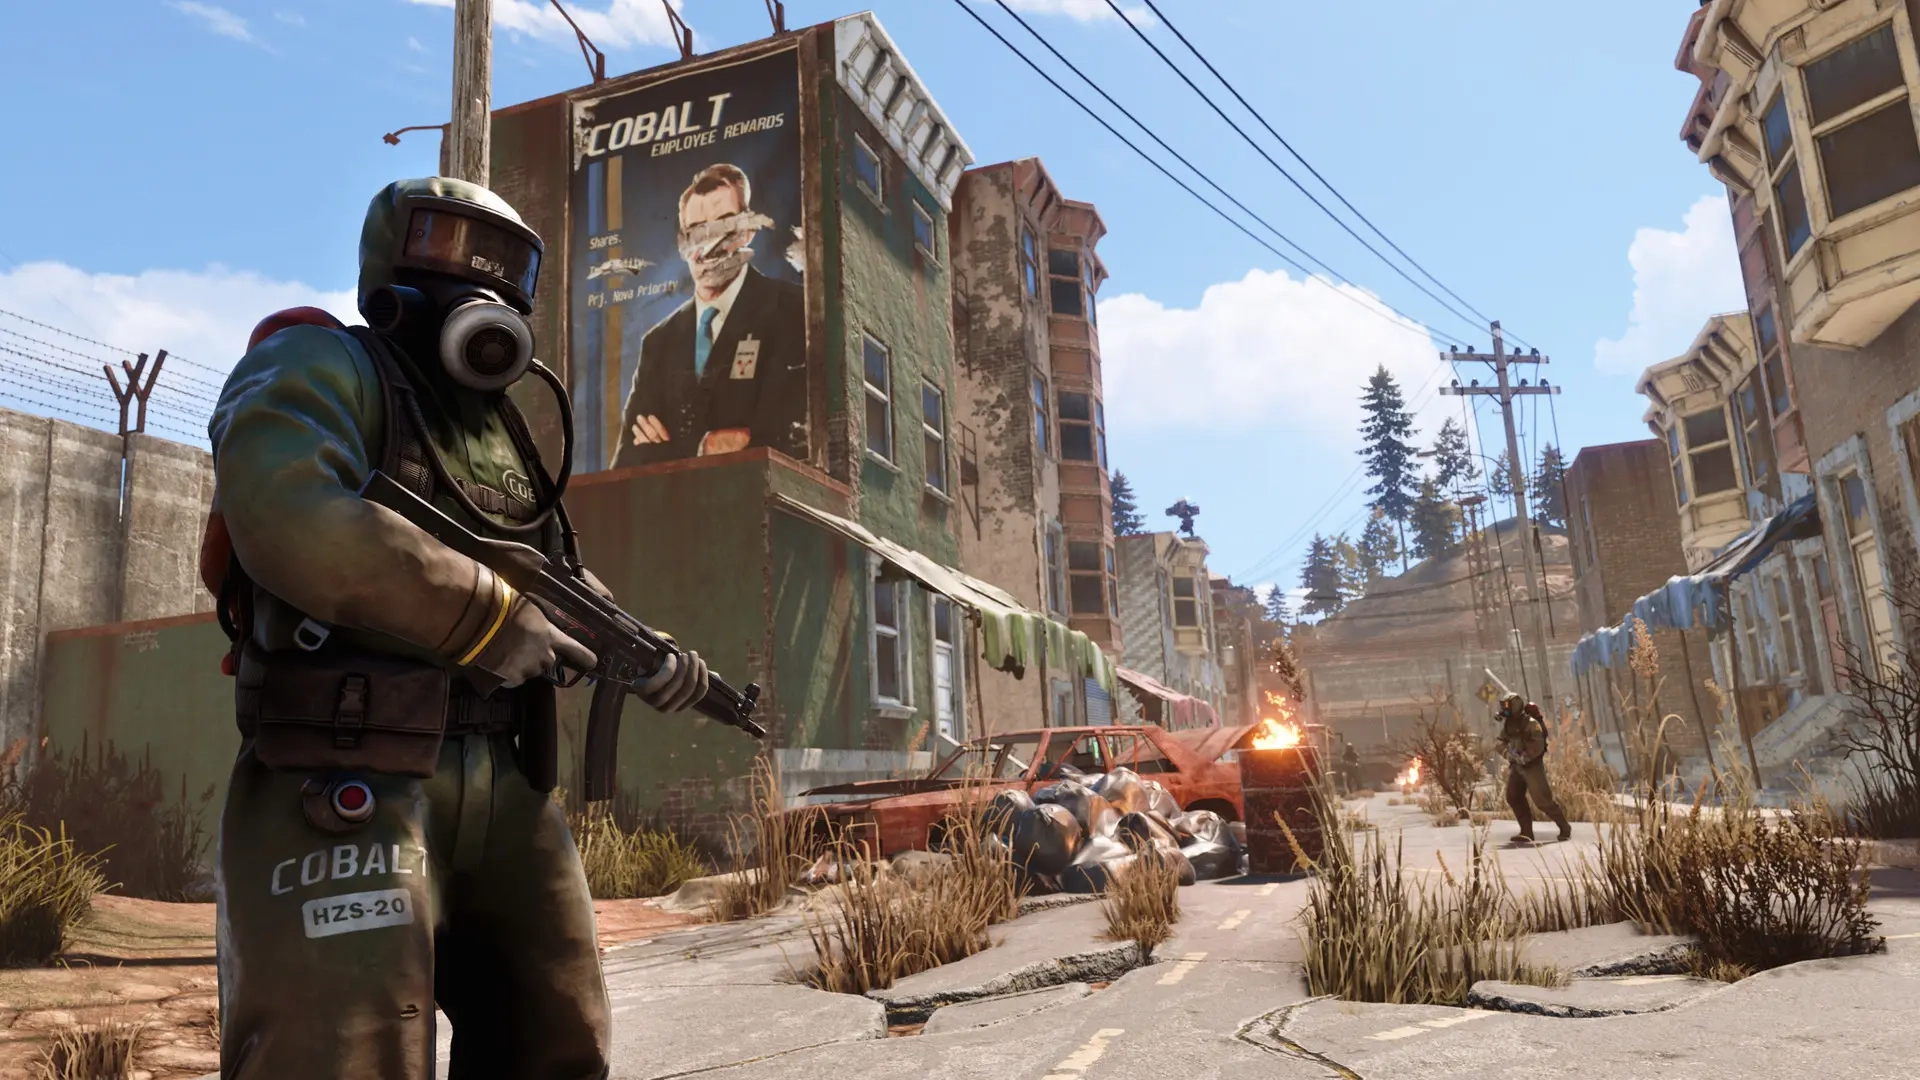
Rust Oil Rig Monument Guide: Small & Large Oil Rigs, Walkthroughs, & More
发布于 ,作者

分享:

分享至 X

分享至 Facebook

分享至 Threads

分享至 Bluesky

复制到剪贴板

通过电子邮件分享
Solo survivors braving the unrelenting ocean waters or veteran squads chasing high-tier loot see the Oil Rig as the ultimate offshore testing location. Whether you're approaching its small or large variant, this monument offers high-risk, high-reward adrenaline-pumping action as it’s filled with elite scientists, heavy reinforcements, other players looking to cash in, and arguably the best loot in the game! Keep reading to learn what to expect from the Small and Large Oil Rig in Rust, and how to deal with the challenges for optimum rewards.
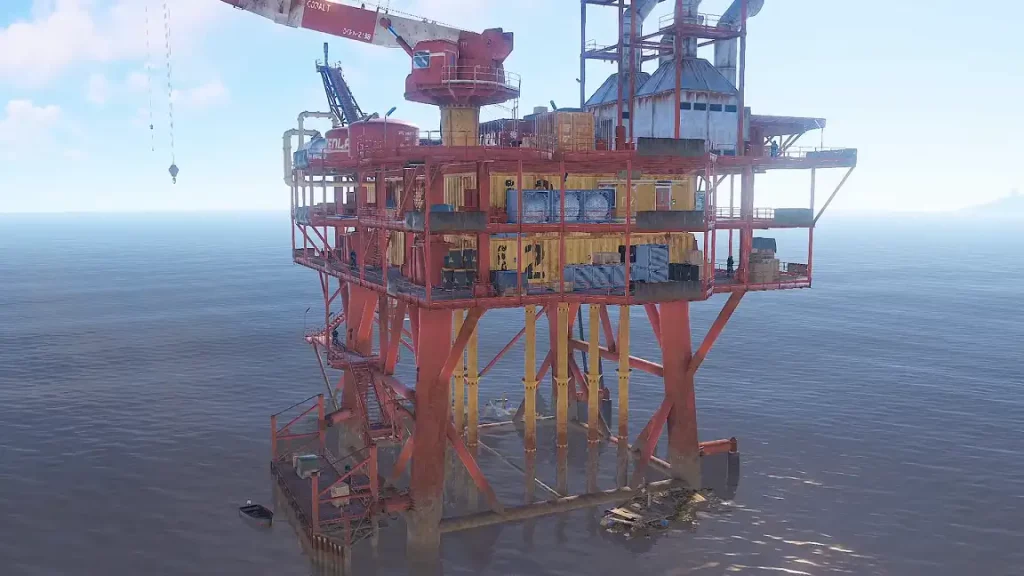 Introduced in the Oil Rig Update, the Small Rig in Rust is a stationary, floating platform located on the outer edges of the map. 15 scientists guard the monument and its loot crates, which number up to 31.
Before attempting this raid, confirm your inventory and gear. Prepare at least one Blue and Red Keycard to access the monument’s puzzle rooms. Additionally, pack plenty of ammunition and medical supplies, especially if you’re planning this run solo. You'll need not only enough bullets to clear out its AI enemies, but also the likely players who will be inbound around the clock! Especially as these rigs are a popular location to tuck, where players will hide on the site to catch unsuspecting players clearing it off guard.
It’s also possible to check the Small Oil Rig if the respawn timers for scientists and loot crates are refreshed, or if any other players in the Rust server are running the monument. Do so by accessing the CCTVs on the monument using the Computer Station and inputting any of the following codes:
Introduced in the Oil Rig Update, the Small Rig in Rust is a stationary, floating platform located on the outer edges of the map. 15 scientists guard the monument and its loot crates, which number up to 31.
Before attempting this raid, confirm your inventory and gear. Prepare at least one Blue and Red Keycard to access the monument’s puzzle rooms. Additionally, pack plenty of ammunition and medical supplies, especially if you’re planning this run solo. You'll need not only enough bullets to clear out its AI enemies, but also the likely players who will be inbound around the clock! Especially as these rigs are a popular location to tuck, where players will hide on the site to catch unsuspecting players clearing it off guard.
It’s also possible to check the Small Oil Rig if the respawn timers for scientists and loot crates are refreshed, or if any other players in the Rust server are running the monument. Do so by accessing the CCTVs on the monument using the Computer Station and inputting any of the following codes:
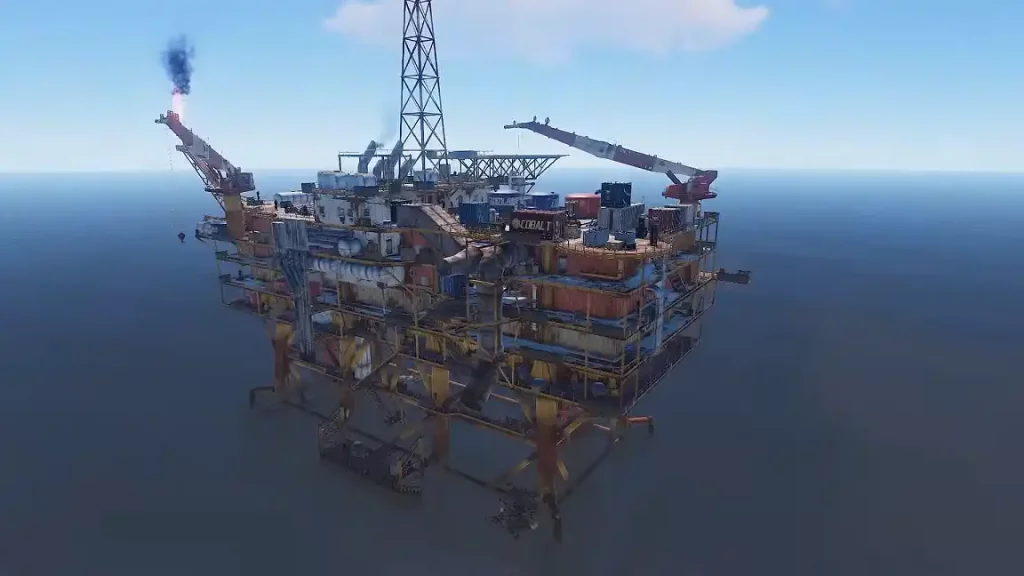 Not only is it bigger than its punier counterpart, but the Large Oil Rig in Rust also has more puzzles and threats that await the bravest survivors. However, beyond the challenges lies a wealth of top-tier loot, including endgame weapons and components. Like the Small Oil Rig, find the Large Oil Rig in the ocean. Check your map, as it’s often easy to miss.
This time, prepare Green, Blue, and Red Keycards to access all loot on this monument. Note that this area can have over 30 loot crates, including Elite and Military Crates. So, it’s advisable to work with allies to clear this monument and split the loot.
Alternatively, wait for the perfect chance to strike by spying the monument. Access the area’s CCTVs through the Computer Station and by inputting any of the following codes:
Not only is it bigger than its punier counterpart, but the Large Oil Rig in Rust also has more puzzles and threats that await the bravest survivors. However, beyond the challenges lies a wealth of top-tier loot, including endgame weapons and components. Like the Small Oil Rig, find the Large Oil Rig in the ocean. Check your map, as it’s often easy to miss.
This time, prepare Green, Blue, and Red Keycards to access all loot on this monument. Note that this area can have over 30 loot crates, including Elite and Military Crates. So, it’s advisable to work with allies to clear this monument and split the loot.
Alternatively, wait for the perfect chance to strike by spying the monument. Access the area’s CCTVs through the Computer Station and by inputting any of the following codes:
Rust Oil Rig Monument Guide: How to Do Small and Big Oil Rigs
If you're looking for some of the best end-game loot in Rust and are ready for an intense set of fights, the oil rig monuments, Small Oil Rig and Big Oil Rig, could be for you!Rust Small Oil Rig Monument Walkthrough
Introduced in the Oil Rig Update, the Small Rig in Rust is a stationary, floating platform located on the outer edges of the map. 15 scientists guard the monument and its loot crates, which number up to 31.
Before attempting this raid, confirm your inventory and gear. Prepare at least one Blue and Red Keycard to access the monument’s puzzle rooms. Additionally, pack plenty of ammunition and medical supplies, especially if you’re planning this run solo. You'll need not only enough bullets to clear out its AI enemies, but also the likely players who will be inbound around the clock! Especially as these rigs are a popular location to tuck, where players will hide on the site to catch unsuspecting players clearing it off guard.
It’s also possible to check the Small Oil Rig if the respawn timers for scientists and loot crates are refreshed, or if any other players in the Rust server are running the monument. Do so by accessing the CCTVs on the monument using the Computer Station and inputting any of the following codes:
- OILRIG1HELI
- OILRIG1DOCK
- OILRIG1EXHAUST
- OILRIG1L1
- OILRIG1L2
- OILRIG1L3
- OILRIG1L4
Level 0 – The Dock
Generally, you’ll start your ascent from the water-level dock. One scientist is patrolling this area. Deal with this hostile yet lone NPC now, or increase the risk of being flanked while ascending to the next level. The other way to enter the Small Oil Rig is by helicopter, landing on the helipad. However, this move is highly risky, as the scientists from lower levels can climb up the stairs, leading to additional enemies to deal with during the final battle. This strategy will require some tricky shooting, head glitching, and the composure to keep your head through the fight.Level 1 – Living Quarters
Once you climb the stairs, you’ll reach the living deck. Don’t rush through the next area, or the two patrolling scientists will fill your survivor’s body with bullet holes. Stay low and neutralize the threats one at a time. Then, loot the barrels and prepare for the next level.Level 2 – The Way Forward
Deal with the five scientists that are patrolling this area before opening the loot crate on this level, if it spawns. Move forward or heal up first before climbing the stairs to the next level.Level 3 –Green Puzzle
Again, clear all moving threats that hinder your progression on this level. Next, locate the Green Keycard room and open it. Be warned, as an additional scientist typically guards the nearby crate. So, deal with that NPC first, before claiming the room’s rewards. Note that six possible loot crates might be available for the taking on this level.Level 4 – The Helipad
The helipad is at the top of the Small Oil Rig, and it’s also the last stand that separates you from top-tier loot. The only hurdle you must face is a pack of scientists (around five or six of them) that are patrolling the perimeter. Defeat the patrolling scientists and find the Blue Keycard room, a small, white building labeled “ADMIN.” Swipe the keycard on the terminal, and loot the Elite and Military Crates inside. Don’t forget to take the Green Keycard from the desk. While inside the Admin Room, swipe a Red Keycard through the appropriate terminal to see the locked crate. Interact with it, and a 15-minute timer starts counting down. This event also summons a Chinook helicopter carrying six Heavy Scientists, each armed with M249s and SPAS-12s. Survive this onslaught by retreating to the crane tower, the narrow connecting stairwells, or the Red Room. Funnel the heavily armored enemies through a chokepoint, allowing you to secure your health while letting you pick the fearsome foes one by one. Once the area is clear, secure the loot from the Locked Crate. Next, exit the monument by jumping off the rig and into the water. Don’t worry, as you’ll take no fall damage. Swim back to your boat, and drive it back to the coast.Rust Large Oil Rig Monument Walkthrough
Not only is it bigger than its punier counterpart, but the Large Oil Rig in Rust also has more puzzles and threats that await the bravest survivors. However, beyond the challenges lies a wealth of top-tier loot, including endgame weapons and components. Like the Small Oil Rig, find the Large Oil Rig in the ocean. Check your map, as it’s often easy to miss.
This time, prepare Green, Blue, and Red Keycards to access all loot on this monument. Note that this area can have over 30 loot crates, including Elite and Military Crates. So, it’s advisable to work with allies to clear this monument and split the loot.
Alternatively, wait for the perfect chance to strike by spying the monument. Access the area’s CCTVs through the Computer Station and by inputting any of the following codes:
- OILRIG2HELI
- OILRIG2DOCK
- OILRIG2EXHAUST
- OILRIG2L1
- OILRIG2L2
- OILRIG2L3A
- OILRIG2L3B
- OILRIG2L4
- OILRIG2L5
- OILRIG2L6A
- OILRIG2L6B
- OILRIG2L6C
- OILRIG2L6D
Level 0 – The Dock
Start your Large Oil Rig run by approaching the monument slowly. Once you’re sufficiently near, snipe the two scientists patrolling the dock. Remember, stay away from the enemies’ firing range to prevent unnecessary health loss.Level 1 – The Calm Before the Storm
Reach this level by climbing up a ladder and some stairs from the dock. Assuming no scientists from the upper levels decide to go down, this area has no threats and also no loot crates. So, search for another flight of stars that leads to the next level.Level 2 – The Lower Grind
Deal with the two scientists patrolling this level. Then, loot the three crates and several barrels before proceeding to the next level.Level 3 – The First Puzzle Area
Find the first Green Keycard Room on the level. Once found, swipe the appropriate keycard through the terminal next to the door, and loot the crates within. This room also has another Green Keycard on the desk. There’s also a Workbench inside that you can use, if you need a quick resupply. Outside the Green Keycard Room is another crate, but also a scientist who’s patrolling the area.Level 4 – Two More Puzzles
This level amps up the difficulty, so prepare to deal with more scientists than on the first floors. However, more crates are also waiting for you and your mates to take what’s inside them on this level. You can also use the different vents on this level to quickly navigate through the adjacent levels. These passageways are also useful for escaping enemy fire. Don’t forget to loot the crates locked behind two puzzle areas in this level. The first challenge is a Blue Keycard room, which you can easily open by swiping the appropriate card through the nearby terminal. The other puzzle requires a fuse to open the locked door, which holds another Blue Keycard and a Recycler.Level 5 – A Quick Passage
Like Level 1, you’ll likely pass through the eastern part of Level 5, and it doesn’t have scientists patrolling the area. However, stay on guard, as other scientists from the upper levels can still wander through here. The western part of Level 5 can only be accessed by heading down from Level 6. Three scientists protect this area. Nonetheless, it’s a good idea to take a detour to this part of the monument to access a hidden room. Find this secret area by going through a vent. Once inside, loot the Weapon Crate and Elite Crates.Level 6 – The Helipad
Similar to the Small Oil Rig, the Large Oil Rig’s final level houses the helipad, and it’s also the most dangerous. Climb up the stairs from Level 5, and eight scientists can greet your approach with heavy gunfire. After dealing with the scientists, search for the Red Keycard puzzle room on this level. Swipe the card on the terminal by the door, and loot the three Elite Crates and four Weapon Crates inside. Return outside to loot another regular crate and two food crates. This level also has a large room with a Research Table inside. Use this workstation if you have Scrap and materials to spare for extra blueprints. After looting the area, interact with the locked crate outside to start a 15-minute countdown timer. Another Chinook helicopter appears momentarily, but this time it carries 12 heavy scientists instead of the six that spawn in the Small Oil Rig. Fight and survive through the massacre of bullets coming your way. However, your problems aren’t done after winning this fight, as scientists from the lower levels respawn one more time. That means you and your allies must deal with these enemies one more time before escaping the area in your boat.
您对这篇博客有何评价?
分享您的看法,帮助我们将博客做得更好!
不喜欢
一般
喜欢

需要游戏服务器吗?
租用一台游戏服务器,您可以和朋友们在极低延迟和自定义设置下私密游玩。从 110+ 款游戏中挑选您的最爱,邀请全球玩家,享受私密对战,或者按照您自己的规则建立属于您的在线社区。



获取第一手独家资讯!
订阅我们的电子邮件,获取有关我们托管游戏、公司新闻和独家优惠的最新动态。随时掌握一手资讯!