7 Days to Die 3.0 Sandbox Settings Guide & Best Presets
发布于 ,作者

分享:

分享至 X

分享至 Facebook

分享至 Threads

分享至 Bluesky

复制到剪贴板

通过电子邮件分享
With the arrival of the 7 Days to Die 3.0 Dead Hot Summer update, you can now completely customize your survival experience. Instead of choosing from a handful of difficulty options, Version 3.0 introduces over 150 Sandbox Settings that can adjust everything from zombie behavior and loot progression to death penalties and resource gathering. Here, we'll tell you about the most exciting 7 Days to Die sandbox settings while offering a look at some presets to get you started.
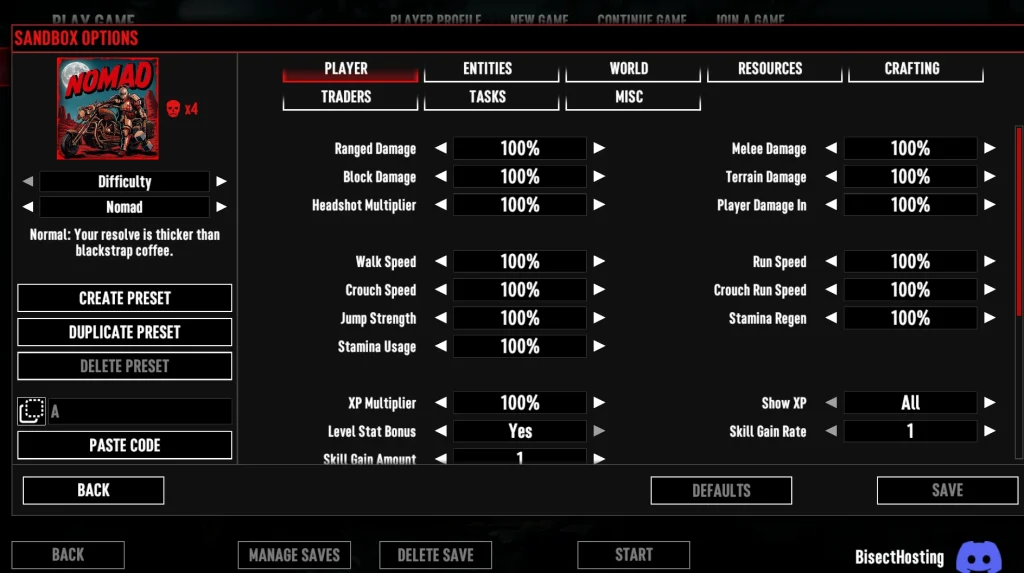 The Dead Hot Summer update sandbox settings are built for any kind of player. Whether you enjoy playing alone or with friends, you can now tweak nearly every possible facet of 7 Days to Die with a variety of options. Below, we've listed the eight different categories that the sandbox settings fall into, as well as a few examples of what you can expect to find and adjust within each one.
Of course, these are not every option available in the sandbox settings; there are more than 150 to fine-tune to your liking. However, this should give you an understanding of what each category will allow you to modify as you brainstorm your ideal zombie apocalypse.
The Dead Hot Summer update sandbox settings are built for any kind of player. Whether you enjoy playing alone or with friends, you can now tweak nearly every possible facet of 7 Days to Die with a variety of options. Below, we've listed the eight different categories that the sandbox settings fall into, as well as a few examples of what you can expect to find and adjust within each one.
Of course, these are not every option available in the sandbox settings; there are more than 150 to fine-tune to your liking. However, this should give you an understanding of what each category will allow you to modify as you brainstorm your ideal zombie apocalypse.
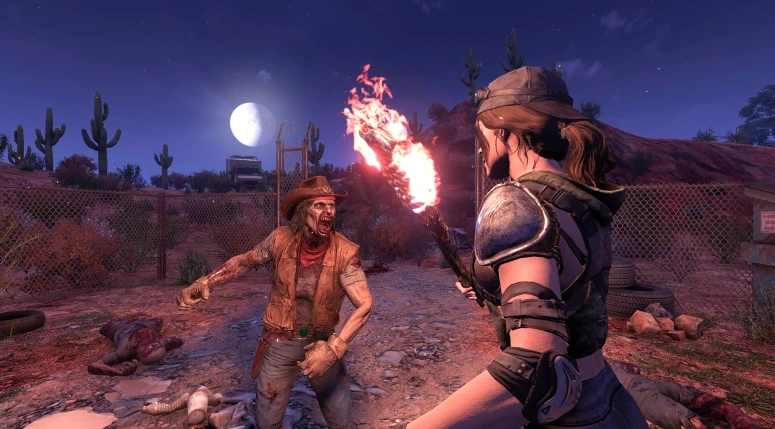 Adjusting more than 150 different sandbox settings does sound daunting. However, you're free to experiment and tweak these settings to find the experience that works best for you. If you're not sure about where to begin with the mountain of 3.0 sandbox settings, these should give you a few ideas before you start creating your own set of rules.
7 Days to Die Sandbox Settings Explained
The Dead Hot Summer update sandbox settings are built for any kind of player. Whether you enjoy playing alone or with friends, you can now tweak nearly every possible facet of 7 Days to Die with a variety of options. Below, we've listed the eight different categories that the sandbox settings fall into, as well as a few examples of what you can expect to find and adjust within each one.
Of course, these are not every option available in the sandbox settings; there are more than 150 to fine-tune to your liking. However, this should give you an understanding of what each category will allow you to modify as you brainstorm your ideal zombie apocalypse.
- Player
- Adjustments to the player characters themselves.
- Ranged Damage
- Run Speed
- Jump Strength
- XP Multiplier
- Infection Rate
- Drop on Death
- Death Penalty
- Skill Gain Rate
- Adjustments to the player characters themselves.
- Entities
- Adjustments to both zombies and other NPCs, such as animals.
- Enemy Spawning
- Biome Animal Respawn
- Max Enemy Tier
- Zombie Feral Speed
- Zombie Night Speed
- Entity Health Bars
- Zombie Digging
- Zombies Eat Animals
- Adjustments to both zombies and other NPCs, such as animals.
- World
- Adjustments to the game world that affect gameplay and environmental events.
- Biome Progression
- Temperature Survival
- Max Tech Type
- Blood Moon Frequency
- Storm Warning
- 24 Hour Cycle
- Daylight Length
- Storm Frequency
- Adjustments to the game world that affect gameplay and environmental events.
- Resources
- Adjustments to the loot, resources, and all materials.
- Max Loot Quality
- Loot Respawn Days
- Food Abundance
- Medical Abundance
- Melee Abundance
- Ranged Abundance
- Loot Abundance
- Mining Yield
- Seed Drop
- Crop Growth
- Adjustments to the loot, resources, and all materials.
- Crafting
- Adjustments to the crafting system and crafted resources.
- Crafting Progression
- Crafting Timer
- Crafting Yield
- Crafting Cost
- Item Degradation
- Repair Method
- Adjustments to the crafting system and crafted resources.
- Traders
- Adjustments to interactions with NPC traders.
- Trading Enabled
- Trader Item Count
- Buy Price
- Vending Reset
- Trader Buy Limit
- Vending Enabled
- Trading Dialog
- Trader Protection
- Adjustments to interactions with NPC traders.
- Tasks
- Adjustments to turn quests on or off and adjust their benefits.
- POI Quests
- Quests Per Day
- Base Skill Points
- Intro Quests
- Intro Challenges
- Trade Routes
- Adjustments to turn quests on or off and adjust their benefits.
- Misc
- Additional adjustments that don't fit within the above categories.
- Vehicle Fuel Usage
- Vehicle Block Damage
- Vehicle Entity Damage
- Electrical Output
- Silly Sounds
- Black and White
- Gravity
- Tiny Zombies
- Additional adjustments that don't fit within the above categories.
Best 7 Days to Die 3.0 Sandbox Settings Presets
Adjusting more than 150 different sandbox settings does sound daunting. However, you're free to experiment and tweak these settings to find the experience that works best for you. If you're not sure about where to begin with the mountain of 3.0 sandbox settings, these should give you a few ideas before you start creating your own set of rules.
Almost Creative Mode
While 7 Days to Die doesn't have a true creative mode, this is the next best thing! With no enemies and heaps of resources, you can freely explore the apocalyptic world and create whatever your heart desires.- Entities Menu
- Enemy Spawning: No
- World Menu
- Blood Moon Frequency: Disabled
- Resource Abundance
- 500%
Disaster Film
Having to skirt around and blast or slice your way through zombies is already pretty exciting. However, you could always amp things up by turning your fight for survival into a fight with nature itself. These settings will make it so zombies are the least of your worries as the world itself tries to tear you apart.- Player Menu
- Death Degradation: Both
- Death Degradation Amount: 25%
- Infection Rate: 125%
- Entities Menu
- Zombies Eat Animals: No
- World Menu
- Storm Frequency: 500%
- Resources Menu
- Loot Abundance: 200%
- Medical Abundance: 150%
- Magazine Abundance: 75%
- Crafting Menu
- Item Degradation: Very High
- Repair Degradation: 25%
- Misc Menu
- Vehicle Self Damage: 125%
Caveman Life
Ever wonder what it would've been like if the zombie apocalypse had happened in the Stone Age? With these settings, you can live out the caveman nightmare for yourself! You won't have any technology, you won't have as many resources, and you won't even be able to talk with traders. Sure, you can still trade, but there won't be any talking. Grab as many sticks as you can, and good luck! Oonga boonga!- Player Menu
- Ranged Damage: 50%
- Melee Damage: 150%
- Entities Menu
- Biome Animal Respawn: Very Fast
- World Menu
- Air Drops: Disabled
- Allow Map: No
- Allow Compass: No
- Biome Progression: No
- Max Tech Type: Tech 0
- Resources Menu
- Crop Yield: None
- Seed Drop: None
- Crafting Menu
- Crafting Max Quality: 1
- Traders Menu
- Vending Enabled: No
- Trading Dialog: No
- Tasks Menu
- Intro Challenges: No
- Misc Menu
- Electrical Output: 25%
Chibi Mode
If the caveman life wasn't enough silliness for you, try Chibi Mode! With this, the zombies will be like cute(?) little critters that want to eat your flesh. They'll wander around with big heads and a few feet shorter. It might actually make things a bit harder when you're aiming to kill them, as you'll be looking down a lot more. At the same time, their diminutive stature and massive heads make them much more fragile. At the same time, there's a whole lot more of them, and they're a whole lot faster. This mode is fast, frenetic, and filled with goofy chaos.- Player Menu
- Ranged Damage: 150%
- Melee Damage: 150%
- Block Damage: 150%
- Terrain Damage: 150%
- Headshot Multiplier: 125%
- Player Damage In: 75%
- Walk Speed: 120%
- Run Speed: 120%
- Crouch Speed: 120%
- Jump Strength: 150%
- Stamina Regen: 125%
- Stamina Usage: 75%
- XP Multiplier: 150%
- Skill Gain Amount: 3
- Death Penalty: None
- Death Degradation: Durability
- Death Degradation Amount: 5%
- Drop on Death: None
- Infection Rate: 50%
- Encumberance Slots: Low
- Jar Refund: 80%
- Entities Menu
- Enemy Density: High
- Enemy Respawn: Fast
- Headshot Mode: Headshot Only
- Zombie Day Speed: Jog
- Zombie Feral Speed: Nightmare
- Zombie BM Speed: Nightmare
- Zombie Feral Sense: Day
- AI Smell Mode: Jog
- World Menu
- Workstations in the Wild: 60%
- Blood Moun Count: 10 Enemies
- Air Drops: 1-3 Days
- Resources Menu
- Biome Loot Stage: High
- POI Loot Stage: High
- Loot Respawn Days: 5
- Loot Timer: 50%
- Loot Bag Drop: 150%
- Loot Abundance: 125%
- Mining Yield: 125%
- Crop Yield: 125%
- Seed Drop: 125%
- Resource Yield: 125%
- Crop Growth: 125%
- Crafting Menu
- Crafting Timer: 150%
- Dew Collector Time: 150%
- Apiary Time: 150%
- Item Degradation: Low
- Traders Menu
- Trader Hours: BM Closed
- Global Trader Stage: High
- Tasks Menu
- Quests Per Day: 5
- Misc Menu
- Vehicle Fuel Usage: 85%
- Vehicle Entity Damage: 150%
- Vehicle Safe Damage: 85%
- Celebrate Kills: Headshot Only
- Big Heads: Yes
- Tiny Zombies: Yes
- Gravity: 60%
Bite Club
If you're looking for the most brutal challenge in 7 Days to Die's sandbox settings, this might be what you need. You'll be fighting it out against more aggressive zombies that are more likely to infect you with their bites. At the same time, permadeath has been turned on. Keep the zombies at bay the best you can, or a single slip-up can mean the end. Throw in the reduced amount of available loot, and you're going to have to be pretty good at fist fighting to keep yourself alive.- Player Menu
- Death Penalty: Permanent Death
- Infection Rate: 150%
- Ranged Damage: 85%
- Block Damage: 85%
- Melee Damage: 85%
- Terrain Damage: 85%
- Player Damage In: 150%
- Run Speed: 120%
- Entities Menu
- Zombie Day Speed: Jog
- Zombie Feral Sense: Night
- AI Smell Mode: Sprint
- Zombie Rage: 50%
- World Menu
- Blood Moon Count: 16 Enemies
- Storm Frequency: 150%
- Resources Menu
- Loot Respawn Days: Disabled
- Loot Abundance: 50%
- Traders Menu
- Trading Enabled: No
- Tasks Menu
- Intro Challenges: No
- Misc Menu
- Electrical Output: 25%

您对这篇博客有何评价?
分享您的看法,帮助我们将博客做得更好!
不喜欢
一般
喜欢

需要游戏服务器吗?
租用一台游戏服务器,您可以和朋友们在极低延迟和自定义设置下私密游玩。从 110+ 款游戏中挑选您的最爱,邀请全球玩家,享受私密对战,或者按照您自己的规则建立属于您的在线社区。








获取第一手独家资讯!
订阅我们的电子邮件,获取有关我们托管游戏、公司新闻和独家优惠的最新动态。随时掌握一手资讯!