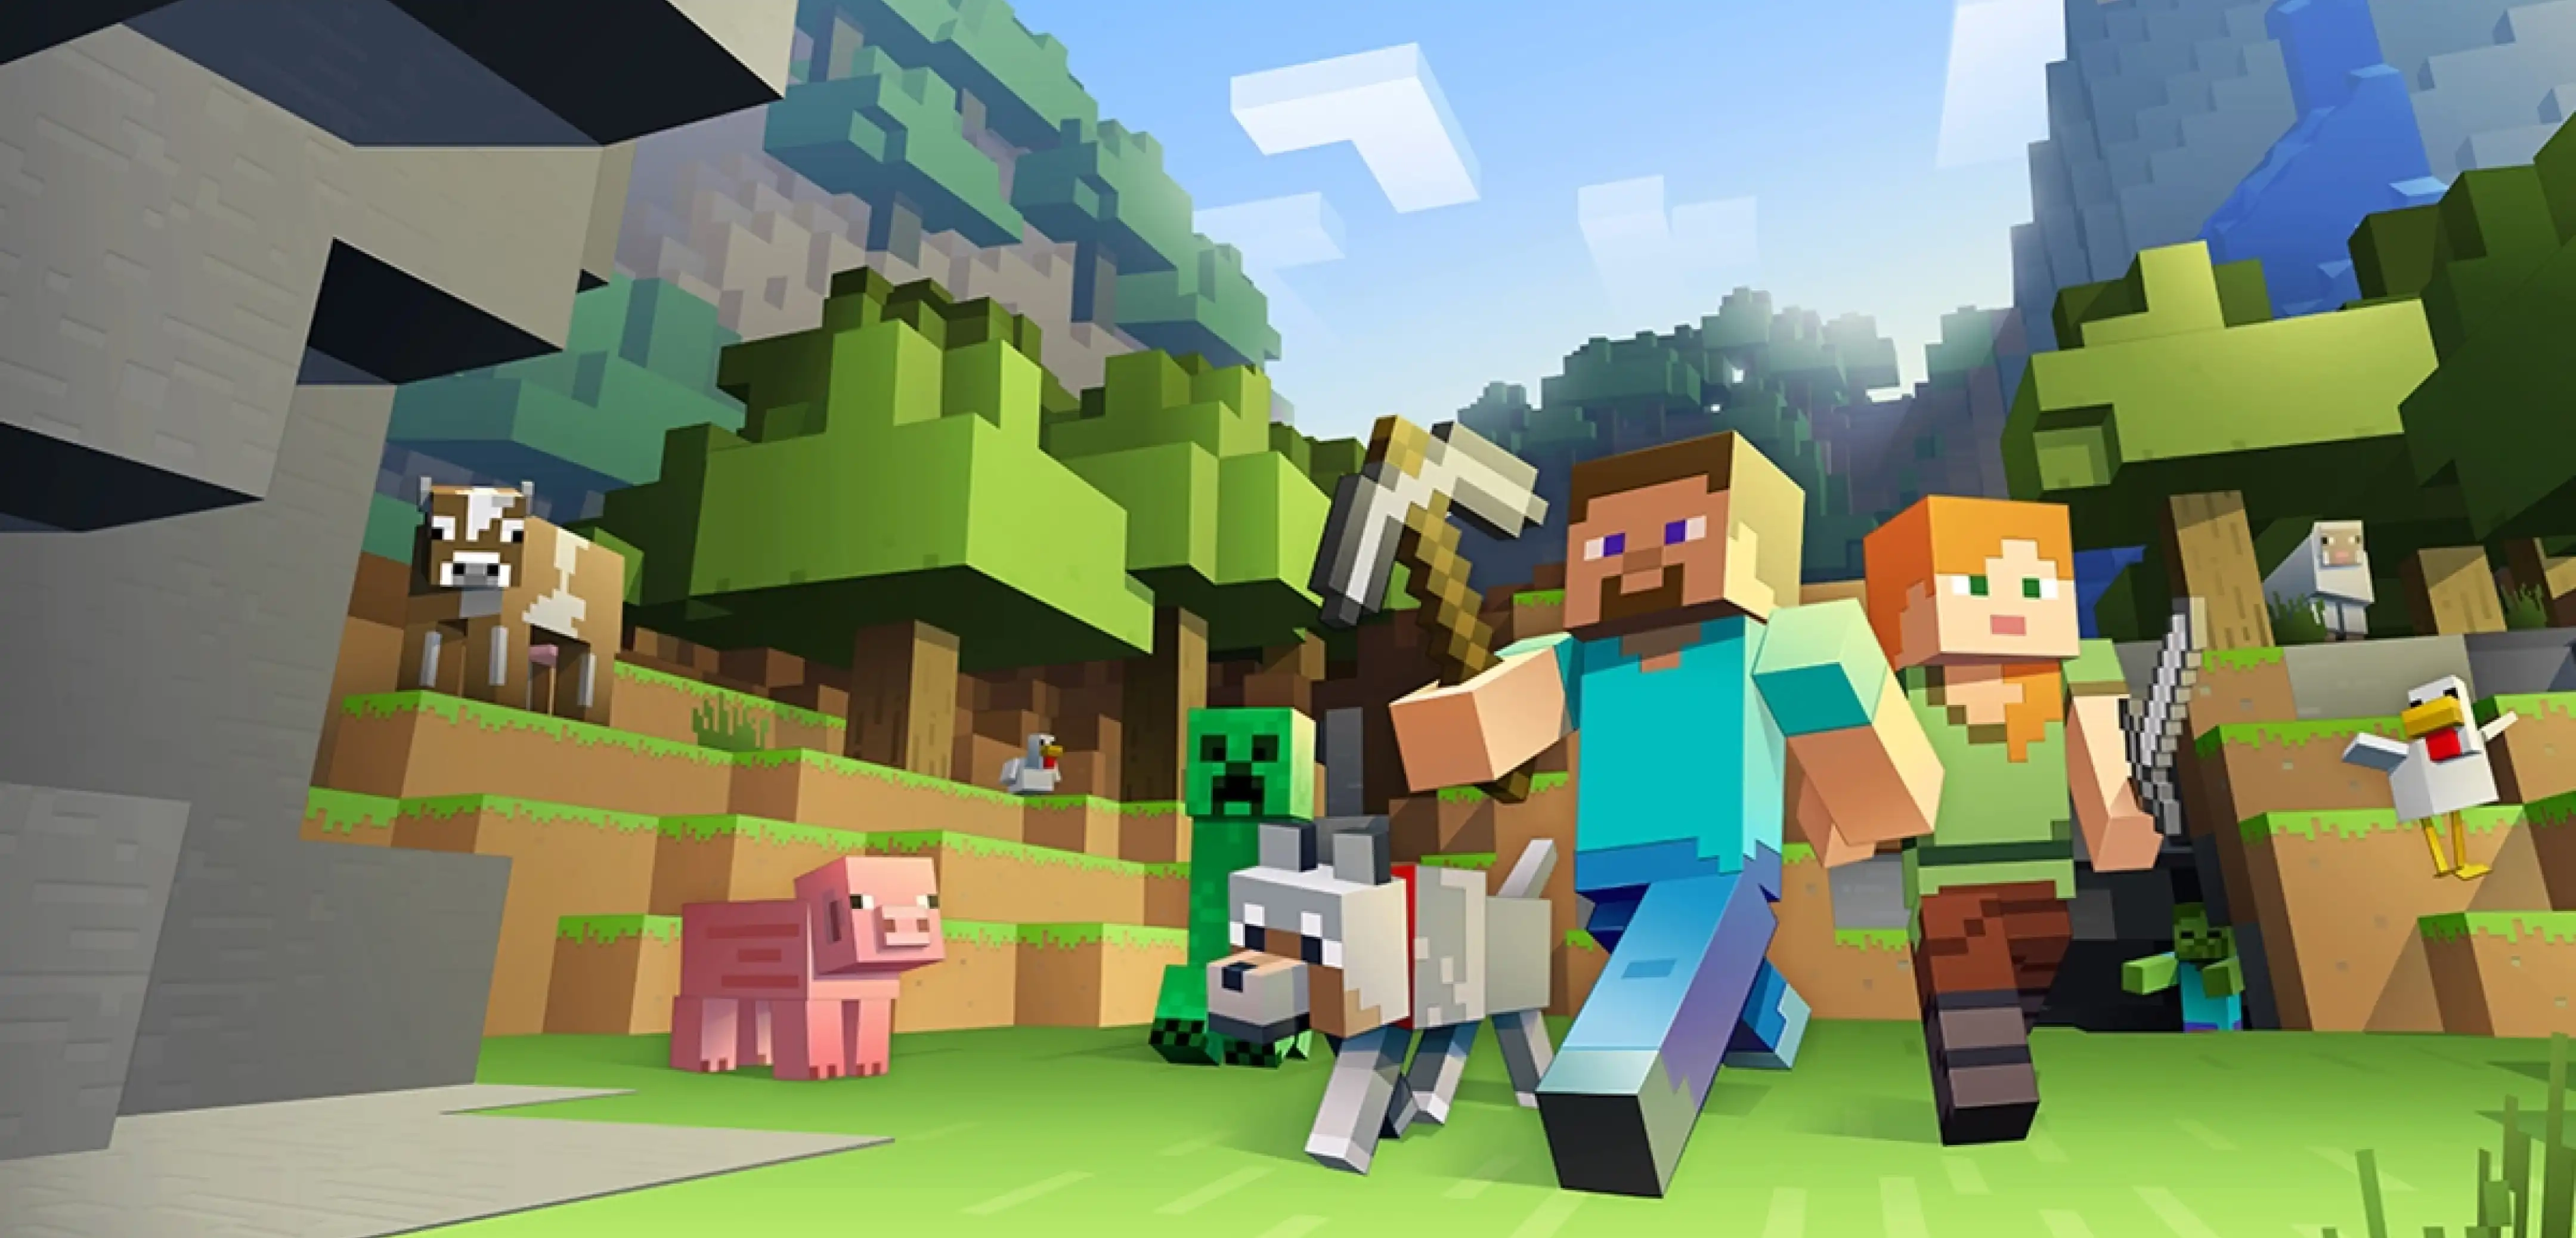
How to Play Minecraft Java Edition in VR
发布于 ,作者

分享:

分享至 X

分享至 Facebook

分享至 Threads

分享至 Bluesky

复制到剪贴板

通过电子邮件分享
With support officially ending for Minecraft Bedrock Edition VR, many fans are looking to Java Edition to continue their adventures, but how is it set up? Today, we answer that and more in “How to Play Minecraft Java Edition in VR.”
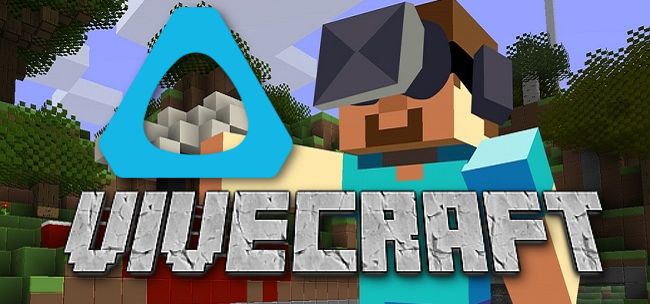 Mojang does not offer official support for Minecraft VR on Java Edition. Instead, Java Edition VR is managed and maintained entirely by fans through the use of Vivecraft. A mod of such high quality, some fans argue it is not only comparable to the official Bedrock Edition VR but better too.
The mod setup is very straightforward, but the steps can vary depending on hardware. SteamVR-compatible headsets such as the HTC Vive, Oculus Rift S, Valve Index, and Windows MR can continue with the steps we have laid out below. For those with Oculus Quest 1 or 2, GearVR, Google Cardboard, Vive Focus, or PSVR, please see the official Vivecraft Website for setup instructions, found here.
Mojang does not offer official support for Minecraft VR on Java Edition. Instead, Java Edition VR is managed and maintained entirely by fans through the use of Vivecraft. A mod of such high quality, some fans argue it is not only comparable to the official Bedrock Edition VR but better too.
The mod setup is very straightforward, but the steps can vary depending on hardware. SteamVR-compatible headsets such as the HTC Vive, Oculus Rift S, Valve Index, and Windows MR can continue with the steps we have laid out below. For those with Oculus Quest 1 or 2, GearVR, Google Cardboard, Vive Focus, or PSVR, please see the official Vivecraft Website for setup instructions, found here.
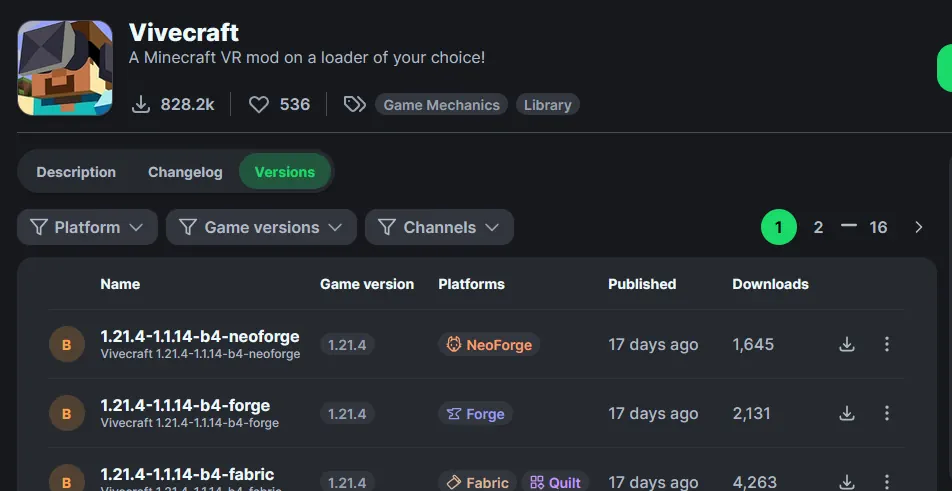 The first step is downloading the Vivecraft jar file, which can be found on the Vivecraft Modrinth page here. As of writing, Vivecraft for Minecraft 1.21.4 is still in beta, with Minecraft 1.20.4 being the latest official release. For the sake of this guide, we will be downloading the Vivecraft 1.21.4 “Fabric” beta jar and proceeding under the assumption that you have used a Vivecraft jar for Fabric as well.
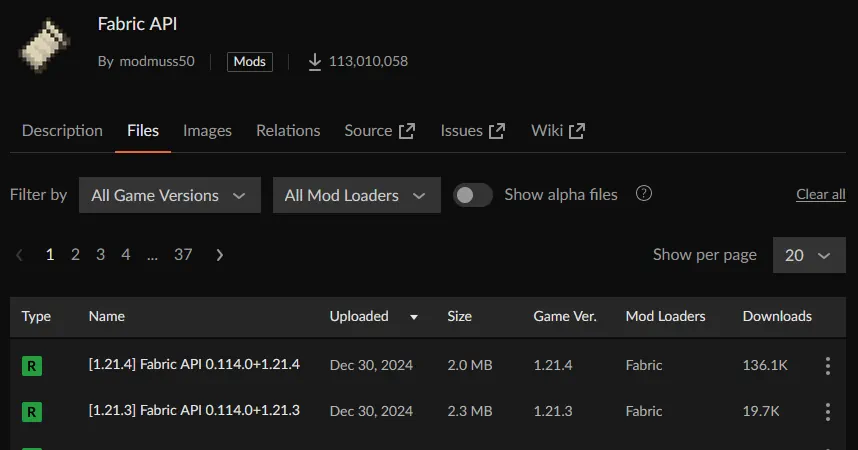 This is very similar to step one and merely requires a jar file to be downloaded from the page here. The only part to take note of is the Minecraft version, as it needs to match the jar selected for Vivecraft. In our case, we selected Vivecraft for 1.21.4, so the 1.21.4 version of the Fabric API was what we downloaded.
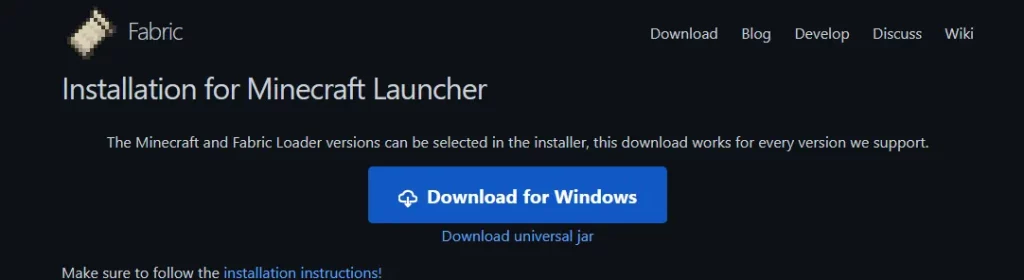 Before proceeding with this step, ensure Minecraft Java Edition has been run at least once and then completely closed. The installation will not work if Minecraft or the launcher is currently open. Once done, head to the page found here and download the installer.
The file downloaded should appear as “fabric-installer-#-#-#.exe” with varying numbers in place of “#.” If the file is by any other name, delete it and double-check that the correct download button was used.
Before proceeding with this step, ensure Minecraft Java Edition has been run at least once and then completely closed. The installation will not work if Minecraft or the launcher is currently open. Once done, head to the page found here and download the installer.
The file downloaded should appear as “fabric-installer-#-#-#.exe” with varying numbers in place of “#.” If the file is by any other name, delete it and double-check that the correct download button was used.
 Upon opening the Fabric installer, a few options will become available. The first is the Minecraft version that Fabric will be running on. Ensure it matches the version noted in the downloaded Vivecraft jar file. In our case, the beta jar was for Minecraft 1.21.4, so no adjustments were needed.
For “Loader Version,” we recommend leaving that option as is. After that is the “Launcher Location.” If Minecraft Java Edition was installed in the default location, this can also be left as is. Otherwise, update the installer to the custom location.
Finally, there will be a checkbox for “Create Profile.” Ensure the checkmark is present. Then, when all is ready, click install.
Upon opening the Fabric installer, a few options will become available. The first is the Minecraft version that Fabric will be running on. Ensure it matches the version noted in the downloaded Vivecraft jar file. In our case, the beta jar was for Minecraft 1.21.4, so no adjustments were needed.
For “Loader Version,” we recommend leaving that option as is. After that is the “Launcher Location.” If Minecraft Java Edition was installed in the default location, this can also be left as is. Otherwise, update the installer to the custom location.
Finally, there will be a checkbox for “Create Profile.” Ensure the checkmark is present. Then, when all is ready, click install.
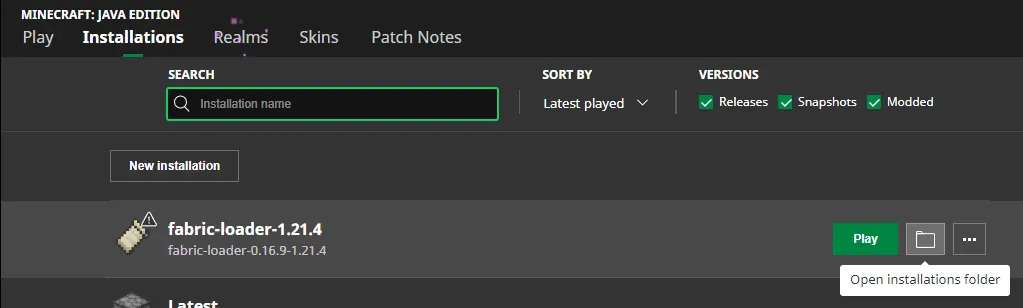 When Minecraft Java Edition is next opened, a new profile titled “fabric-loader” should be visible under the “Installations” tab found at the top of the launcher. Open the “Installations” tab, hover your mouse over the “fabric-loader” profile, and select the “Open Installations Folder” button. This should open the “.minecraft” folder, which contains a folder titled “mods.” Open the “mods” folder and move both the Vivecraft jar file and Fabric API jar file inside.
Once both jar files have been moved into the mods folder, the folder can be closed.
When Minecraft Java Edition is next opened, a new profile titled “fabric-loader” should be visible under the “Installations” tab found at the top of the launcher. Open the “Installations” tab, hover your mouse over the “fabric-loader” profile, and select the “Open Installations Folder” button. This should open the “.minecraft” folder, which contains a folder titled “mods.” Open the “mods” folder and move both the Vivecraft jar file and Fabric API jar file inside.
Once both jar files have been moved into the mods folder, the folder can be closed.
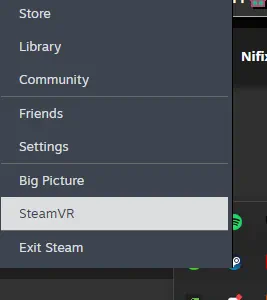 Vivecraft uses Steam VR to function, so it must be running while Minecraft Java Edition VR is played. Thankfully, it is free and only requires a Steam account. For those who do not have Steam, it can be found here.
Once Steam has been installed, opened, and logged into, right-click the Steam icon in the Windows Tray (bottom left corner of the taskbar) and select Steam VR. This will prompt the Steam VR download or open Steam VR if the download was already done prior. Once it is running, proceed to step 7.
Vivecraft uses Steam VR to function, so it must be running while Minecraft Java Edition VR is played. Thankfully, it is free and only requires a Steam account. For those who do not have Steam, it can be found here.
Once Steam has been installed, opened, and logged into, right-click the Steam icon in the Windows Tray (bottom left corner of the taskbar) and select Steam VR. This will prompt the Steam VR download or open Steam VR if the download was already done prior. Once it is running, proceed to step 7.
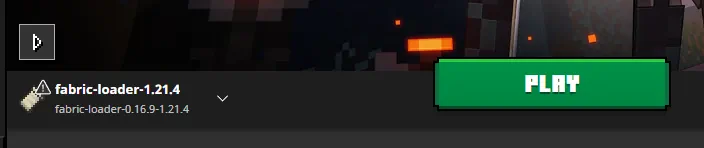 Everything is now installed and ready to go! Open the Minecraft launcher, select the fabric loader profile as seen in the screenshot above, and click play. The Minecraft menu should appear as normal with a toggle for VR that can be turned on and off. Upon changing the toggle to “On,” it is finally time to enjoy the game.
Vivecraft
Mojang does not offer official support for Minecraft VR on Java Edition. Instead, Java Edition VR is managed and maintained entirely by fans through the use of Vivecraft. A mod of such high quality, some fans argue it is not only comparable to the official Bedrock Edition VR but better too.
The mod setup is very straightforward, but the steps can vary depending on hardware. SteamVR-compatible headsets such as the HTC Vive, Oculus Rift S, Valve Index, and Windows MR can continue with the steps we have laid out below. For those with Oculus Quest 1 or 2, GearVR, Google Cardboard, Vive Focus, or PSVR, please see the official Vivecraft Website for setup instructions, found here.
How to Play Minecraft Java Edition in VR
Step 1: Download The Vivecraft Jar File
The first step is downloading the Vivecraft jar file, which can be found on the Vivecraft Modrinth page here. As of writing, Vivecraft for Minecraft 1.21.4 is still in beta, with Minecraft 1.20.4 being the latest official release. For the sake of this guide, we will be downloading the Vivecraft 1.21.4 “Fabric” beta jar and proceeding under the assumption that you have used a Vivecraft jar for Fabric as well.
Step 2: Download the Fabric API Jar File
This is very similar to step one and merely requires a jar file to be downloaded from the page here. The only part to take note of is the Minecraft version, as it needs to match the jar selected for Vivecraft. In our case, we selected Vivecraft for 1.21.4, so the 1.21.4 version of the Fabric API was what we downloaded.
Step 3: Download the Fabric Installer
Before proceeding with this step, ensure Minecraft Java Edition has been run at least once and then completely closed. The installation will not work if Minecraft or the launcher is currently open. Once done, head to the page found here and download the installer.
The file downloaded should appear as “fabric-installer-#-#-#.exe” with varying numbers in place of “#.” If the file is by any other name, delete it and double-check that the correct download button was used.
Step 4: Run the Fabric Installer
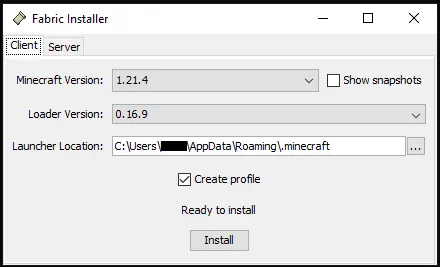
Upon opening the Fabric installer, a few options will become available. The first is the Minecraft version that Fabric will be running on. Ensure it matches the version noted in the downloaded Vivecraft jar file. In our case, the beta jar was for Minecraft 1.21.4, so no adjustments were needed.
For “Loader Version,” we recommend leaving that option as is. After that is the “Launcher Location.” If Minecraft Java Edition was installed in the default location, this can also be left as is. Otherwise, update the installer to the custom location.
Finally, there will be a checkbox for “Create Profile.” Ensure the checkmark is present. Then, when all is ready, click install.
Step 5: The Mods Folder
When Minecraft Java Edition is next opened, a new profile titled “fabric-loader” should be visible under the “Installations” tab found at the top of the launcher. Open the “Installations” tab, hover your mouse over the “fabric-loader” profile, and select the “Open Installations Folder” button. This should open the “.minecraft” folder, which contains a folder titled “mods.” Open the “mods” folder and move both the Vivecraft jar file and Fabric API jar file inside.
Once both jar files have been moved into the mods folder, the folder can be closed.
Step 6: Install & Run Steam VR
Vivecraft uses Steam VR to function, so it must be running while Minecraft Java Edition VR is played. Thankfully, it is free and only requires a Steam account. For those who do not have Steam, it can be found here.
Once Steam has been installed, opened, and logged into, right-click the Steam icon in the Windows Tray (bottom left corner of the taskbar) and select Steam VR. This will prompt the Steam VR download or open Steam VR if the download was already done prior. Once it is running, proceed to step 7.
Step 7: Open Minecraft
Everything is now installed and ready to go! Open the Minecraft launcher, select the fabric loader profile as seen in the screenshot above, and click play. The Minecraft menu should appear as normal with a toggle for VR that can be turned on and off. Upon changing the toggle to “On,” it is finally time to enjoy the game.
您对这篇博客有何评价?
分享您的看法,帮助我们将博客做得更好!
不喜欢
一般
喜欢
需要游戏服务器吗?
租用一台游戏服务器,您可以和朋友们在极低延迟和自定义设置下私密游玩。从 110+ 款游戏中挑选您的最爱,邀请全球玩家,享受私密对战,或者按照您自己的规则建立属于您的在线社区。



获取第一手独家资讯!
订阅我们的电子邮件,获取有关我们托管游戏、公司新闻和独家优惠的最新动态。随时掌握一手资讯!