

分享至 X

分享至 Facebook

分享至 Threads

分享至 Bluesky

复制到剪贴板

通过电子邮件分享
For many, Minecraft worlds contain countless years of work and memories. Resetting the world for an update not an option that would ever be considered. But what if you did not need to reset everything? Thankfully, using the MCA Selector, that is a reality.
Today we will be going over how to delete chunks surrounding your builds so that the world can regenerate around them. Nothing lost, and new 1.18 generation gained. So let’s be on our way!
Step 1: A Backup
Before beginning any work on a world, always make a backup. Corruption can happen for many reasons. Even when it seemingly shouldn’t. So again, please make a backup. All it takes is one mess up for years of work to be gone forever.
Step 2: Installing MCA Selector

MCA Selector can be found here. Download the windows installer version, run the .exe it provides, and then follow the installation steps as they appear. Upon a successful install, click the newly created shortcut on your desktop, and proceed to step 3.
The install is a bit more complicated if using Mac or Linux, but the previously linked download page provides exact instructions. The steps continue as normal upon completion.
Step 3: Importing the World
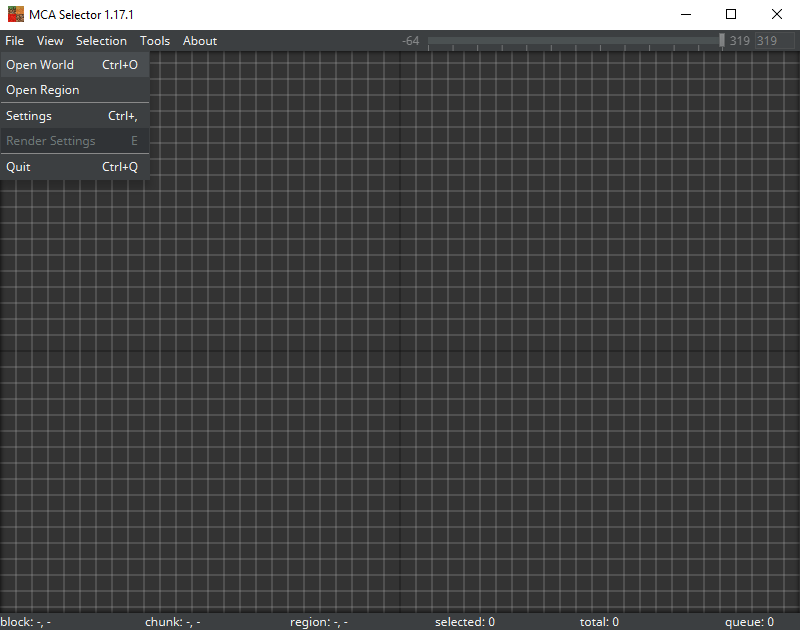
After opening the newly installed program, a grey grid will appear. Head to “File” seen in the top left and click “Open World.” This will cause a folder to open that contains each of your worlds.

If editing the overworld, click the desired world folder, and then click “Select Folder” in the bottom right. Doing so will cause your world to appear on the grid. Please note, the load time varies depending on the world size.
If editing the end or nether, open the desired world folder and select DIM-1 for Nether or DIM1 for The End instead.
Step 4: Locating Your Builds
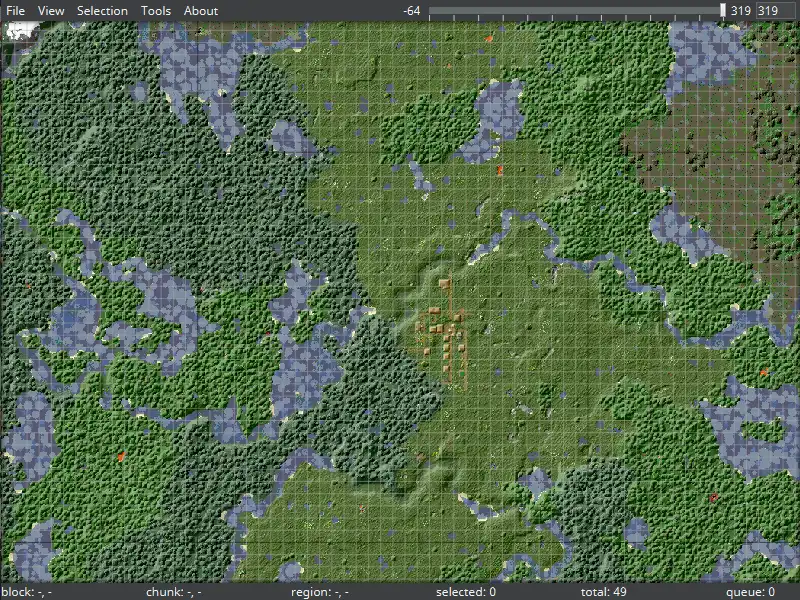
Maps can be massive, so it may take some time to find where your builds are. Here are the basic controls for movement.
Scroll Wheel: Zooms in and out.
Arrow Keys: Moves the camera.
Once found, we can begin selecting chunks.
Step 5: Selecting Chunks
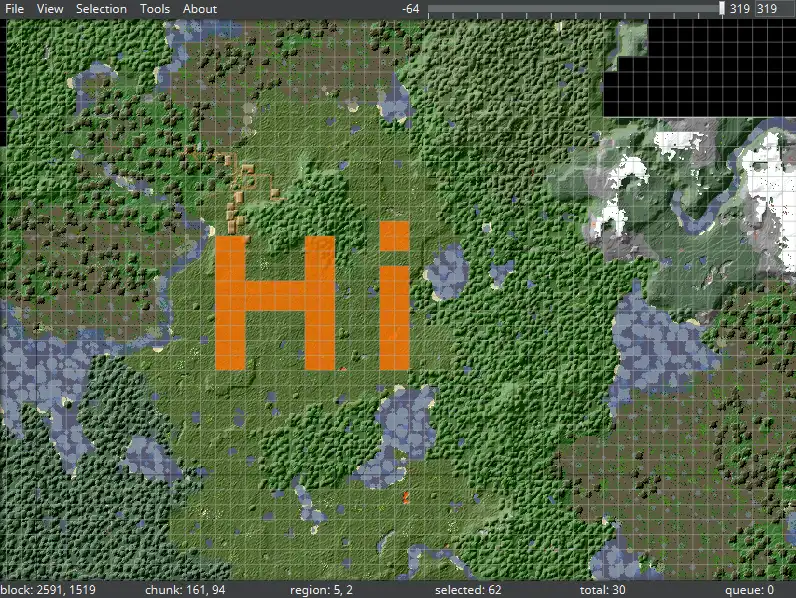
The controls we will be using to select chunks can be found below.
Left Click: Selects a chunk.
Left Click AND hold: Selects chunks in a box shape by dragging the cursor.
Ctrl+L: Clears selected chunks.
Selected chunks will appear as orange on your grid, and we recommend clicking around to get the hang of it before proceeding. The test selections can then be cleared by clicking Ctrl+L on your keyboard at any time.
Please note, there are two different ways to go about deleting chunks, so be sure to read both 6A and 6B before picking which best fits your goals.
Step 6A: Deleting Specific Chunks
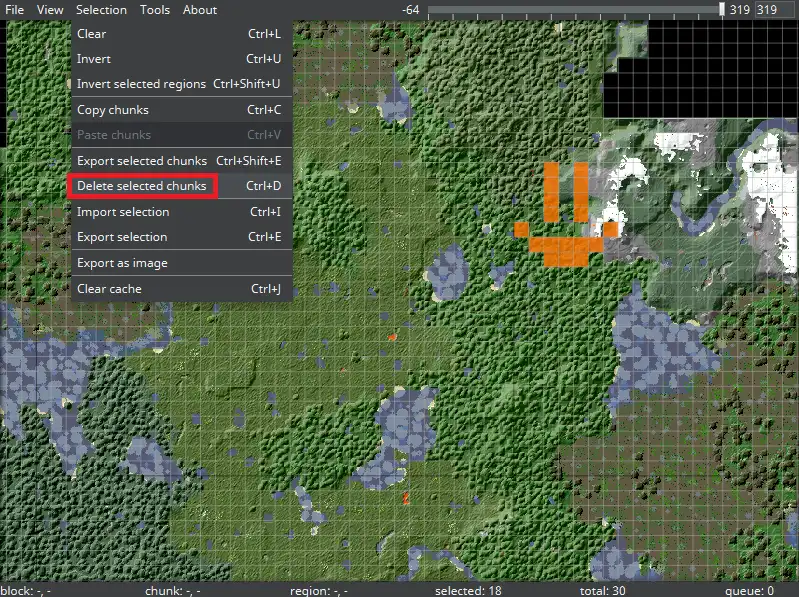
The first method is deleting specific chunks within the world. As seen above, I made a little happy face. Once “Delete Selected Chunks” is selected, it will delete the orange chunks leaving the area black like the top right corner. This method is best used for resetting small parts of the world or bugged areas.
Step 6B: Deleting Chunks Using Selection Inversion
To reset everything surrounding your builds, an option called Invert will be used. In other words, we will initially be doing the opposite of 6A. This means highlighting what we want to keep.
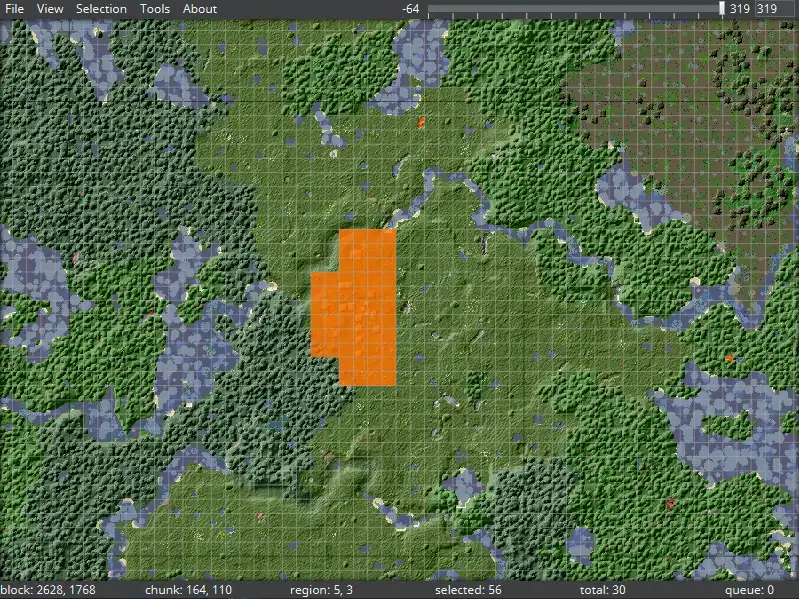
For example, in the screenshot above, I have highlighted the village I want to keep. This means every chunk I have not highlighted will soon be deleted.
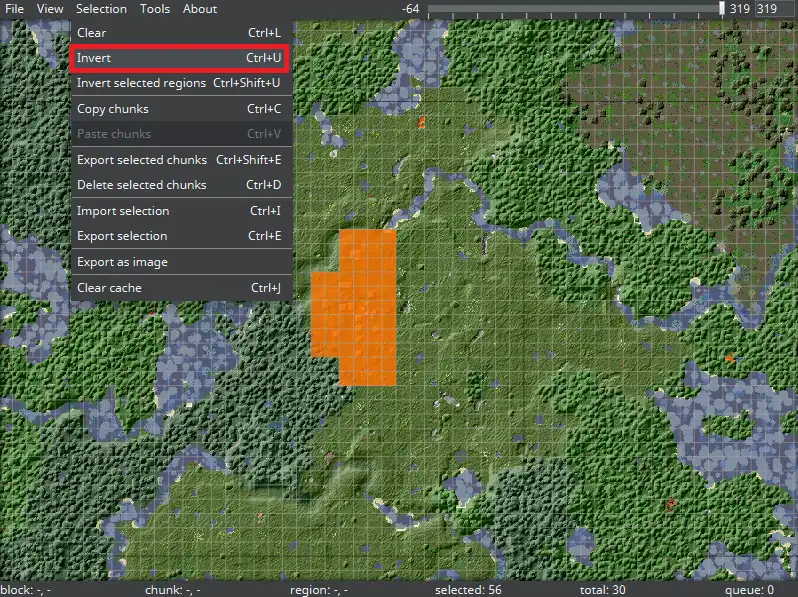
Now we do as previously mentioned and click “Invert” under “Selection.”
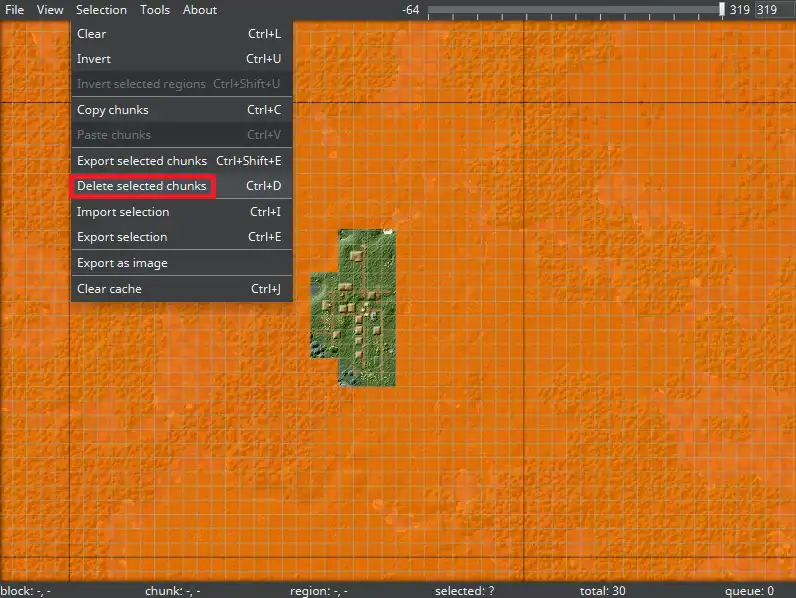
And just like that, your builds are unselected, and all others chunks are selected instead. From there, click “Delete Selected Chunks,” approve the warning prompt, and all orange chunks will be deleted.
Step 7: Closing MCA Selector
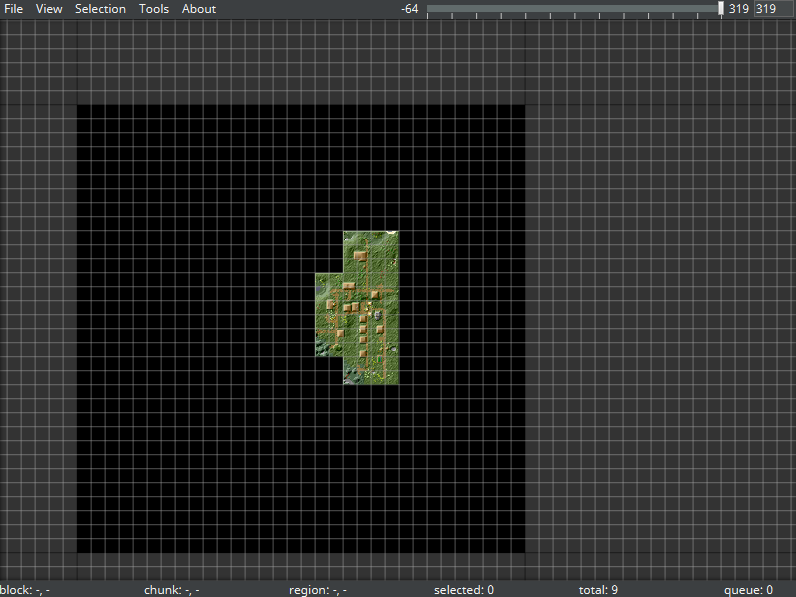
Your world should now look like the image above—builds in a sea yet to be generated chunks. Under “File” select “Quit” and you are done. The world can now be joined.
Step 8: A Job Well Done
This guide has reached its end, and we hope it has helped you use MCA Select to delete your chunks. If there are any questions or I missed something, please feel free to comment below.
As a side note, MCA Selector is capable of much more than what we have used it for today. We highly recommend checking out their wiki here for further reading.
Until Next Time,
BisectHosting =)
Looking for a private Minecraft server to host your world? We here at BisectHosting offer affordable options for just that. Your Minecraft server is only a few steps away.

您对这篇博客有何评价?







获取第一手独家资讯!
订阅我们的电子邮件,获取有关我们托管游戏、公司新闻和独家优惠的最新动态。随时掌握一手资讯!