Enshrouded Bosses Guide: Every Boss, Locations, Loot, & More
发布于 ,作者

分享:

分享至 X

分享至 Facebook

分享至 Threads

分享至 Bluesky

复制到剪贴板

通过电子邮件分享
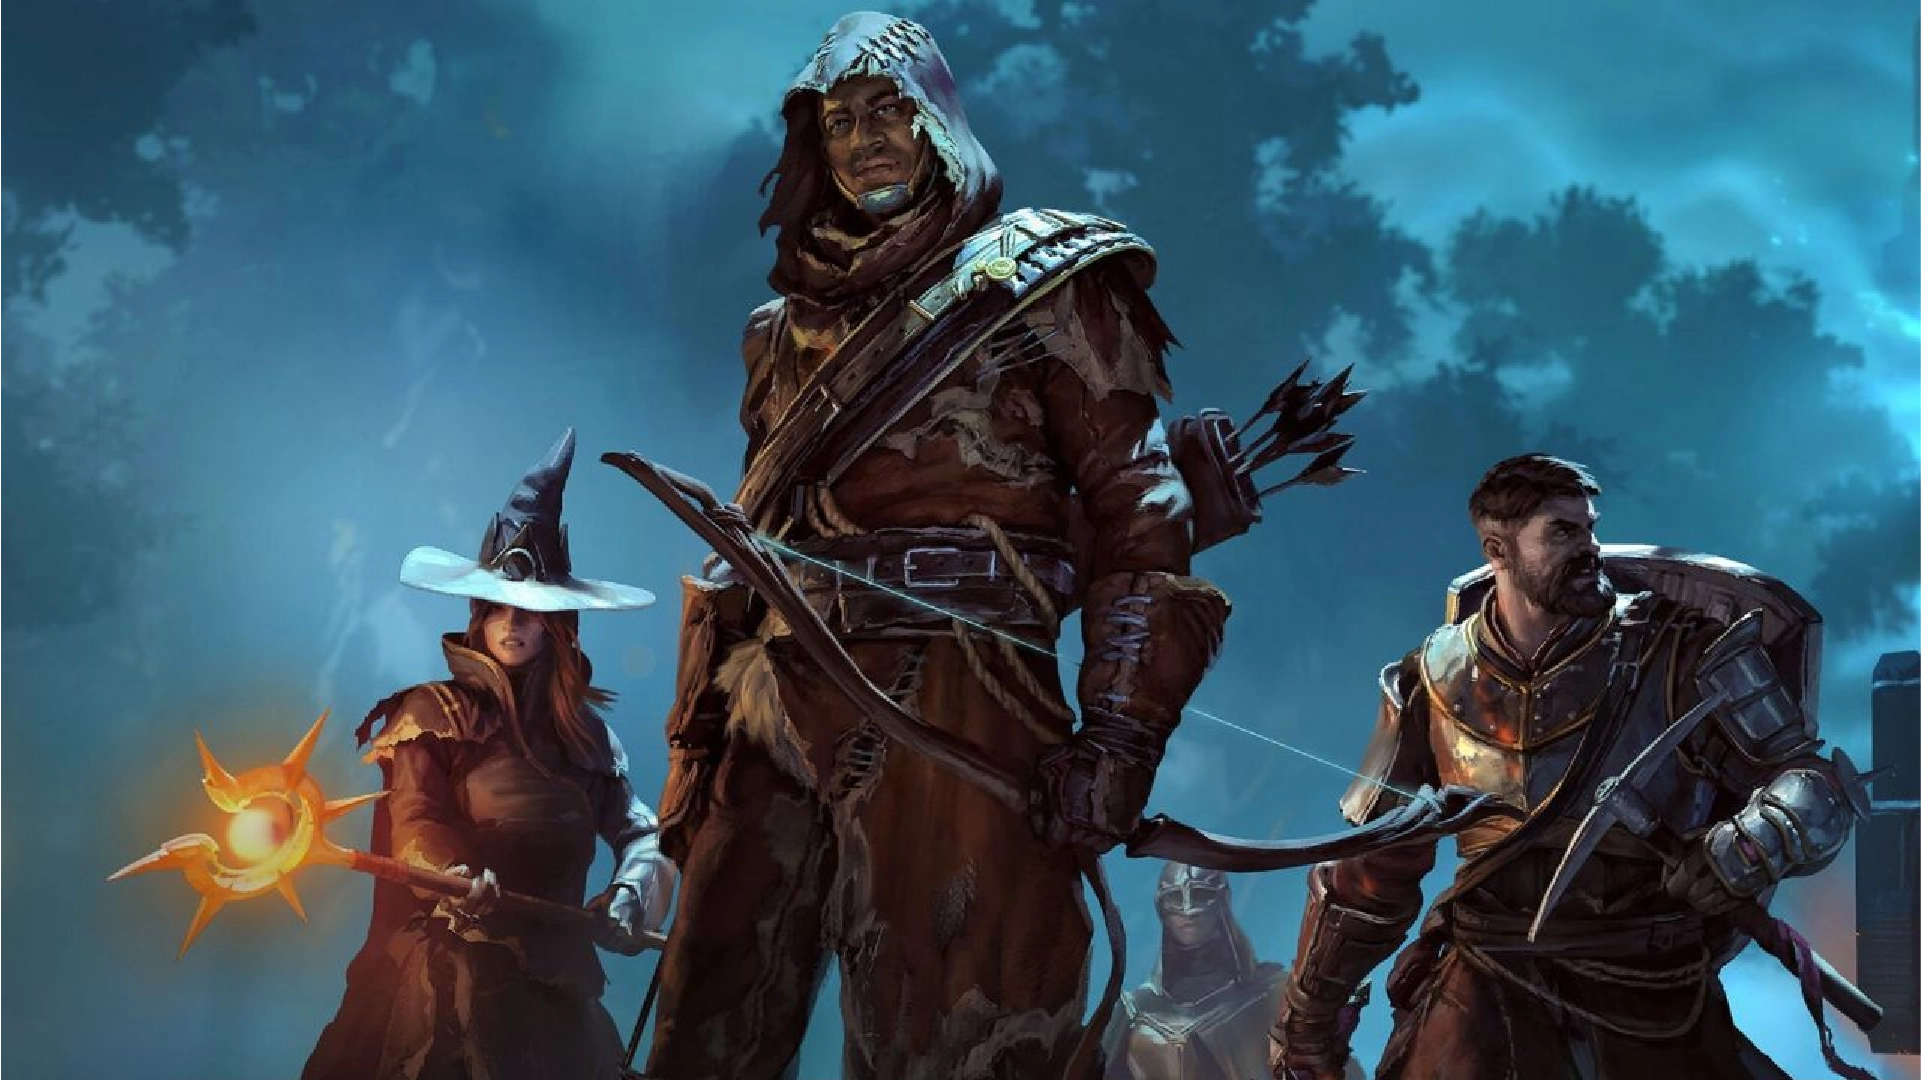
Enshrouded offers players plenty of creatures to discover and fight, including some giant bosses scattered all around its world. Below, we’ve detailed every boss in Enshrouded, where they can be found, some tips for fighting them, and the loot rewards they offer!
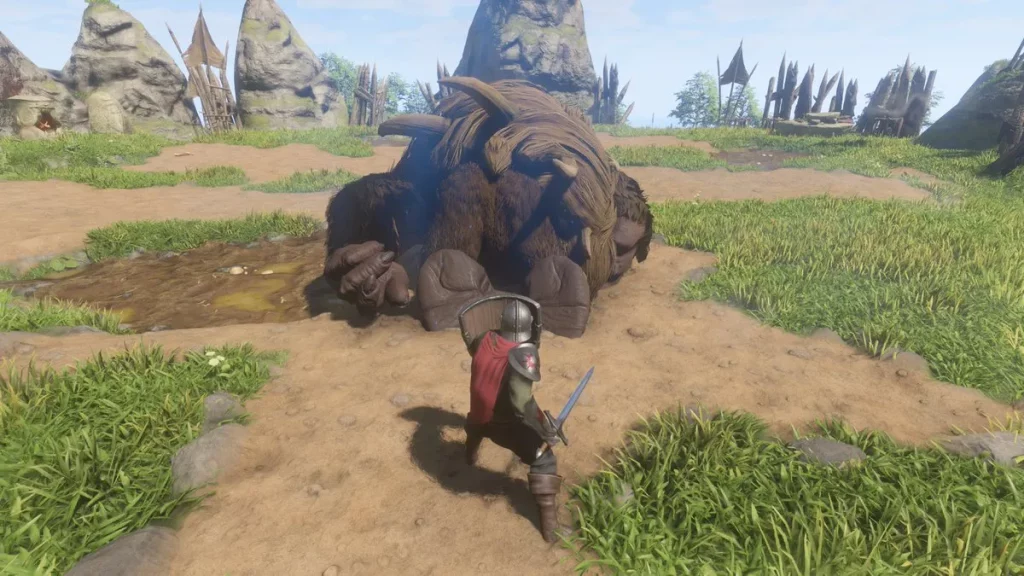 A Vukah Brawler is likely to be one of the earlier bosses that you’ll encounter in Enshrouded. They’re not too tricky, but can prove a bit more challenging for melee-focused players.
Vukah Brawlers are vulnerable to fire damage and often surround themselves with smaller enemies. Take the smaller foes out before focusing on the Brawler, and you’ll have a much easier time. Specifically, you'll want to target any Vukah wielding a staff. They should be your first priority as they'll attempt to heal the Vukah Brawler and other enemies.
As far as the Brawler itself, it only has one attack — a giant leap across the arena to land on you. It's a quick and strong move, but one that's easily avoided with a dodge roll. However, you'll want to avoid large patches of mud. If your feet get caked with mud, you'll be significantly slower and have a harder time dodging the Brawler.
Along with their heads, Vukah Brawlers drop fairly average loot, such as common resources like leather and random weapons. However, there is a chance for Vukah Brawlers to drop a legendary weapon known as Jezmina’s Apotheosis.
Locations:
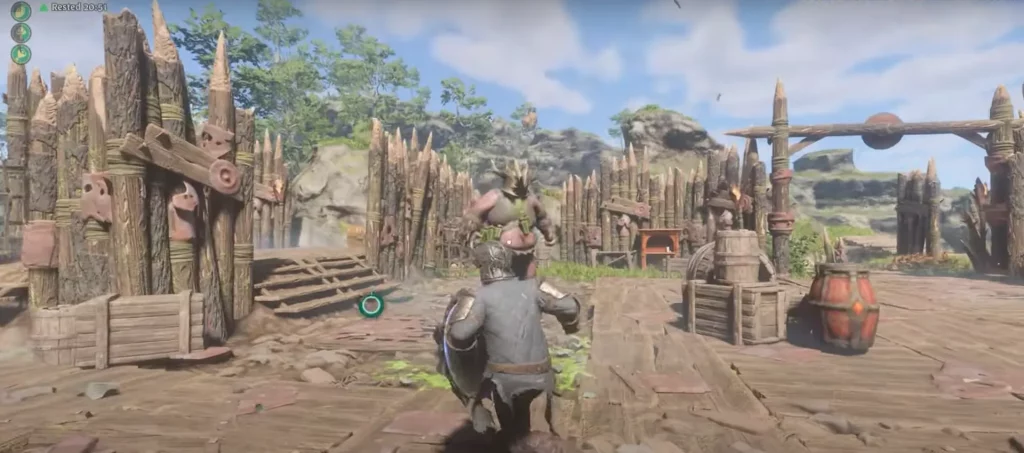 There are three different types of Scavenger Matrons. The standard variety is a large, slow, and close-ranged attacker. Meanwhile, the Gorger variety will hurl poisonous projectiles toward players, and the Grizzler regularly calls in reinforcements.
No matter which kind you’re facing, you’ll have an easy time if you use some ranged attacks, such as bows or spells. Fortunately, the camps where you often fight Scavengers have a fair amount of tricky terrain. Tricky for the Matron, that is. If you put enough boxes, rocks, or other pieces of environment between the Matron and yourself, you'll have a very easy time plucking away the boss's health from afar.
Getting up close to a Scavenger Matron is a bit riskier, but there's a nice trick for melee users. Getting as close to a Matron as you can and staying behind it is very easy to do. They don't turn very quickly, and they don't have a great move for getting you if you're up close. They do have a large, close-ranged attack, but it has a large telegraph, and you can easily avoid it. So, when fighting a Matron, either get up super close or stay far away!
As far as loot goes, the Scavenger Matron’s head (or helmet in this case) is very valuable. You’ll need one in order to increase your Flame Altar to a Flame Level of 3. You'll also need one for a grapple hook upgrade, so, luckily, each Scavenger Matron variant can drop the head that you need.
Locations:
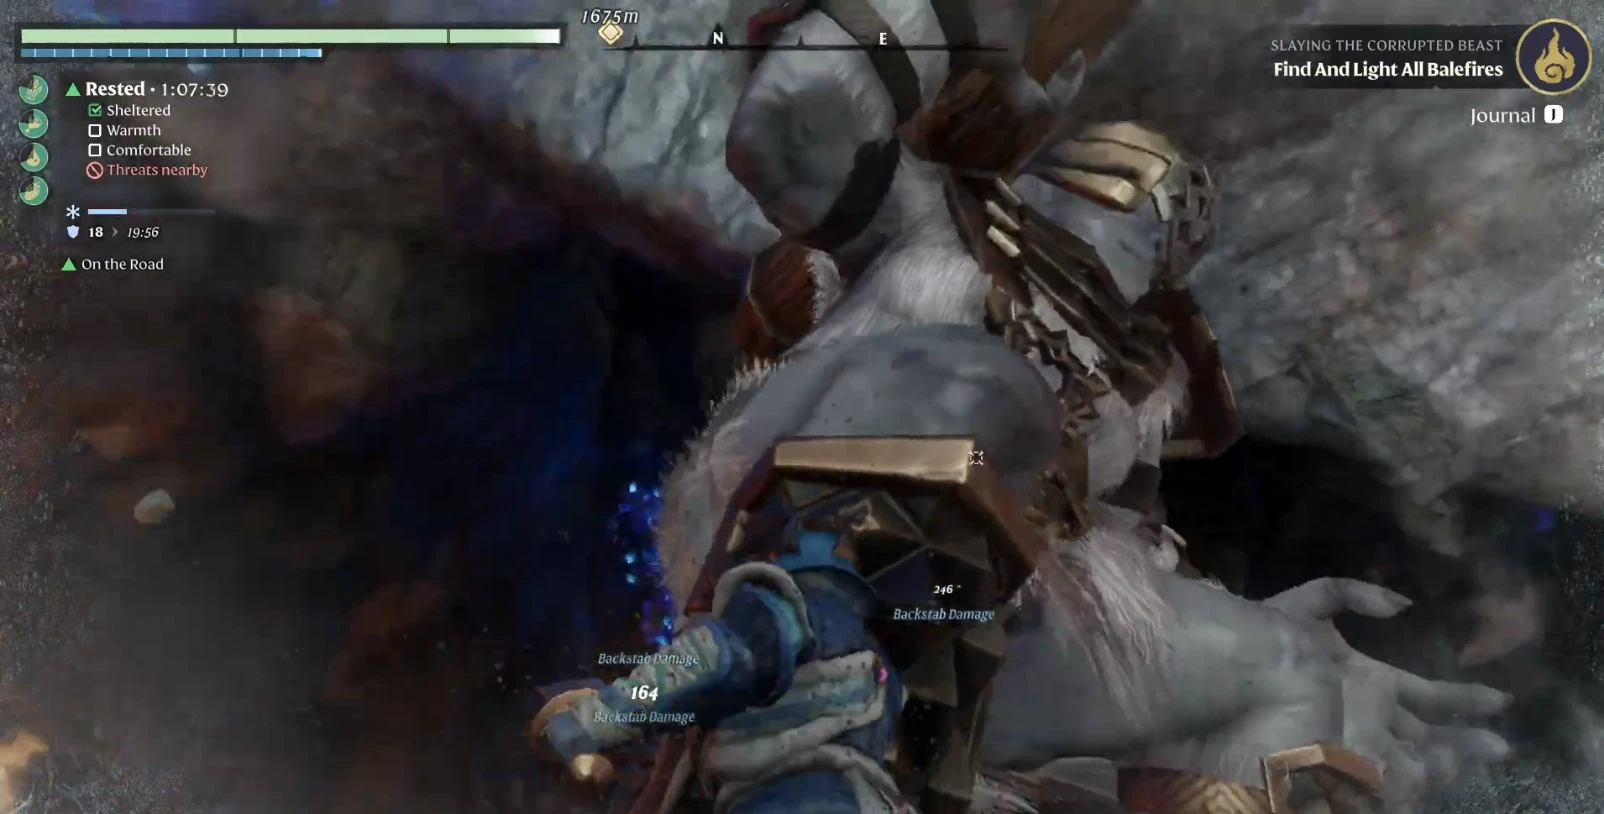 It's possible that the basic Cyclops in Enshrouded is the easiest boss in the game. This lumbering oaf doesn't have the best ranged attacks, and it telegraphs its close-ranged moves for a long time. If you're a ranged user, you shouldn't have any difficulty kiting the beastie around its dwelling and blasting it from afar.
If you're a melee player, you'll likely have an even easier time, as when you hug the giant's ankles, it will constantly try to stomp on you. However, its stomp has a fairly long and obvious wind-up. You can dodge out of the way and continue to relentlessly slash on the opposite foot for loads of damage. The only thing to keep an eye on is your stamina. Use too much, and one of those stomps might land on your head.
Once you've bested a Cyclops, you'll not have the most exciting loot in the world to claim: a Cyclops Head. What's it good for other than being gross? Well, it's nothing more than a trophy piece. Combine it with nails and wood planks at a Hunter crafting station, and you'll have a trophy. Throw in some bronze or iron bars, and you'll have a bronze or iron trophy, respectively.
Locations:
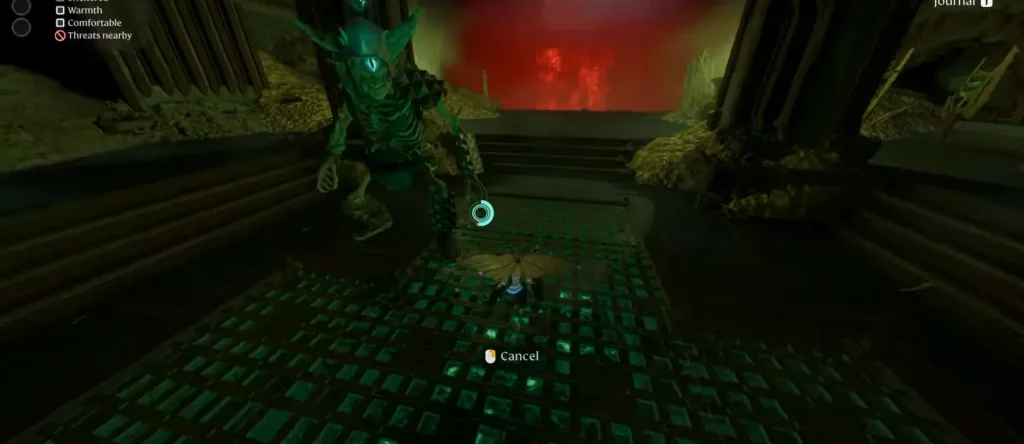 Much like the Matrons, when you’re fighting a Hollow Cyclops, you’ll want to avoid the middle ground. Either plink away its health from a distance, or try to stick to its backside. Unlike the Matrons, the Cyclops has quite a few tricks up its sleeve. For starters, its large club attack. This move cannot be blocked, but you can dodge away from it.
Next, if the Cyclops equips a large sword, it's about to do two horizontal swipes. The first swipe cannot be blocked and can only be dodged if you jump over it. A dodge roll will not work. Similarly, the second swipe cannot be blocked but can be avoided with a dodge roll.
As its final weapon-based move, the Cyclops will occasionally equip a dagger in each hand before delivering three targeted thrusts. These cannot be dodged, but they can be blocked with a shield! All of these different moves can be avoided if you're close enough to the Cyclops and dodge roll underneath it. Sticking around its feet will cause it to do a stomping move, so keep an eye out for that.
Finally, the Cyclops as a large AOE attack that covers the ground around it. Don't worry! It doesn't do any damage to you if it hits. It simply sends you high into the air, and you can use your glider to land safely. Make sure you use your glider, or you will take some fall damage.
When it comes to loot, a Hollow Cyclops doesn’t offer much unless you have a specific quest to gather its head or some Giant Bones.
Locations:
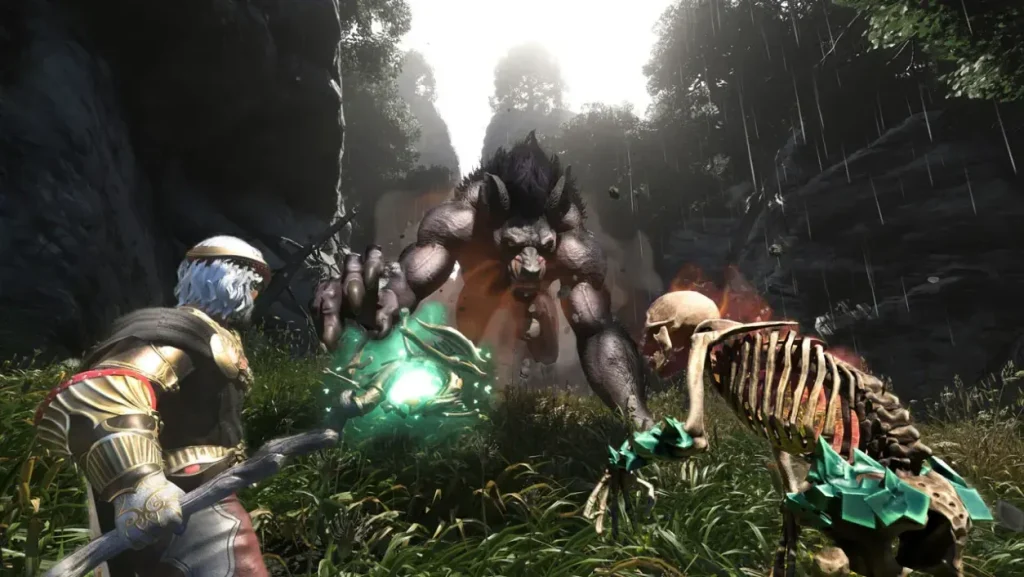 Don't let the fact that this miniboss is found in the early areas of the Springlands fool you. This fearsome beast might only be level 9, but it can pack a serious punch if you're not careful. This furry beastie is fast, and it will regularly lunge across the arena to swipe at you.
If you typically prefer ranged combat, you're going to have a hard time unless you have another player with you to draw its attention. Stick to careful dodging and shield usage. Rolling toward the Direwolf's attacks rather than away from them can put you in a great position to come out of the dodge roll swinging. Additionally, if you have access to some fire magic or fire arrows, these will deal extra damage to a Direwolf.
When you've bested it, it will drop some Animal Fur, Bones, Raw Wolf Meat, a Direwolf Head, and a random piece of equipment. Like many bosses, it can also drop randomized gear. There are 12 different weapons and armor pieces that it could drop, but it's random each time. If you feel like grinding this boss to see what gear you can earn, don't worry — it respawns like all open world minibosses and bosses in Enshrouded. You can either restart your server to get a boss to spawn, or wait roughly 30 minutes. Keep in mind that can't be too close to a boss's spawn location or they won't return at all!
Location:
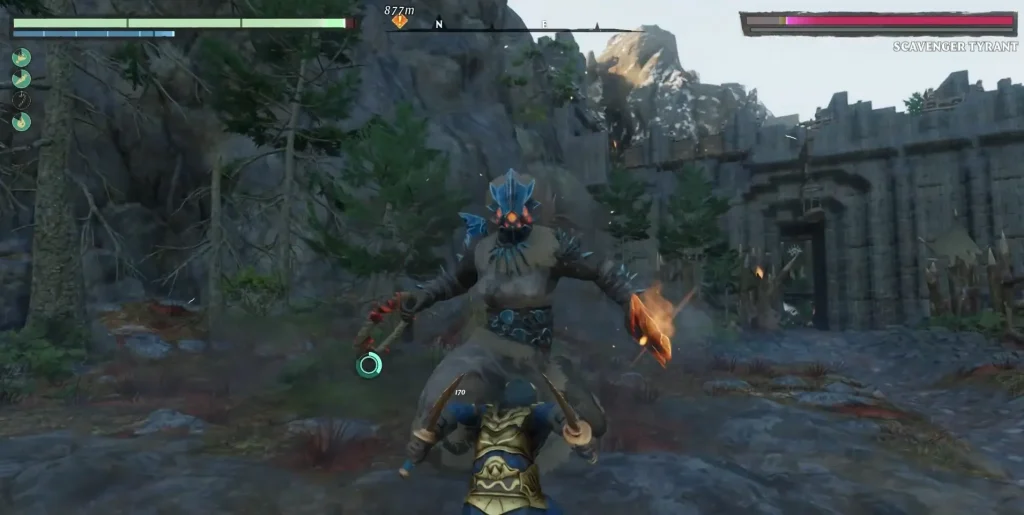 Those pesky Scavengers feel like they're everywhere in Enshrouded, but luckily they aren't all this big! A Scavenger Tyrant is a miniboss that can put you in the dirt just as easily as any other if you aren't careful. If you're a rough-and-tumble melee player, you'll want to rely on the trusty dodge rolling and shield blocks. However, things can get really hairy if you're not paying attention to the Scavenger minions that often accompany a Tyrant.
For ranged players, you'll have a significant advantage if you get some high ground. The Tyrant does have a longer-ranged whip attack, but if you're up high enough on a rocky outcropping or other vertical piece of geometry, you can almost cheese a Scavenger Tyrant and just pick away at its health with your bow, staff, or wand.
Once you've bested a Tyrant, you can expect it to drop some Hardened Leather, Animal Fur, Obsidian, a Scavenger Tyrant Head, and potentially some randomized weapons and armor. If you're completing the "A Blast Furnace for the Blacksmith" quest, the Scavenger Tyrant boss at the end will give you Bellows.
Locations:
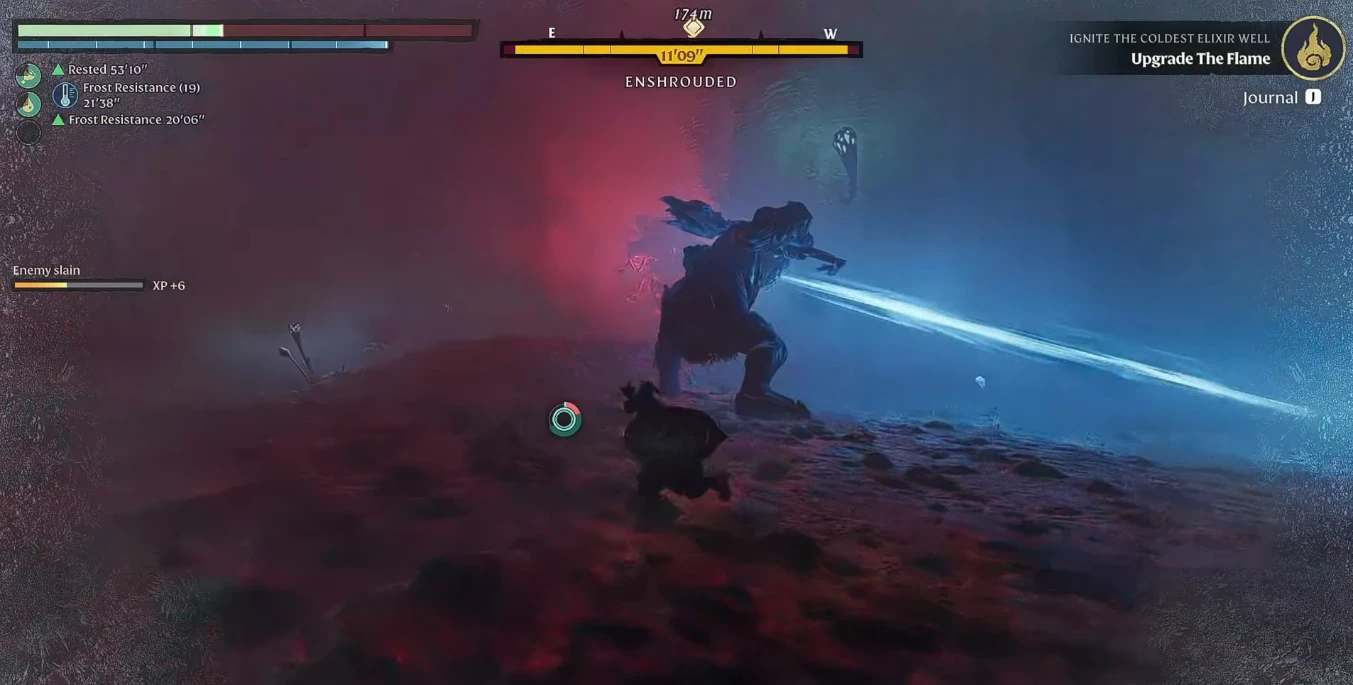 We've come a long way from the basic Cyclops. The Fell Cyclops is a monstrously hard fight compared to its normal cousin. This is more of a late-game encounter in Enshrouded and, as such, you'll want the best armor and weapons you can get your hands on. Additionally, the sole area home to the Fell Cyclops is incredibly cold. Make sure you've got all the frost resistance you can stack up with armor and food.
The Fell Cyclops's biggest threat is its laser-powered eye. It can fire a variety of laser attacks your way. Some blasts will follow a line directly in front of the monster, some will sweep side-to-side, and sometimes its head will track you. The answer to all of these is to keep moving and do your best to get behind the Fell Cyclops itself.
It also features moves you'll be familiar with from fighting the other types of Cyclops. Swinging its hammer, trying to stomp you, and the enormously threatening ground slam that ruptures the earth. For this last one, you'll want to jump right before the beast brings both of its hands slamming to the earth. So long as you avoid the new laser moves, this should feel familiar to any player who has slain the other Cyclops variants.
Once you've managed to fell this towering creature, you can find a Fell Cyclops Head or Enshrouded Cyclops Eye. As you might have already guessed, the head is only good for trophy-making. However, the eye can be used to create the following pieces of gear:
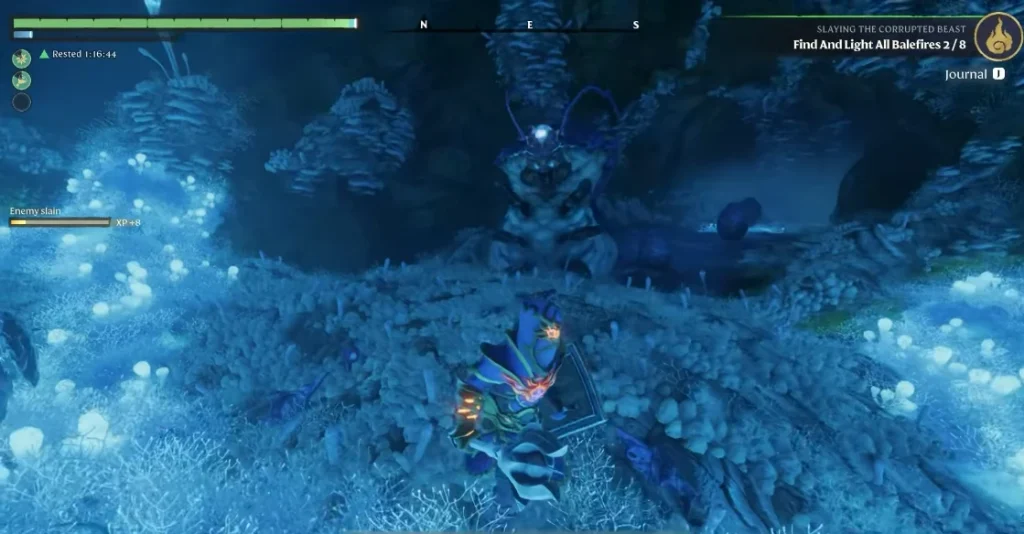 Technically, the Fell Critter Queen is more of a miniboss than a true boss in Enshrouded. However, it's still a worthwhile fight thanks to the Giant Critter Scales you can gather from defeating the beastie. These are necessary for crafting a multitude of chest pieces.
Luckily, it's also not one of the most challenging fights in the game. The biggest threat to keep track of is the Critter Queen summoning hordes of smaller bugs. These bugs will rush you, slash at you, and, most lethally, try to explode next to you. Dispatching them quickly is the key. At the same time, the queen herself will try to hit you with long-ranged wads of insectoid spit. The key in this fight, whether you're using a melee or ranged weapon, is to stay mobile.
As for attacking the queen, she is a bit on the squishy side. It won't take too much damage to bring her down. Ranged users ought to pick their minion-free moments and blast her from afar. Meanwhile, melee users should be aware that the queen will try to smack you with her claws if you get too close. Luckily, the queen isn't too fast and simply dodging these swipes to attack her rear can grant you tons of damage.
Location:
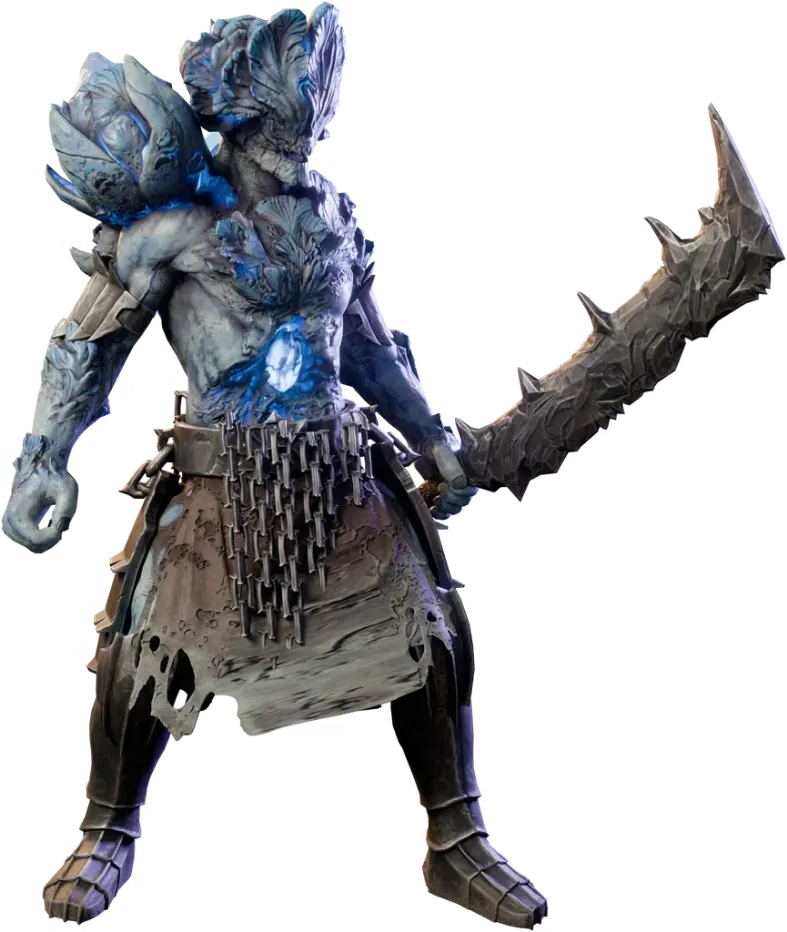 If you thought bosses like the Direwolf were fast and erratic, just wait until you come across a Fell Striker. These towering bad guys love to lunge toward you, and they do it at a shocking speed. When they're far from you, a Fell Striker will zoom to close the distance while swinging its sword in large sweeping arcs. Luckily, like all boss attacks in Enshrouded, there will be a telegraph to let you know it's about to charge. Just make sure you get out of the way as fast as possible.
After it's charging attack, a Fell Striker will have its largest window of vulnerability. This is a great chance for melee players to get in close or for ranged users to start pelting from afar while repositioning to dodge the next charge. Other than the lunging and large, sweeping sword strikes, this is a standard fight. Occasionally, it will throw some ice your way, but simple dodging and careful positioning should help you emerge victorious.
When it's dead, a Fell Striker will give a guaranteed drop of a Shroud Core and Fell Striker Head. It also has a chance to drop Legendary Runes and, if you're really lucky, its own Fell Striker Greatsword!
Location:
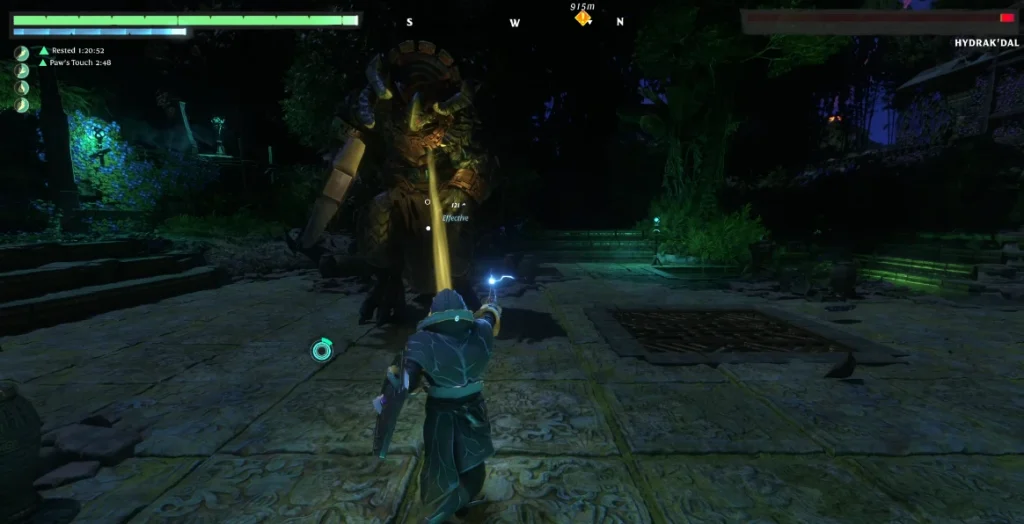 Another miniboss, the Hydrak'Dal is much more fierce than the title miniboss would imply. This lizard will rush you relentlessly and even cast a few magic spells this way. Even more so than the Fell Critter Queen, mobility is the most important factor in this fight. The Hydrak'Dal will try to slow you down with ice spikes, but the most dangerous spell is its earthquake summon. Luckily, it telegraphs the move with a large wind-up, and a glowing yellow circle will appear beneath your feet. Move out of the way fast, or you'll be sent flying with a seismic burst of energy.
Melee users will have the hardest time in this fight. Getting close to the Hydrak'Dal prompts it to unleash a flurry of melee attacks. For the best results, ranged battle is advised. Luckily, the arena where you'll fight a Hydrak'Dal is filled with platforms, nooks, and crannies. If you need a place to recover or simply get in a few ranged shots, it's easy to get up high and out of reach of the Hydrak'Dal's attacks. Well, most of them. Always keep an eye out for that personalized earthquake!
When you defeat the lizard, you'll receive a Hydrak'Dal Head as a reward. Good for trophies and necessary for upgrading your Flame Altar to level 9.
Location:
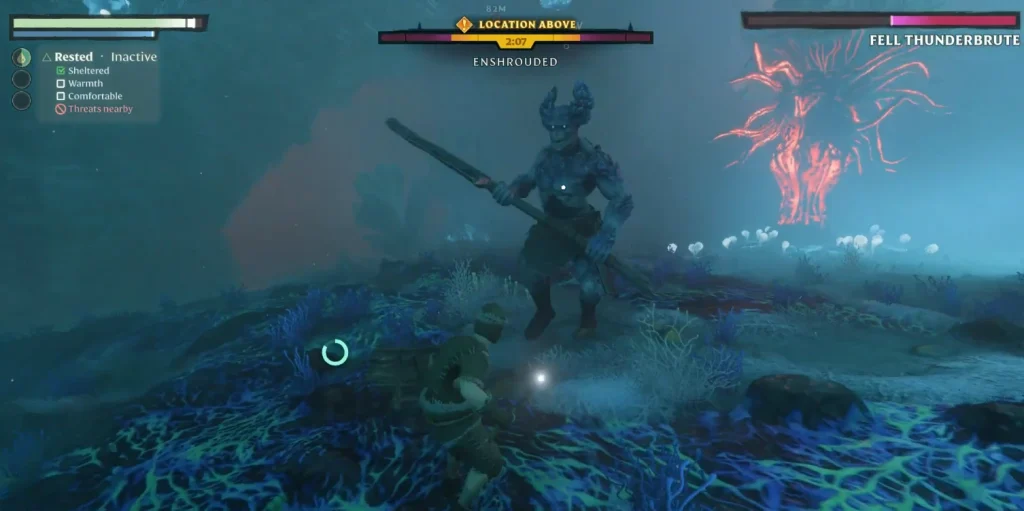 The next miniboss in our list, you'll run into Fell Thunderbrutes nearly everywhere in your adventuring. They're common, they're angry, but they aren't too hard to beat. The quickest way to defeat one is with ranged attacks. Thunderbrutes only want to get up close and smack you, but they're very slow. If you have a good few spells and/or a strong bow, you can dispatch a Thunderbrute at range with ease.
Melee users aren't out of luck either, though. The Thunderbrute's movement and attacks are all slow. If you're up close, you can easily dodge out of the way when it slowly winds up a swing or a stomp. Do your best to dodge roll behind it and lay on the pressure. As always, simply keep an eye on your stamina so you don't leave yourself without an escape.
When you've beaten a Fell Thunderbrute, it will drop a Shroud Core, a Fell Thunderbrute Head, and some Runes. It even has the chance to drop a Fell Commander's Bow if you're lucky. However, the Shroud Core is the real prize. With these, you can craft Improved Grappling Hooks or Medium Magic Chests.
Location:
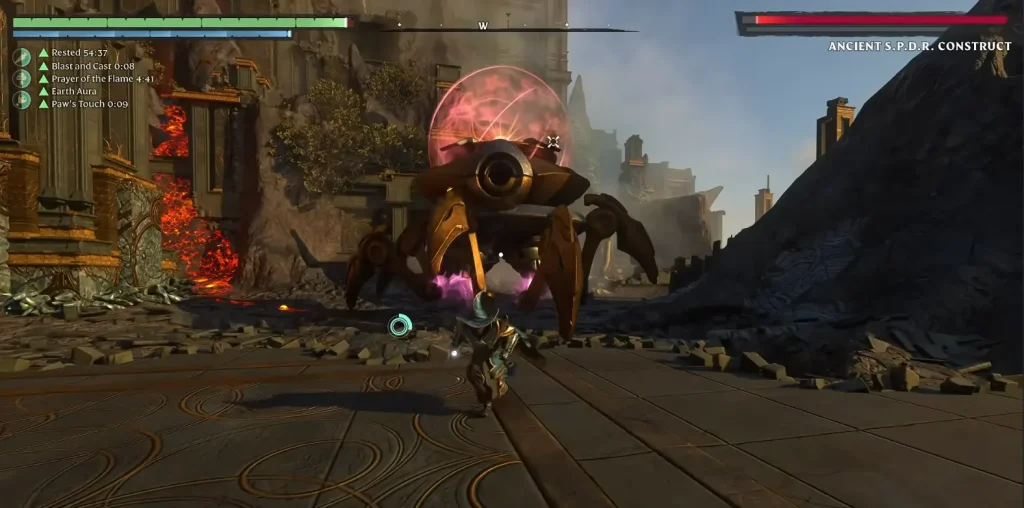 Thank heavens it's a robotic spider rather than a disgusting real one! The Ancient S.P.D.R. Construct is a massive, and surprisingly fast-moving enemy that has more than a few tricks up its sleeves. The first thing to be aware of is that it can teleport. While it might occasionally disappear and reappear somewhere else on the battlefield, one of its trickiest maneuvers is to teleport above you. It will then come crashing down in an attempt to squash you. If this mechanical menace blinks out of existence, do your best to keep moving rather than preparing to fight.
Luckily, landing on the ground after a failed slam leaves the S.P.D.R. vulnerable. You'll notice it normally has an energy dome on its head, but that field will occasionally disappear. This is your chance to use your grapple shot and zip up to its head. Then, you're free to strike at its core for some huge damage. This core can become vulnerable after it misses attacks, or while it takes the time to focus on you as it blasts missiles or lasers your way. Finally, if you see the S.P.D.R. start to envelop itself in a large bubble shield, wail on it with all your might to break it. This bubble can restore its health!
When it's finally dismantled, this boss will drop Moonstone, Archaic Shards, Legendary Runes, Archaic Cores, and an Ancient S.P.D.R. Construct Eye. Plenty of rarer goodies!
Location:
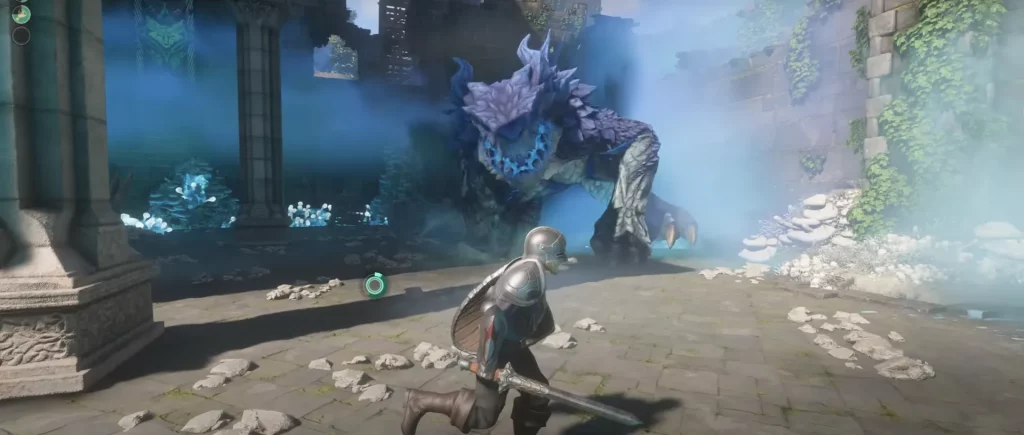 This is a giant boss. Unlike most bosses, you’ll only find the Fell Wispwyvern in a single location. It has arena-sweeping ice attacks, can summon reinforcements, and it’s not too slow either. Luckily, it has a unique weakness. When you see the Fell Wispwyvern charging up a large, ice-breath attack, you can shoot its mouth with an arrow to stun it.
During this stunned phase, you’ll have a huge window of time to try and deal as much damage as possible. When that window is up, keep dodging its attacks and keep an eye out for another chance to knock it down.
Also, unlike other bosses, the Fell Wispwyvern offers a bit more unique loot. It drops its head, of course, which you’ll need to take your Flame Altar to Flame Level 4. However, it also drops Shroud Cores, Runes, a Commander’s Ring, and the Key to the Pike. The Commander’s Ring is a nice find as it increases your health and mana by a whopping 30 points each. The Key to the Pike is also useful, as it opens all doors in Pike Castle.
Location:
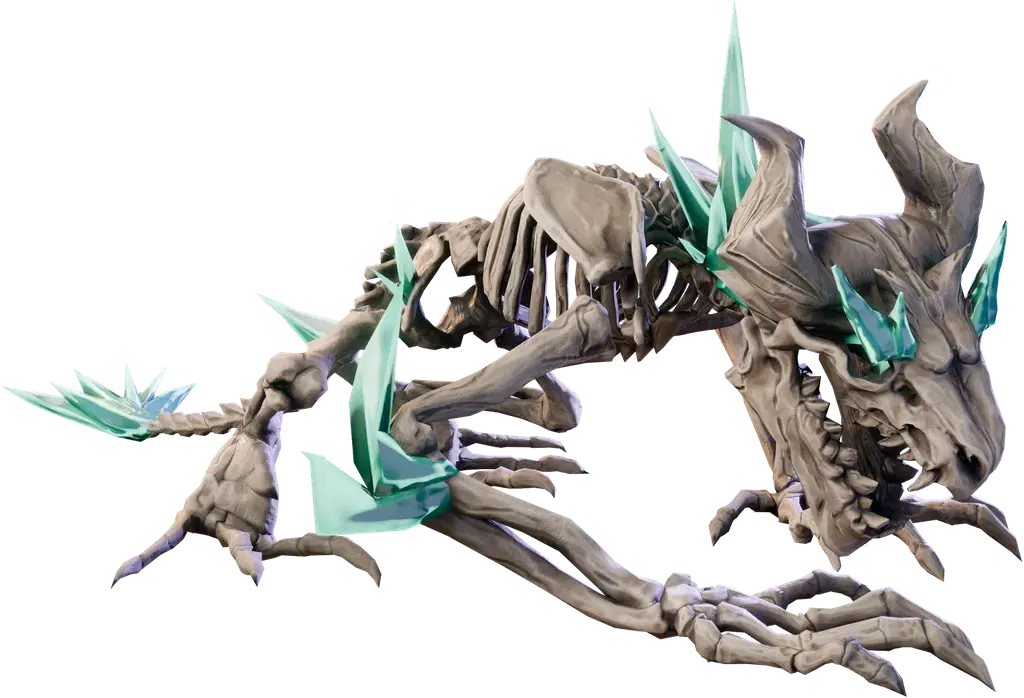 Guess who's back! No, it's probably not the same Fell Wispwyvern that you slew at Pikemead's Reach, but it's still a big, nasty dragon. This time, it's got a bone to pick. When you come across it, you'll notice that this undead Wispwyvern uses all of the same abilities and attacks that its living Fell Wispwyvern counterpart does. However, a Hollow Wispwyvern has a lot more health and is often a higher level. To beat it, remember the tactic of shooting an arrow at its mouth while it charges a large breath attack. Rush in to deal damage while its stunned, and repeat until it finally dies (again).
When you have it dead for good, you can expect to get some Ectoplasm Aggregate, a Hollow Wispwyvern Head, Icy Giant Bones, Legendary Runes, and a Venerable Hollow Chestplate. Not bad for taking down a big pile of bones!
Location:
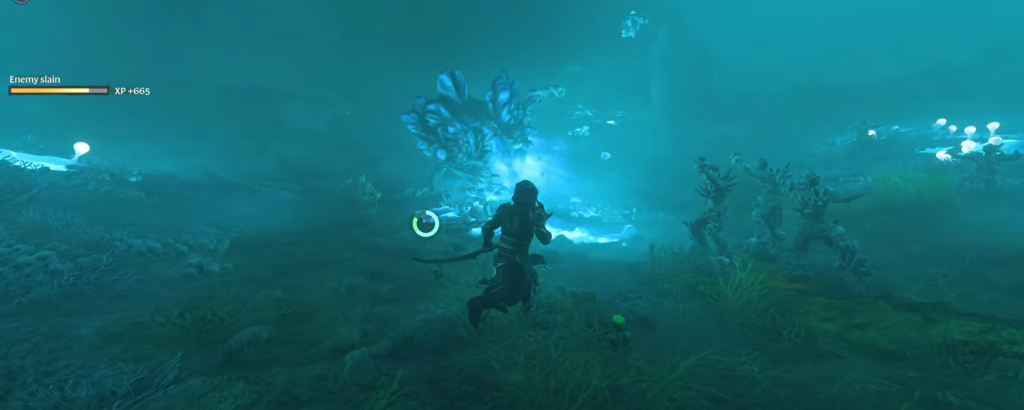 We’re back to bosses that can be found in multiple locations, and this one isn’t quite as intense as the Fell Wispwyvern. Despite its small moveset, however, it can still deal some damage.
The two things to keep in mind during this fight are to stay more mobile and to dispel the Hornets as quickly as you can. Whether you use an attack or a torch, you’ll want them out of the way so that you can focus on the Fell Monstrosity. Luckily, the beastie is vulnerable to fire, which can make things a bit easier.
Other than occasionally spawning Hornets, the Fell Monstrosity has only a few ranged attacks. They have obvious telegraphs and are easy to avoid, so long as you keep on moving.
While it doesn’t drop any unique rings like the Wispwyvern, you will need a Fell Monstrosity Head to, you guessed it, advance your Flame Altar. A Fell Monstrosity head will take your Flame Altar to its fifth Flame Level.
Locations:
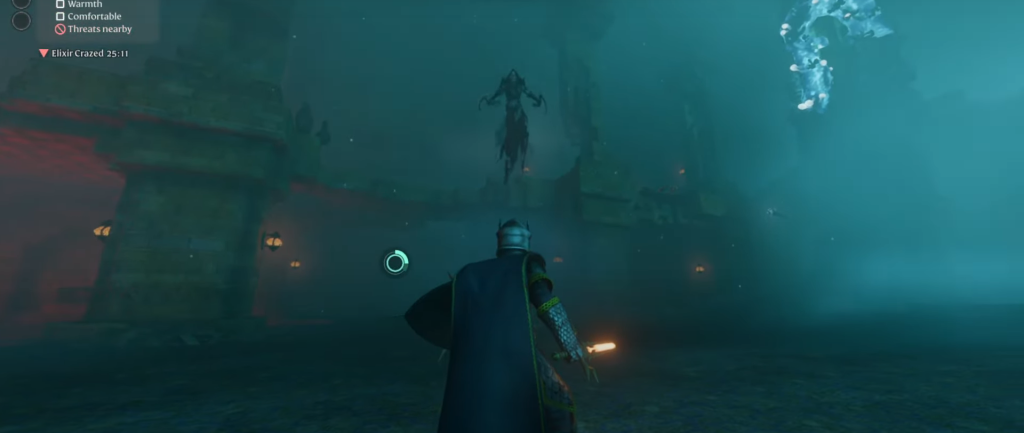 Strangely, the Fell Sicklescythe has an incredibly small moveset. Yet, that doesn’t mean this boss is easy. It is quick, mobile, and, most frustratingly, often airborne.
When it throws its sickles at you, you need to dodge them twice: once when they’re thrown, and once when they return to the Fell Sicklescythe’s hands. If you see a giant, chattering skull floating your way, run. That skull will explode for heaps of damage, and you don’t want to be in the blast zone.
Once more, the loot that you should focus on is the creature’s head. A Fell Sicklescythe head will take your Flame Altar to a level six Flame Level.
Locations:
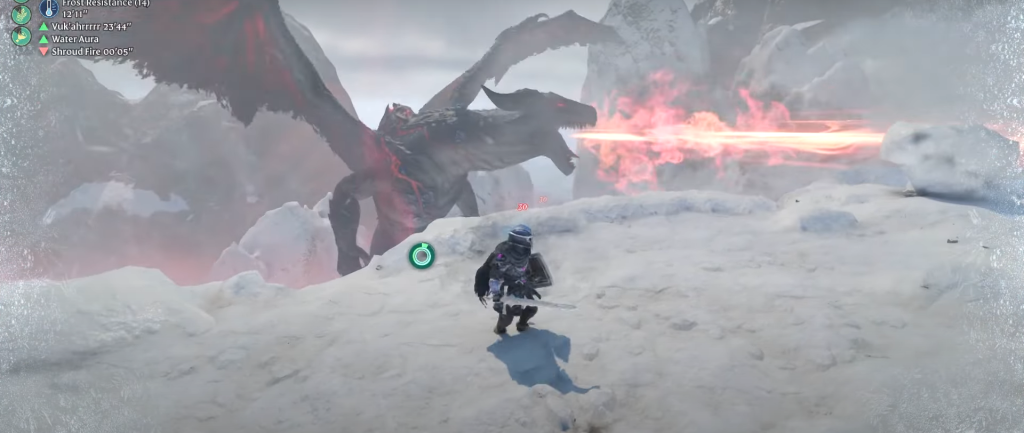 Finally, as a fresh addition with Souls of the Frozen Frontier, we have the Fell Dragon Youngling. Don’t let its name deceive you — this boss is massive!
Like the Fell Wispwyvern, this fella can only be found in one spot, and it takes more damage when it is stunned. Unlike the Fell Wispwyvern, it won’t give you a convenient opportunity to stun it. Using Chain Lightning or Stun Arrows to fill the beastie’s stun meter is likely your best bet. When it is stunned, take advantage, deal some damage to its head, and get ready to do it all again.
One thing you’ll want to be very good at during this fight is flying with your glider. The Fell Dragon Youngling can blow you off the arena’s edge, and you’ll be in for a nasty fall if you don’t pull out your glider quickly enough.
Additionally, using your glider to avoid the Fell Dragon Youngling's large fire-breath attack is a great idea. That breath attack will cover a huge part of the donut-shaped arena, but using your glider to soar underneath the dragon and land on the opposite side not only gets you out of the way, but also gives you a nice opportunity to deal some damage.
As far as loot is concerned, you’ll receive Shroud Cores, Runes, and a Fell Dragon Youngling Head for your trouble. We aren’t sure what the head's purpose is at this time, but it would look very impressive mounted on your base!
Location:
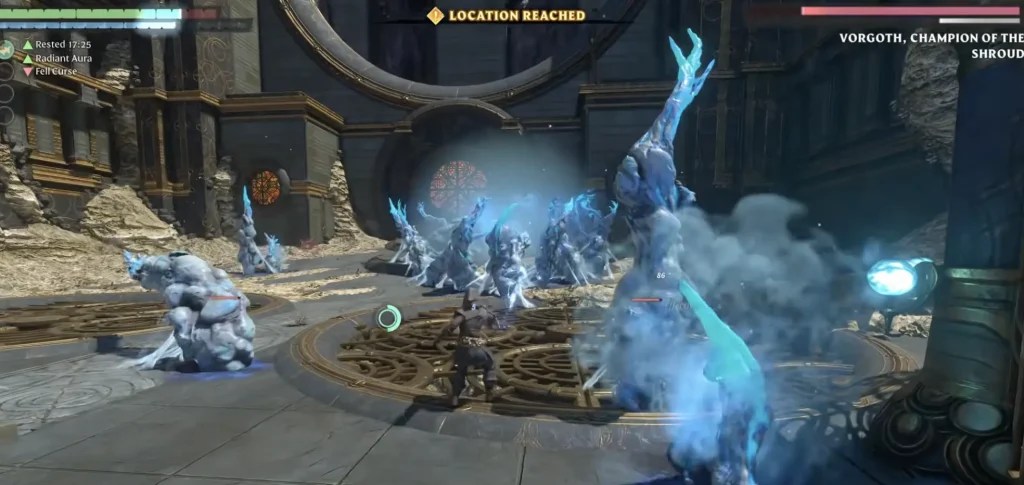 Finally, after the army of foes you've left in your wake, it's time to face the ultimate challenge: Lord Vorgoth. This fight is split into two phases: the first, sees you fighting a large swordsman form of Vorgoth. In this phase, there's plenty of attacks you're used to, and some spooky new stuff. He'll close the gap with lunges and jumps, and swing his huge sword in your direction. He'll also cause large AOE attacks to erupt out of the ground while summoning tentacles to spawn near you. These tentacles are particularly nasty. They can easily overwhelm you, so kill them as quickly as possible to mitigate their presence. Stay mobile, don't stop dodging, and hit him with all you've got during any opening you can.
In the second phase, you'll face the Wanderer's Vessel. This is a corrupted form of Vorgoth, where the Shroud has overtaken him while giving new abilities. Here, he'll come at you with tentacle strikes, his entire seething body sliding across the floor, and some projectiles. You'll need to constantly be moving around the map and watching his moves to stay alive. Keep in mind that any weapon you have that deals Shroud-type damage will be rendered completely ineffective against both phases of this fight. Come prepared with some Fire weapons to deal extra damage instead.
When you finally topple this enormous baddie, you'll receive a heaping helping of Legendary Runes, the Shroud Vessel's Greatsword, Vorgoth's Bound Essence, and Vorgoth's Eye. Needless to say, these are some of the rarest items in the entire game. But, that's because the final fight will be a huge test of your fighting prowess. Good luck!
Location:
All Enshrouded Bosses
Before we jump into specifics, there are a few similarities between Enshrouded bosses to keep in mind. First, several bosses can be found in multiple spots throughout the world of Embervale. Second, bosses will respawn after a certain amount of in-game time has passed or following a server reset. Second, every boss has a chance to drop their head as a collectible item once they’re defeated. Some heads have a specific purpose, while others only exist as a trophy and testament to your victory. We’ll outline which heads are which down below.Vukah Brawler
A Vukah Brawler is likely to be one of the earlier bosses that you’ll encounter in Enshrouded. They’re not too tricky, but can prove a bit more challenging for melee-focused players.
Vukah Brawlers are vulnerable to fire damage and often surround themselves with smaller enemies. Take the smaller foes out before focusing on the Brawler, and you’ll have a much easier time. Specifically, you'll want to target any Vukah wielding a staff. They should be your first priority as they'll attempt to heal the Vukah Brawler and other enemies.
As far as the Brawler itself, it only has one attack — a giant leap across the arena to land on you. It's a quick and strong move, but one that's easily avoided with a dodge roll. However, you'll want to avoid large patches of mud. If your feet get caked with mud, you'll be significantly slower and have a harder time dodging the Brawler.
Along with their heads, Vukah Brawlers drop fairly average loot, such as common resources like leather and random weapons. However, there is a chance for Vukah Brawlers to drop a legendary weapon known as Jezmina’s Apotheosis.
Locations:
- Low Meadows - Vukah Ceremony Hill
- Nomad Highlands - Vukah Arena
- Nomad Highlands - Cave Passage - Pillars of Creation
- Kindlewastes - Vukah Sacrifice Hill
Scavenger Matron
There are three different types of Scavenger Matrons. The standard variety is a large, slow, and close-ranged attacker. Meanwhile, the Gorger variety will hurl poisonous projectiles toward players, and the Grizzler regularly calls in reinforcements.
No matter which kind you’re facing, you’ll have an easy time if you use some ranged attacks, such as bows or spells. Fortunately, the camps where you often fight Scavengers have a fair amount of tricky terrain. Tricky for the Matron, that is. If you put enough boxes, rocks, or other pieces of environment between the Matron and yourself, you'll have a very easy time plucking away the boss's health from afar.
Getting up close to a Scavenger Matron is a bit riskier, but there's a nice trick for melee users. Getting as close to a Matron as you can and staying behind it is very easy to do. They don't turn very quickly, and they don't have a great move for getting you if you're up close. They do have a large, close-ranged attack, but it has a large telegraph, and you can easily avoid it. So, when fighting a Matron, either get up super close or stay far away!
As far as loot goes, the Scavenger Matron’s head (or helmet in this case) is very valuable. You’ll need one in order to increase your Flame Altar to a Flame Level of 3. You'll also need one for a grapple hook upgrade, so, luckily, each Scavenger Matron variant can drop the head that you need.
Locations:
- Springlands - The Hill of Scavengers
- Revelwood - Glenwood’s End
- Revelwood - Fawnsong Frontier
- Nomad Highlands - Ruins northwest of Mining Rift
- Nomad Highlands - Lupa’s Lair
- Nomad Highlands - Surat’s Rest
- Kindlewastes - Ocean’s Heart
Cyclops
It's possible that the basic Cyclops in Enshrouded is the easiest boss in the game. This lumbering oaf doesn't have the best ranged attacks, and it telegraphs its close-ranged moves for a long time. If you're a ranged user, you shouldn't have any difficulty kiting the beastie around its dwelling and blasting it from afar.
If you're a melee player, you'll likely have an even easier time, as when you hug the giant's ankles, it will constantly try to stomp on you. However, its stomp has a fairly long and obvious wind-up. You can dodge out of the way and continue to relentlessly slash on the opposite foot for loads of damage. The only thing to keep an eye on is your stamina. Use too much, and one of those stomps might land on your head.
Once you've bested a Cyclops, you'll not have the most exciting loot in the world to claim: a Cyclops Head. What's it good for other than being gross? Well, it's nothing more than a trophy piece. Combine it with nails and wood planks at a Hunter crafting station, and you'll have a trophy. Throw in some bronze or iron bars, and you'll have a bronze or iron trophy, respectively.
Locations:
- Albaneve Summits - Cave Passage
- Albaneve Summits - Cyclops Cave Passage below Everfrore Keep
- Albaneve Summits - Quiet Caves
- Alvaneve Summits - Cyclops Cave near Lake Luma
Hollow Cyclops
Much like the Matrons, when you’re fighting a Hollow Cyclops, you’ll want to avoid the middle ground. Either plink away its health from a distance, or try to stick to its backside. Unlike the Matrons, the Cyclops has quite a few tricks up its sleeve. For starters, its large club attack. This move cannot be blocked, but you can dodge away from it.
Next, if the Cyclops equips a large sword, it's about to do two horizontal swipes. The first swipe cannot be blocked and can only be dodged if you jump over it. A dodge roll will not work. Similarly, the second swipe cannot be blocked but can be avoided with a dodge roll.
As its final weapon-based move, the Cyclops will occasionally equip a dagger in each hand before delivering three targeted thrusts. These cannot be dodged, but they can be blocked with a shield! All of these different moves can be avoided if you're close enough to the Cyclops and dodge roll underneath it. Sticking around its feet will cause it to do a stomping move, so keep an eye out for that.
Finally, the Cyclops as a large AOE attack that covers the ground around it. Don't worry! It doesn't do any damage to you if it hits. It simply sends you high into the air, and you can use your glider to land safely. Make sure you use your glider, or you will take some fall damage.
When it comes to loot, a Hollow Cyclops doesn’t offer much unless you have a specific quest to gather its head or some Giant Bones.
Locations:
- Revelwood - Hollow Halls
- Highlands - Hollow Halls
- Kindlewastes - Hollow Halls
Direwolf
Don't let the fact that this miniboss is found in the early areas of the Springlands fool you. This fearsome beast might only be level 9, but it can pack a serious punch if you're not careful. This furry beastie is fast, and it will regularly lunge across the arena to swipe at you.
If you typically prefer ranged combat, you're going to have a hard time unless you have another player with you to draw its attention. Stick to careful dodging and shield usage. Rolling toward the Direwolf's attacks rather than away from them can put you in a great position to come out of the dodge roll swinging. Additionally, if you have access to some fire magic or fire arrows, these will deal extra damage to a Direwolf.
When you've bested it, it will drop some Animal Fur, Bones, Raw Wolf Meat, a Direwolf Head, and a random piece of equipment. Like many bosses, it can also drop randomized gear. There are 12 different weapons and armor pieces that it could drop, but it's random each time. If you feel like grinding this boss to see what gear you can earn, don't worry — it respawns like all open world minibosses and bosses in Enshrouded. You can either restart your server to get a boss to spawn, or wait roughly 30 minutes. Keep in mind that can't be too close to a boss's spawn location or they won't return at all!
Location:
- Springlands - Ancient Vault — Farmer
Scavenger Tyrant
Those pesky Scavengers feel like they're everywhere in Enshrouded, but luckily they aren't all this big! A Scavenger Tyrant is a miniboss that can put you in the dirt just as easily as any other if you aren't careful. If you're a rough-and-tumble melee player, you'll want to rely on the trusty dodge rolling and shield blocks. However, things can get really hairy if you're not paying attention to the Scavenger minions that often accompany a Tyrant.
For ranged players, you'll have a significant advantage if you get some high ground. The Tyrant does have a longer-ranged whip attack, but if you're up high enough on a rocky outcropping or other vertical piece of geometry, you can almost cheese a Scavenger Tyrant and just pick away at its health with your bow, staff, or wand.
Once you've bested a Tyrant, you can expect it to drop some Hardened Leather, Animal Fur, Obsidian, a Scavenger Tyrant Head, and potentially some randomized weapons and armor. If you're completing the "A Blast Furnace for the Blacksmith" quest, the Scavenger Tyrant boss at the end will give you Bellows.
Locations:
- Albaneve Summits - Rothstep
- Albaneve Summits - Everfrore Keep
- Albaneve Summits - Forge of Obsidia
Fell Cyclops
We've come a long way from the basic Cyclops. The Fell Cyclops is a monstrously hard fight compared to its normal cousin. This is more of a late-game encounter in Enshrouded and, as such, you'll want the best armor and weapons you can get your hands on. Additionally, the sole area home to the Fell Cyclops is incredibly cold. Make sure you've got all the frost resistance you can stack up with armor and food.
The Fell Cyclops's biggest threat is its laser-powered eye. It can fire a variety of laser attacks your way. Some blasts will follow a line directly in front of the monster, some will sweep side-to-side, and sometimes its head will track you. The answer to all of these is to keep moving and do your best to get behind the Fell Cyclops itself.
It also features moves you'll be familiar with from fighting the other types of Cyclops. Swinging its hammer, trying to stomp you, and the enormously threatening ground slam that ruptures the earth. For this last one, you'll want to jump right before the beast brings both of its hands slamming to the earth. So long as you avoid the new laser moves, this should feel familiar to any player who has slain the other Cyclops variants.
Once you've managed to fell this towering creature, you can find a Fell Cyclops Head or Enshrouded Cyclops Eye. As you might have already guessed, the head is only good for trophy-making. However, the eye can be used to create the following pieces of gear:
- Eternal Frost Arrow II
- Frostbite Slasher Hood
- Hailcaster Hat
- Invisible Barrier
- Shroud Beam Channel
- Wolf's Fang Hood
- Albaneve Summits - Elixir Well
Fell Critter Queen
Technically, the Fell Critter Queen is more of a miniboss than a true boss in Enshrouded. However, it's still a worthwhile fight thanks to the Giant Critter Scales you can gather from defeating the beastie. These are necessary for crafting a multitude of chest pieces.
Luckily, it's also not one of the most challenging fights in the game. The biggest threat to keep track of is the Critter Queen summoning hordes of smaller bugs. These bugs will rush you, slash at you, and, most lethally, try to explode next to you. Dispatching them quickly is the key. At the same time, the queen herself will try to hit you with long-ranged wads of insectoid spit. The key in this fight, whether you're using a melee or ranged weapon, is to stay mobile.
As for attacking the queen, she is a bit on the squishy side. It won't take too much damage to bring her down. Ranged users ought to pick their minion-free moments and blast her from afar. Meanwhile, melee users should be aware that the queen will try to smack you with her claws if you get too close. Luckily, the queen isn't too fast and simply dodging these swipes to attack her rear can grant you tons of damage.
Location:
- Revelwood - Elixir Well east of Fort Kelvin
- Kindlewastes - Shroud Lair northwest of Low Tide
Fell Striker
If you thought bosses like the Direwolf were fast and erratic, just wait until you come across a Fell Striker. These towering bad guys love to lunge toward you, and they do it at a shocking speed. When they're far from you, a Fell Striker will zoom to close the distance while swinging its sword in large sweeping arcs. Luckily, like all boss attacks in Enshrouded, there will be a telegraph to let you know it's about to charge. Just make sure you get out of the way as fast as possible.
After it's charging attack, a Fell Striker will have its largest window of vulnerability. This is a great chance for melee players to get in close or for ranged users to start pelting from afar while repositioning to dodge the next charge. Other than the lunging and large, sweeping sword strikes, this is a standard fight. Occasionally, it will throw some ice your way, but simple dodging and careful positioning should help you emerge victorious.
When it's dead, a Fell Striker will give a guaranteed drop of a Shroud Core and Fell Striker Head. It also has a chance to drop Legendary Runes and, if you're really lucky, its own Fell Striker Greatsword!
Location:
- Springlands - Near an Elixir Well
- Revelwood - Near Pikemead's Reach
- Revelwood - Near an Elixir Well
- Nomad Highlands - Near an Elixir Well
- Kindlewastes - Low Tide
- Albaneve Summits - Near an Elixir Well
- Veilwater Basin - Smuggler's Hideout
- Cinder's Cradle - Pink Glowing Ancient Ruins
Hydrak'Dal
Another miniboss, the Hydrak'Dal is much more fierce than the title miniboss would imply. This lizard will rush you relentlessly and even cast a few magic spells this way. Even more so than the Fell Critter Queen, mobility is the most important factor in this fight. The Hydrak'Dal will try to slow you down with ice spikes, but the most dangerous spell is its earthquake summon. Luckily, it telegraphs the move with a large wind-up, and a glowing yellow circle will appear beneath your feet. Move out of the way fast, or you'll be sent flying with a seismic burst of energy.
Melee users will have the hardest time in this fight. Getting close to the Hydrak'Dal prompts it to unleash a flurry of melee attacks. For the best results, ranged battle is advised. Luckily, the arena where you'll fight a Hydrak'Dal is filled with platforms, nooks, and crannies. If you need a place to recover or simply get in a few ranged shots, it's easy to get up high and out of reach of the Hydrak'Dal's attacks. Well, most of them. Always keep an eye out for that personalized earthquake!
When you defeat the lizard, you'll receive a Hydrak'Dal Head as a reward. Good for trophies and necessary for upgrading your Flame Altar to level 9.
Location:
- Veilwater Basin - Hydrak'Dal Temple northwest of Lake Heartblood
Fell Thunderbrute
The next miniboss in our list, you'll run into Fell Thunderbrutes nearly everywhere in your adventuring. They're common, they're angry, but they aren't too hard to beat. The quickest way to defeat one is with ranged attacks. Thunderbrutes only want to get up close and smack you, but they're very slow. If you have a good few spells and/or a strong bow, you can dispatch a Thunderbrute at range with ease.
Melee users aren't out of luck either, though. The Thunderbrute's movement and attacks are all slow. If you're up close, you can easily dodge out of the way when it slowly winds up a swing or a stomp. Do your best to dodge roll behind it and lay on the pressure. As always, simply keep an eye on your stamina so you don't leave yourself without an escape.
When you've beaten a Fell Thunderbrute, it will drop a Shroud Core, a Fell Thunderbrute Head, and some Runes. It even has the chance to drop a Fell Commander's Bow if you're lucky. However, the Shroud Core is the real prize. With these, you can craft Improved Grappling Hooks or Medium Magic Chests.
Location:
- Springlands - Elixir Well east of Braelyn Bridge
- Springlands - Elixir Well west of Ferndale
- Low Meadows - Ring of Rot
- Revelwood - Ancient Bridge
- Revelwood - Bramblespine Boneyard
- Revelwood - Elixir Well west of Pikemead's Reach
- Revelwood - Huckstar Square, Pikemead's Reach
- Revelwood - Pike's Port, - Pikemead's Reach
- Nomad Highlands - Smothering Pit
- Nomad Highlands - Elixir Well south of the Pillars of Creation
- Kindlewastes - Low Tide
- Albaneve Summits - Elixir Well
Ancient S.P.D.R. Construct
Thank heavens it's a robotic spider rather than a disgusting real one! The Ancient S.P.D.R. Construct is a massive, and surprisingly fast-moving enemy that has more than a few tricks up its sleeves. The first thing to be aware of is that it can teleport. While it might occasionally disappear and reappear somewhere else on the battlefield, one of its trickiest maneuvers is to teleport above you. It will then come crashing down in an attempt to squash you. If this mechanical menace blinks out of existence, do your best to keep moving rather than preparing to fight.
Luckily, landing on the ground after a failed slam leaves the S.P.D.R. vulnerable. You'll notice it normally has an energy dome on its head, but that field will occasionally disappear. This is your chance to use your grapple shot and zip up to its head. Then, you're free to strike at its core for some huge damage. This core can become vulnerable after it misses attacks, or while it takes the time to focus on you as it blasts missiles or lasers your way. Finally, if you see the S.P.D.R. start to envelop itself in a large bubble shield, wail on it with all your might to break it. This bubble can restore its health!
When it's finally dismantled, this boss will drop Moonstone, Archaic Shards, Legendary Runes, Archaic Cores, and an Ancient S.P.D.R. Construct Eye. Plenty of rarer goodies!
Location:
- Albaneve Summits - Near the Frontier Research Lab
- Nomad Highlands - Near the Engine Chambers
- Cinder's Cradle - Near the Ancient Citadel
- Cinder's Cradle - Near the Worker's Ward
Fell Wispwyvern
This is a giant boss. Unlike most bosses, you’ll only find the Fell Wispwyvern in a single location. It has arena-sweeping ice attacks, can summon reinforcements, and it’s not too slow either. Luckily, it has a unique weakness. When you see the Fell Wispwyvern charging up a large, ice-breath attack, you can shoot its mouth with an arrow to stun it.
During this stunned phase, you’ll have a huge window of time to try and deal as much damage as possible. When that window is up, keep dodging its attacks and keep an eye out for another chance to knock it down.
Also, unlike other bosses, the Fell Wispwyvern offers a bit more unique loot. It drops its head, of course, which you’ll need to take your Flame Altar to Flame Level 4. However, it also drops Shroud Cores, Runes, a Commander’s Ring, and the Key to the Pike. The Commander’s Ring is a nice find as it increases your health and mana by a whopping 30 points each. The Key to the Pike is also useful, as it opens all doors in Pike Castle.
Location:
- Revelwood - The Pike in Pikemead’s Reach
Hollow Wispwyvern
Guess who's back! No, it's probably not the same Fell Wispwyvern that you slew at Pikemead's Reach, but it's still a big, nasty dragon. This time, it's got a bone to pick. When you come across it, you'll notice that this undead Wispwyvern uses all of the same abilities and attacks that its living Fell Wispwyvern counterpart does. However, a Hollow Wispwyvern has a lot more health and is often a higher level. To beat it, remember the tactic of shooting an arrow at its mouth while it charges a large breath attack. Rush in to deal damage while its stunned, and repeat until it finally dies (again).
When you have it dead for good, you can expect to get some Ectoplasm Aggregate, a Hollow Wispwyvern Head, Icy Giant Bones, Legendary Runes, and a Venerable Hollow Chestplate. Not bad for taking down a big pile of bones!
Location:
- Can be found within high-level Hollow Halls
Fell Monstrosity
We’re back to bosses that can be found in multiple locations, and this one isn’t quite as intense as the Fell Wispwyvern. Despite its small moveset, however, it can still deal some damage.
The two things to keep in mind during this fight are to stay more mobile and to dispel the Hornets as quickly as you can. Whether you use an attack or a torch, you’ll want them out of the way so that you can focus on the Fell Monstrosity. Luckily, the beastie is vulnerable to fire, which can make things a bit easier.
Other than occasionally spawning Hornets, the Fell Monstrosity has only a few ranged attacks. They have obvious telegraphs and are easy to avoid, so long as you keep on moving.
While it doesn’t drop any unique rings like the Wispwyvern, you will need a Fell Monstrosity Head to, you guessed it, advance your Flame Altar. A Fell Monstrosity head will take your Flame Altar to its fifth Flame Level.
Locations:
- Nomad Highlands - Cradle of Dusk
- Nomad Highlands - Elixir Well in Umber Hollow
- Kindlewastes - Elixir Well near Rose Shell Burrow
Fell Sicklescythe
Strangely, the Fell Sicklescythe has an incredibly small moveset. Yet, that doesn’t mean this boss is easy. It is quick, mobile, and, most frustratingly, often airborne.
When it throws its sickles at you, you need to dodge them twice: once when they’re thrown, and once when they return to the Fell Sicklescythe’s hands. If you see a giant, chattering skull floating your way, run. That skull will explode for heaps of damage, and you don’t want to be in the blast zone.
Once more, the loot that you should focus on is the creature’s head. A Fell Sicklescythe head will take your Flame Altar to a level six Flame Level.
Locations:
- Kindlewastes - Haunted Sun Temple near Brittlebush
- Kindlewastes - Ridgeback Mine
- Kindlewastes - Elixir Well near Low Tide
- Kindlewastes - The Grim
- Kindlewastes - Hollow Halls
Fell Dragon Youngling
Finally, as a fresh addition with Souls of the Frozen Frontier, we have the Fell Dragon Youngling. Don’t let its name deceive you — this boss is massive!
Like the Fell Wispwyvern, this fella can only be found in one spot, and it takes more damage when it is stunned. Unlike the Fell Wispwyvern, it won’t give you a convenient opportunity to stun it. Using Chain Lightning or Stun Arrows to fill the beastie’s stun meter is likely your best bet. When it is stunned, take advantage, deal some damage to its head, and get ready to do it all again.
One thing you’ll want to be very good at during this fight is flying with your glider. The Fell Dragon Youngling can blow you off the arena’s edge, and you’ll be in for a nasty fall if you don’t pull out your glider quickly enough.
Additionally, using your glider to avoid the Fell Dragon Youngling's large fire-breath attack is a great idea. That breath attack will cover a huge part of the donut-shaped arena, but using your glider to soar underneath the dragon and land on the opposite side not only gets you out of the way, but also gives you a nice opportunity to deal some damage.
As far as loot is concerned, you’ll receive Shroud Cores, Runes, and a Fell Dragon Youngling Head for your trouble. We aren’t sure what the head's purpose is at this time, but it would look very impressive mounted on your base!
Location:
- Albaneve Summits - Howling Peak
Vorgoth, Champion of the Shroud - The Final Boss
Finally, after the army of foes you've left in your wake, it's time to face the ultimate challenge: Lord Vorgoth. This fight is split into two phases: the first, sees you fighting a large swordsman form of Vorgoth. In this phase, there's plenty of attacks you're used to, and some spooky new stuff. He'll close the gap with lunges and jumps, and swing his huge sword in your direction. He'll also cause large AOE attacks to erupt out of the ground while summoning tentacles to spawn near you. These tentacles are particularly nasty. They can easily overwhelm you, so kill them as quickly as possible to mitigate their presence. Stay mobile, don't stop dodging, and hit him with all you've got during any opening you can.
In the second phase, you'll face the Wanderer's Vessel. This is a corrupted form of Vorgoth, where the Shroud has overtaken him while giving new abilities. Here, he'll come at you with tentacle strikes, his entire seething body sliding across the floor, and some projectiles. You'll need to constantly be moving around the map and watching his moves to stay alive. Keep in mind that any weapon you have that deals Shroud-type damage will be rendered completely ineffective against both phases of this fight. Come prepared with some Fire weapons to deal extra damage instead.
When you finally topple this enormous baddie, you'll receive a heaping helping of Legendary Runes, the Shroud Vessel's Greatsword, Vorgoth's Bound Essence, and Vorgoth's Eye. Needless to say, these are some of the rarest items in the entire game. But, that's because the final fight will be a huge test of your fighting prowess. Good luck!
Location:
- Cinder's Cradle - Mother Flame's Domicile inside the Ancient Citadel

您对这篇博客有何评价?
分享您的看法,帮助我们将博客做得更好!
不喜欢
一般
喜欢

需要游戏服务器吗?
租用一台游戏服务器,您可以和朋友们在极低延迟和自定义设置下私密游玩。从 110+ 款游戏中挑选您的最爱,邀请全球玩家,享受私密对战,或者按照您自己的规则建立属于您的在线社区。





获取第一手独家资讯!
订阅我们的电子邮件,获取有关我们托管游戏、公司新闻和独家优惠的最新动态。随时掌握一手资讯!