
Palworld Ultra Raids Guide: Exclusive Rewards, Ultra Slabs, & More
Опубликовано автором

Поделиться:

Поделиться в X

Поделиться в Facebook

Поделиться в Threads

Поделиться в Bluesky

Скопировать в буфер обмена

Поделиться по email
So, you've ventured throughout the Palpagos Islands and have seen everything there is to see. You've been to the World Tree, beaten every hard-mode tower, and conquered every raid. Well, you might not have known that there are even more challenging raids in Palworld, known as the Ultra Raids. Here, we'll tell you how to start each Ultra Raid, what exclusive rewards you can earn from them, and more. Let's get raiding!
 As Palworld players who have reached the endgame will be aware, raids are highly challenging battles with enormous and powerful Pals. These Pals can only be summoned if you're using the correct item, which often takes the form of a slab. For Ultra Raids, you'll need specific Ultra slabs. Luckily, you'll receive an Ultra Slab for a raid boss once you've bested its normal raid version.
Within Ultra Raids, you can expect to fight stronger versions of the Pals you've already bested. All Ultra Raid bosses are at an enormous level 80; they have more health, more damage resistance, more attack power, and even some new movesets. If you want to stay alive, you'll need to come prepared with appropriately leveled gear and Pals.
So, why risk life and limb in an Ultra Raid? You'll largely get the same rewards that you can get from a normal raid. These rewards, such as Work Suitability Handbooks, Eggs featuring the powerful Raid Pal you've bested, and more, are all still worthwhile trinkets. However, you can earn some exclusive headgear from each Ultra Raid as well. Some of the perks from these headgear pieces are worthwhile, and some are best used as fashion statements to brag about your accomplishments.
As Palworld players who have reached the endgame will be aware, raids are highly challenging battles with enormous and powerful Pals. These Pals can only be summoned if you're using the correct item, which often takes the form of a slab. For Ultra Raids, you'll need specific Ultra slabs. Luckily, you'll receive an Ultra Slab for a raid boss once you've bested its normal raid version.
Within Ultra Raids, you can expect to fight stronger versions of the Pals you've already bested. All Ultra Raid bosses are at an enormous level 80; they have more health, more damage resistance, more attack power, and even some new movesets. If you want to stay alive, you'll need to come prepared with appropriately leveled gear and Pals.
So, why risk life and limb in an Ultra Raid? You'll largely get the same rewards that you can get from a normal raid. These rewards, such as Work Suitability Handbooks, Eggs featuring the powerful Raid Pal you've bested, and more, are all still worthwhile trinkets. However, you can earn some exclusive headgear from each Ultra Raid as well. Some of the perks from these headgear pieces are worthwhile, and some are best used as fashion statements to brag about your accomplishments.
 When fighting the new and improved Bellanoir Libero Ultra, you'll have to deal with a massive healing phase. If its health gets low enough, it can resummon a huge chunk of health to keep the fight going. This just means you need to deal even more damage on top of the already enormous health pool to take the critter down. Throw in the additional uses of Nightmare Ray and Flame Waltz, and you've got a lot more to dodge this time around.
If you successfully eliminate this raid boss, you'll receive the Witch's Crown. When worn, it will give you a Dragon Damage Reduction Lv. 1 passive. Useful for taking on some of the Dragon raids!
When fighting the new and improved Bellanoir Libero Ultra, you'll have to deal with a massive healing phase. If its health gets low enough, it can resummon a huge chunk of health to keep the fight going. This just means you need to deal even more damage on top of the already enormous health pool to take the critter down. Throw in the additional uses of Nightmare Ray and Flame Waltz, and you've got a lot more to dodge this time around.
If you successfully eliminate this raid boss, you'll receive the Witch's Crown. When worn, it will give you a Dragon Damage Reduction Lv. 1 passive. Useful for taking on some of the Dragon raids!
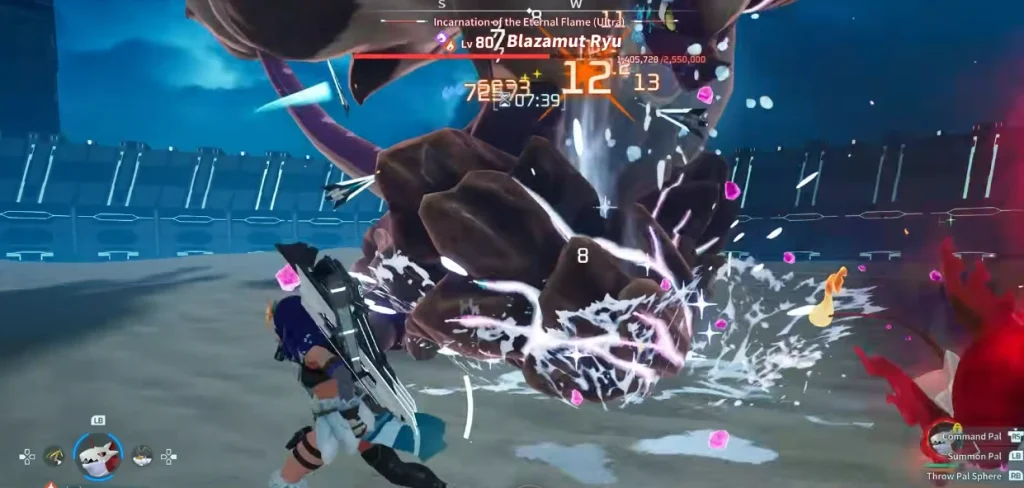
 For the big and brutish Blazamut Ryu, there's not too much that's different from its normal version. Just keep in mind that, like all Ultra Raids, everything hits harder, and the beast itself has more health.
Come out unscathed, and you'll have the Horns of Supremacy headpiece. Wear it, and you'll have a Water Damage Reduction Lv.1 buff.
For the big and brutish Blazamut Ryu, there's not too much that's different from its normal version. Just keep in mind that, like all Ultra Raids, everything hits harder, and the beast itself has more health.
Come out unscathed, and you'll have the Horns of Supremacy headpiece. Wear it, and you'll have a Water Damage Reduction Lv.1 buff.
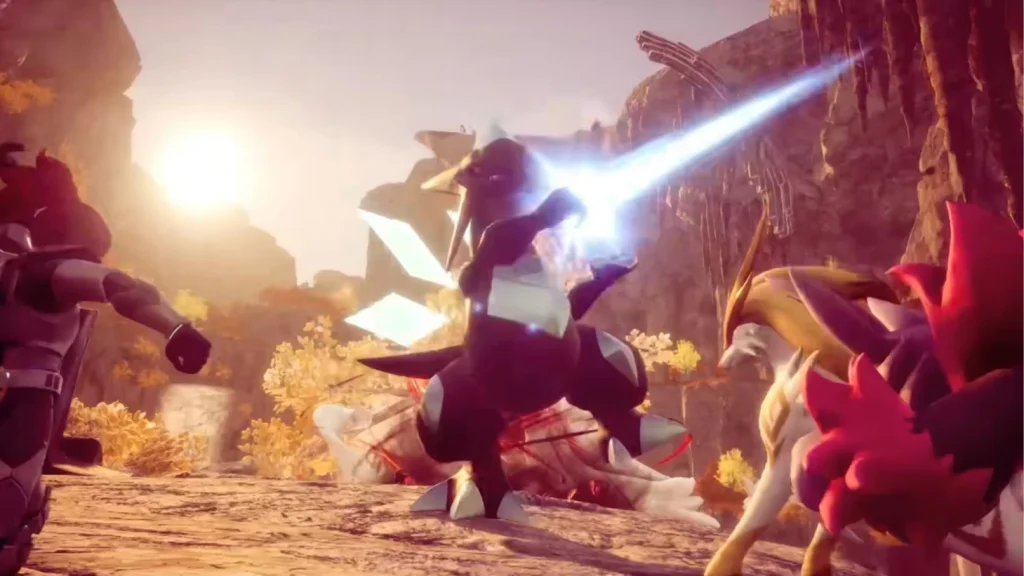 Xenolord isn't known for being easy to beat in a normal raid. The Ultra Raid is even tougher now that the monster's already powerful Beam Slicer will deal triple damage to flying targets. Flying around in a raid is usually a fantastic way to avoid damage, and that's still the case here. Just keep in mind that it can cost you dearly, with the damage buffs favoring Ultra Xenolord. Additionally, waves of Xenogard and Xenovaders can appear in this raid to give you even more enemies to worry about.
Perhaps the most morbid Ultra Raid reward, Xenolord's Head is a wearable helmet that will give you an Ice Damage Reduction Lv. 1 buff.
Xenolord isn't known for being easy to beat in a normal raid. The Ultra Raid is even tougher now that the monster's already powerful Beam Slicer will deal triple damage to flying targets. Flying around in a raid is usually a fantastic way to avoid damage, and that's still the case here. Just keep in mind that it can cost you dearly, with the damage buffs favoring Ultra Xenolord. Additionally, waves of Xenogard and Xenovaders can appear in this raid to give you even more enemies to worry about.
Perhaps the most morbid Ultra Raid reward, Xenolord's Head is a wearable helmet that will give you an Ice Damage Reduction Lv. 1 buff.
 Since you're not fighting a Pal when you take on the Moon Lord, this raid works a bit differently. For starters, it's actually called a Master Raid rather than an Ultra Raid. However, moveset-wise, not much has changed. Just stay mobile and remember that each attack will hurt you a whole lot more.
This raid doesn't offer an exclusive hat for victory. It does, however, offer a new batch of goodies: Diamonds, special Lotus items, a Moon Lord Statue Schematic, and more advanced shematics than those available in the normal raid.
Since you're not fighting a Pal when you take on the Moon Lord, this raid works a bit differently. For starters, it's actually called a Master Raid rather than an Ultra Raid. However, moveset-wise, not much has changed. Just stay mobile and remember that each attack will hurt you a whole lot more.
This raid doesn't offer an exclusive hat for victory. It does, however, offer a new batch of goodies: Diamonds, special Lotus items, a Moon Lord Statue Schematic, and more advanced shematics than those available in the normal raid.
 When fighting Hartalis Ultra, you'll need to take special care in the battle's second phase. During this phase, it will create an enormous barrier that makes it immune to damage. If you and your crew don't eliminate this barrier quickly enough, an enormous explosion will take place that has the potential to wipe out your raiding party in a single blow. Keep in mind that it changes its element to Neutral halfway through the fight; have plenty of different damage-dealing weapons and Pals, and you should be fine.
Emerge victorious, and the Crown of Salvation will be yours. With it, you'll receive an Electric Damage Reduction Lv. 1 buff.
When fighting Hartalis Ultra, you'll need to take special care in the battle's second phase. During this phase, it will create an enormous barrier that makes it immune to damage. If you and your crew don't eliminate this barrier quickly enough, an enormous explosion will take place that has the potential to wipe out your raiding party in a single blow. Keep in mind that it changes its element to Neutral halfway through the fight; have plenty of different damage-dealing weapons and Pals, and you should be fine.
Emerge victorious, and the Crown of Salvation will be yours. With it, you'll receive an Electric Damage Reduction Lv. 1 buff.
How Ultra Raids Work in Palworld
As Palworld players who have reached the endgame will be aware, raids are highly challenging battles with enormous and powerful Pals. These Pals can only be summoned if you're using the correct item, which often takes the form of a slab. For Ultra Raids, you'll need specific Ultra slabs. Luckily, you'll receive an Ultra Slab for a raid boss once you've bested its normal raid version.
Within Ultra Raids, you can expect to fight stronger versions of the Pals you've already bested. All Ultra Raid bosses are at an enormous level 80; they have more health, more damage resistance, more attack power, and even some new movesets. If you want to stay alive, you'll need to come prepared with appropriately leveled gear and Pals.
So, why risk life and limb in an Ultra Raid? You'll largely get the same rewards that you can get from a normal raid. These rewards, such as Work Suitability Handbooks, Eggs featuring the powerful Raid Pal you've bested, and more, are all still worthwhile trinkets. However, you can earn some exclusive headgear from each Ultra Raid as well. Some of the perks from these headgear pieces are worthwhile, and some are best used as fashion statements to brag about your accomplishments.
Bellanoir Libero Ultra
When fighting the new and improved Bellanoir Libero Ultra, you'll have to deal with a massive healing phase. If its health gets low enough, it can resummon a huge chunk of health to keep the fight going. This just means you need to deal even more damage on top of the already enormous health pool to take the critter down. Throw in the additional uses of Nightmare Ray and Flame Waltz, and you've got a lot more to dodge this time around.
If you successfully eliminate this raid boss, you'll receive the Witch's Crown. When worn, it will give you a Dragon Damage Reduction Lv. 1 passive. Useful for taking on some of the Dragon raids!
- Required Slab: Bellanoir Libero (Ultra) Slab
- HP: 2,394,000
- Attack Damage: 1000%
- Damage Reduction: 91%
- Element: Dark
- Possible Drops:
- Ancient Civilization Core:
- Quantity: 10
- Probability: 100%
- Witch's Crown: 1
- Quantity: 1
- Probability: 100%
- Training Crystal:
- Quantity: 10
- Probability: 100%
- Bellanoir Libero (Ultra) Slab:
- Quantity: 1
- Probability: 100%
- Applied Ranching Handbook I
- Quantity: 2
- Probability: 33.3%
- Applied Transporting Handbook I
- Quantity: 2
- Probability: 33.3%
- Applied Medicine Production Handbook I
- Quantity: 2
- Probability: 33.3%
- Twilight Siren Bellanoir Libero Huge Dark Egg
- Quantity: 1
- Probability: 10%
- Bellanoir Libero Huge Dark Egg
- Quantity: 1
- Probability: 90%
- Ancient Civilization Core:
Blazamut Ryu Ultra
For the big and brutish Blazamut Ryu, there's not too much that's different from its normal version. Just keep in mind that, like all Ultra Raids, everything hits harder, and the beast itself has more health.
Come out unscathed, and you'll have the Horns of Supremacy headpiece. Wear it, and you'll have a Water Damage Reduction Lv.1 buff.
- Required Slab: Blazamut Ryu (Ultra) Slab
- HP: 2,550,000
- Attack Damage: 800%
- Damage Reduction: 91%
- Element: Fire & Dragon
- Possible Drops:
- Ancient Civilization Core:
- Quantity: 10
- Probability: 100%
- Horns of Supremacy:
- Quantity: 1
- Probability: 100%
- Training Crystal:
- Quantity: 10
- Probability: 100%
- Blazamut Ryu (Ultra) Slab:
- Quantity: 1
- Probability: 10%
- Applied Mining Handbook I:
- Quantity: 1
- Probability: 33.3%
- Applied Lumbering Handbook I:
- Quantity: 1
- Probability: 33.3%
- Applied Gathering Handbook I:
- Quantity: 1
- Probability: 33.3%
- Incarnation of the Eternal Flame Blazamut Ryu Huge Dragon Egg:
- Quantity: 1
- Probability: 10%
- Blazamut Ryu Huge Dragon Egg:
- Quantity: 1
- Probability: 90%
- Ancient Civilization Core:
Xenolord Ultra
Xenolord isn't known for being easy to beat in a normal raid. The Ultra Raid is even tougher now that the monster's already powerful Beam Slicer will deal triple damage to flying targets. Flying around in a raid is usually a fantastic way to avoid damage, and that's still the case here. Just keep in mind that it can cost you dearly, with the damage buffs favoring Ultra Xenolord. Additionally, waves of Xenogard and Xenovaders can appear in this raid to give you even more enemies to worry about.
Perhaps the most morbid Ultra Raid reward, Xenolord's Head is a wearable helmet that will give you an Ice Damage Reduction Lv. 1 buff.
- Required Slab: Xenolord (Ultra) Slab
- HP: 2,394,000
- Attack Damage: 1000%
- Damage Reduction: 91%
- Element: Dragon & Dark
- Possible Drops:
- Ancient Civilization Core:
- Quantity: 10
- Probability: 100%
- Xenolord's Head:
- Quantity: 1
- Probability: 100%
- Training Crystal:
- Quantity: 10
- Probability: 100%
- Xenolord (Ultra) Slab:
- Quantity: 1
- Probability: 10%
- Applied Handiwork Handbook I:
- Quantity: 1
- Probability: 33.3%
- Applied Generating Electricity Handbook I:
- Quantity: 1
- Probability: 33.3%
- Applied Cooling Handbook I:
- Quantity: 1
- Probability: 33.3%
- Invader from Space Xenolord Huge Dark Egg:
- Quantity: 1
- Probability: 10%
- Xenolord Huge Dragon Egg:
- Quantity: 1
- Probability: 90%
- Ancient Civilization Core:
Moon Lord Master
Since you're not fighting a Pal when you take on the Moon Lord, this raid works a bit differently. For starters, it's actually called a Master Raid rather than an Ultra Raid. However, moveset-wise, not much has changed. Just stay mobile and remember that each attack will hurt you a whole lot more.
This raid doesn't offer an exclusive hat for victory. It does, however, offer a new batch of goodies: Diamonds, special Lotus items, a Moon Lord Statue Schematic, and more advanced shematics than those available in the normal raid.
- Required Slab: Celestial Sigil (Master)
- HP: 2,352,000
- Attack Damage: 700%
- Damage Reduction: 75%
- Element: Non-Elemental
- Possible Drops:
- Ancient Civilization Core:
- Quantity: 10
- Probability: 100%
- Celestial Sigil (Master):
- Quantity: 1
- Probability: 100%
- Training Crystal:
- Quantity: 10
- Probability: 100%
- Diamond:
- Quantity: 5 - 10
- Probability: 100%
- Ancient Civilization Parts:
- Quantity: 10 - 20
- Probability: 100%
- Life Lotus (L):
- Quantity: 1
- Probability: 20%
- Stamina Lotus (L):
- Quantity: 1
- Probability: 20%
- Power Lotus (L):
- Quantity: 1
- Probability: 20%
- Speed Lotus (L):
- Quantity: 1
- Probability: 20%
- Carrying Lotus (L):
- Quantity: 1
- Probability: 100%
- Terra Blade Schematic 4:
- Quantity: 1
- Probability: 25%
- Vortex Beater Schematic 4
- Quantity: 1
- Probability: 25%
- Nightglow Schematic 4
- Quantity: 1
- Probability: 25%
- Terraprisma Schematic 4
- Quantity: 1
- Probability: 25%
- Moon Lord Statue Schematic
- Quantity: 1
- Probability: 100%
- Life Fruit
- Quantity: 3
- Probability: 33.3%
- Power Fruit
- Quantity: 3
- Probability: 33.3%
- Stout Fruit
- Quantity: 3
- Probability: 33.3%
- Ancient Civilization Core:
Hartalis Ultra
When fighting Hartalis Ultra, you'll need to take special care in the battle's second phase. During this phase, it will create an enormous barrier that makes it immune to damage. If you and your crew don't eliminate this barrier quickly enough, an enormous explosion will take place that has the potential to wipe out your raiding party in a single blow. Keep in mind that it changes its element to Neutral halfway through the fight; have plenty of different damage-dealing weapons and Pals, and you should be fine.
Emerge victorious, and the Crown of Salvation will be yours. With it, you'll receive an Electric Damage Reduction Lv. 1 buff.
- Required Slab: Hartalis (Ultra) Slab
- HP: 1,952,000
- Attack Damage: 1300%
- Damage Reduction: 80%
- Element: Water & Grass
- Possible Drops:
-
- Ancient Civilization Core:
- Quantity: 10
- Probability: 100%
- Crown of Salvation:
- Quantity: 1
- Probability: 100%
- Training Crystal:
- Quantity: 10
- Probability: 100%
- Hartalis (Ultra) Slab:
- Quantity: 1
- Probability: 100%
- Applied Kindling Handbook I:
- Quantity: 1
- Probability: 33.3%
- Applied Watering Handbook I:
- Quantity: 1
- Probability: 33.3%
- Applied Planting Handbook I:
- Quantity: 1
- Probability: 33.3%
- King of Salvation Hartalis Huge Common Egg:
- Quantity: 1
- Probability: 10%
- Hartalis Huge Dragon Egg:
- Quantity: 1
- Probability: 90%
- Ancient Civilization Core:
-
Создайте свой собственный
сервер Palworld
сервер Palworld
Выберите тариф, укажите игру и играйте с друзьями!
Подпишитесь на нашу рассылку
Подпишитесь, чтобы получать последние новости из мира игр!

Присоединяйтесь к нашему Discord
Станьте частью нашего сообщества, в котором уже более 20000 единомышленников!
Как бы вы оценили этот блог?
Поделитесь своим мнением и помогите нам сделать наши блоги еще лучше!
Не понравилось
Нейтрально
Понравилось

Нужен игровой сервер?
Арендуйте игровой сервер, где вы и ваши друзья сможете играть в закрытом режиме с низкой задержкой и собственными настройками. Выбирайте из 110+ игр, приглашайте людей со всего мира и наслаждайтесь приватными матчами или создайте свое собственное онлайн-сообщество со своими правилами.

Похожие статьи



УЗНАЙТЕ ВСЕ ПЕРВЫМИ!
Подпишитесь на нашу рассылку, чтобы получать обновления о наших играх, новости компании и эксклюзивные предложения. Будьте в курсе!