Enshrouded Bosses Guide: Every Boss, Locations, Loot, & More
Publicado el por
Compartir:
Compartir en X
Compartir en Facebook
Compartir en Threads
Compartir en Bluesky
Copiar al portapapeles
Compartir por correo electrónico
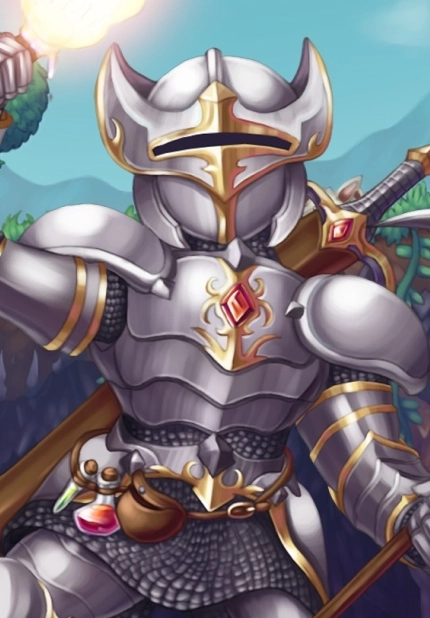
Enshrouded offers players plenty of creatures to discover and fight, including some giant bosses scattered all around its world. Below, we’ve detailed every boss in Enshrouded, where they can be found, some tips for fighting them, and the loot rewards they offer!
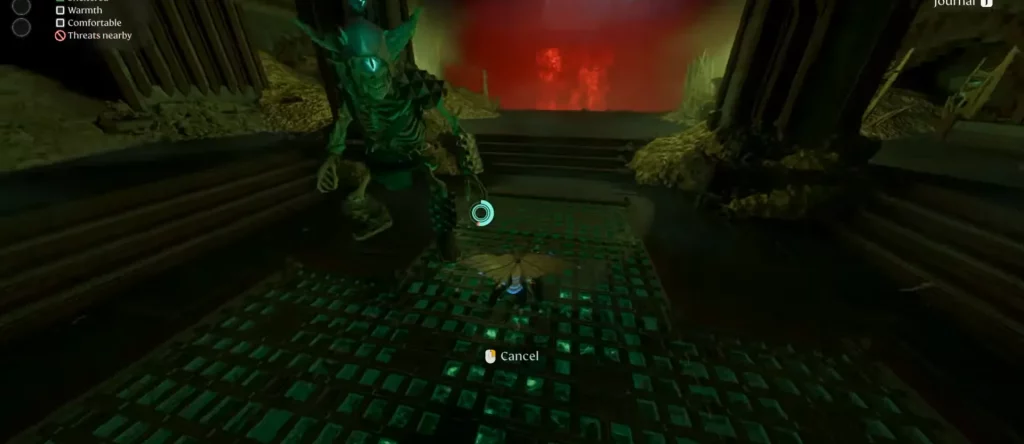
 A Vukah Brawler is likely to be one of the earlier bosses that you’ll encounter in Enshrouded. They’re not too tricky, but can prove a bit more challenging for melee-focused players.
Vukah Brawlers are vulnerable to fire damage and often surround themselves with smaller enemies. Take the smaller foes out before focusing on the Brawler, and you’ll have a much easier time. Specifically, you'll want to target any Vukah wielding a staff. They should be your first priority as they'll attempt to heal the Vukah Brawler and other enemies.
As far as the Brawler itself, it only has one attack — a giant leap across the arena to land on you. It's a quick and strong move, but one that's easily avoided with a dodge roll. However, you'll want to avoid large patches of mud. If your feet get caked with mud, you'll be significantly slower and have a harder time dodging the Brawler.
Along with their heads, Vukah Brawlers drop fairly average loot, such as common resources like leather and random weapons. However, there is a chance for Vukah Brawlers to drop a legendary weapon known as Jezmina’s Apotheosis.
Locations:
A Vukah Brawler is likely to be one of the earlier bosses that you’ll encounter in Enshrouded. They’re not too tricky, but can prove a bit more challenging for melee-focused players.
Vukah Brawlers are vulnerable to fire damage and often surround themselves with smaller enemies. Take the smaller foes out before focusing on the Brawler, and you’ll have a much easier time. Specifically, you'll want to target any Vukah wielding a staff. They should be your first priority as they'll attempt to heal the Vukah Brawler and other enemies.
As far as the Brawler itself, it only has one attack — a giant leap across the arena to land on you. It's a quick and strong move, but one that's easily avoided with a dodge roll. However, you'll want to avoid large patches of mud. If your feet get caked with mud, you'll be significantly slower and have a harder time dodging the Brawler.
Along with their heads, Vukah Brawlers drop fairly average loot, such as common resources like leather and random weapons. However, there is a chance for Vukah Brawlers to drop a legendary weapon known as Jezmina’s Apotheosis.
Locations:
 There are three different types of Scavenger Matrons. The standard variety is a large, slow, and close-ranged attacker. Meanwhile, the Gorger variety will hurl poisonous projectiles toward players, and the Grizzler regularly calls in reinforcements.
No matter which kind you’re facing, you’ll have an easy time if you use some ranged attacks, such as bows or spells. Fortunately, the camps where you often fight Scavengers have a fair amount of tricky terrain. Tricky for the Matron, that is. If you put enough boxes, rocks, or other pieces of environment between the Matron and yourself, you'll have a very easy time plucking away the boss's health from afar.
Getting up close to a Scavenger Matron is a bit riskier, but there's a nice trick for melee users. Getting as close to a Matron as you can and staying behind it is very easy to do. They don't turn very quickly, and they don't have a great move for getting you if you're up close. They do have a large, close-ranged attack, but it has a large telegraph, and you can easily avoid it. So, when fighting a Matron, either get up super close or stay far away!
As far as loot goes, the Scavenger Matron’s head (or helmet in this case) is very valuable. You’ll need one in order to increase your Flame Altar to a Flame Level of 3. You'll also need one for a grapple hook upgrade, so, luckily, each Scavenger Matron variant can drop the head that you need.
Locations:
There are three different types of Scavenger Matrons. The standard variety is a large, slow, and close-ranged attacker. Meanwhile, the Gorger variety will hurl poisonous projectiles toward players, and the Grizzler regularly calls in reinforcements.
No matter which kind you’re facing, you’ll have an easy time if you use some ranged attacks, such as bows or spells. Fortunately, the camps where you often fight Scavengers have a fair amount of tricky terrain. Tricky for the Matron, that is. If you put enough boxes, rocks, or other pieces of environment between the Matron and yourself, you'll have a very easy time plucking away the boss's health from afar.
Getting up close to a Scavenger Matron is a bit riskier, but there's a nice trick for melee users. Getting as close to a Matron as you can and staying behind it is very easy to do. They don't turn very quickly, and they don't have a great move for getting you if you're up close. They do have a large, close-ranged attack, but it has a large telegraph, and you can easily avoid it. So, when fighting a Matron, either get up super close or stay far away!
As far as loot goes, the Scavenger Matron’s head (or helmet in this case) is very valuable. You’ll need one in order to increase your Flame Altar to a Flame Level of 3. You'll also need one for a grapple hook upgrade, so, luckily, each Scavenger Matron variant can drop the head that you need.
Locations:
 It's possible that the basic Cyclops in Enshrouded is the easiest boss in the game. This lumbering oaf doesn't have the best ranged attacks, and it telegraphs its close-ranged moves for a long time. If you're a ranged user, you shouldn't have any difficulty kiting the beastie around its dwelling and blasting it from afar.
If you're a melee player, you'll likely have an even easier time, as when you hug the giant's ankles, it will constantly try to stomp on you. However, its stomp has a fairly long and obvious wind-up. You can dodge out of the way and continue to relentlessly slash on the opposite foot for loads of damage. The only thing to keep an eye on is your stamina. Use too much, and one of those stomps might land on your head.
Once you've bested a Cyclops, you'll not have the most exciting loot in the world to claim: a Cyclops Head. What's it good for other than being gross? Well, it's nothing more than a trophy piece. Combine it with nails and wood planks at a Hunter crafting station, and you'll have a trophy. Throw in some bronze or iron bars, and you'll have a bronze or iron trophy, respectively.
Locations:
It's possible that the basic Cyclops in Enshrouded is the easiest boss in the game. This lumbering oaf doesn't have the best ranged attacks, and it telegraphs its close-ranged moves for a long time. If you're a ranged user, you shouldn't have any difficulty kiting the beastie around its dwelling and blasting it from afar.
If you're a melee player, you'll likely have an even easier time, as when you hug the giant's ankles, it will constantly try to stomp on you. However, its stomp has a fairly long and obvious wind-up. You can dodge out of the way and continue to relentlessly slash on the opposite foot for loads of damage. The only thing to keep an eye on is your stamina. Use too much, and one of those stomps might land on your head.
Once you've bested a Cyclops, you'll not have the most exciting loot in the world to claim: a Cyclops Head. What's it good for other than being gross? Well, it's nothing more than a trophy piece. Combine it with nails and wood planks at a Hunter crafting station, and you'll have a trophy. Throw in some bronze or iron bars, and you'll have a bronze or iron trophy, respectively.
Locations:
 Much like the Matrons, when you’re fighting a Hollow Cyclops, you’ll want to avoid the middle ground. Either plink away its health from a distance, or try to stick to its backside. Unlike the Matrons, the Cyclops has quite a few tricks up its sleeve. For starters, its large club attack. This move cannot be blocked, but you can dodge away from it.
Next, if the Cyclops equips a large sword, it's about to do two horizontal swipes. The first swipe cannot be blocked and can only be dodged if you jump over it. A dodge roll will not work. Similarly, the second swipe cannot be blocked but can be avoided with a dodge roll.
As its final weapon-based move, the Cyclops will occasionally equip a dagger in each hand before delivering three targeted thrusts. These cannot be dodged, but they can be blocked with a shield! All of these different moves can be avoided if you're close enough to the Cyclops and dodge roll underneath it. Sticking around its feet will cause it to do a stomping move, so keep an eye out for that.
Finally, the Cyclops as a large AOE attack that covers the ground around it. Don't worry! It doesn't do any damage to you if it hits. It simply sends you high into the air, and you can use your glider to land safely. Make sure you use your glider, or you will take some fall damage.
When it comes to loot, a Hollow Cyclops doesn’t offer much unless you have a specific quest to gather its head or some Giant Bones.
Locations:
Much like the Matrons, when you’re fighting a Hollow Cyclops, you’ll want to avoid the middle ground. Either plink away its health from a distance, or try to stick to its backside. Unlike the Matrons, the Cyclops has quite a few tricks up its sleeve. For starters, its large club attack. This move cannot be blocked, but you can dodge away from it.
Next, if the Cyclops equips a large sword, it's about to do two horizontal swipes. The first swipe cannot be blocked and can only be dodged if you jump over it. A dodge roll will not work. Similarly, the second swipe cannot be blocked but can be avoided with a dodge roll.
As its final weapon-based move, the Cyclops will occasionally equip a dagger in each hand before delivering three targeted thrusts. These cannot be dodged, but they can be blocked with a shield! All of these different moves can be avoided if you're close enough to the Cyclops and dodge roll underneath it. Sticking around its feet will cause it to do a stomping move, so keep an eye out for that.
Finally, the Cyclops as a large AOE attack that covers the ground around it. Don't worry! It doesn't do any damage to you if it hits. It simply sends you high into the air, and you can use your glider to land safely. Make sure you use your glider, or you will take some fall damage.
When it comes to loot, a Hollow Cyclops doesn’t offer much unless you have a specific quest to gather its head or some Giant Bones.
Locations:
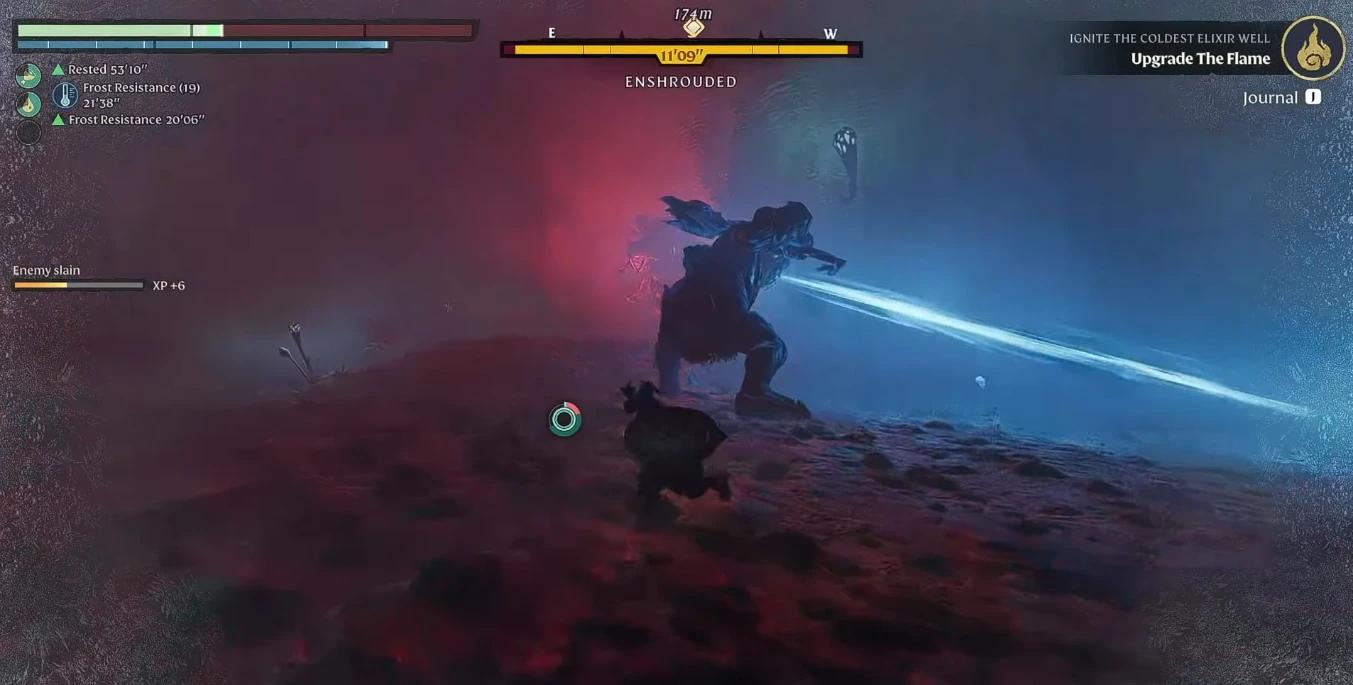 We've come a long way from the basic Cyclops. The Fell Cyclops is a monstrously hard fight compared to its normal cousin. This is more of a late-game encounter in Enshrouded and, as such, you'll want the best armor and weapons you can get your hands on. Additionally, the sole area home to the Fell Cyclops is incredibly cold. Make sure you've got all the frost resistance you can stack up with armor and food.
The Fell Cyclops's biggest threat is its laser-powered eye. It can fire a variety of laser attacks your way. Some blasts will follow a line directly in front of the monster, some will sweep side-to-side, and sometimes its head will track you. The answer to all of these is to keep moving and do your best to get behind the Fell Cyclops itself.
It also features moves you'll be familiar with from fighting the other types of Cyclops. Swinging its hammer, trying to stomp you, and the enormously threatening ground slam that ruptures the earth. For this last one, you'll want to jump right before the beast brings both of its hands slamming to the earth. So long as you avoid the new laser moves, this should feel familiar to any player who has slain the other Cyclops variants.
Once you've managed to fell this towering creature, you can find a Fell Cyclops Head or Enshrouded Cyclops Eye. As you might have already guessed, the head is only good for trophy-making. However, the eye can be used to create the following pieces of gear:
We've come a long way from the basic Cyclops. The Fell Cyclops is a monstrously hard fight compared to its normal cousin. This is more of a late-game encounter in Enshrouded and, as such, you'll want the best armor and weapons you can get your hands on. Additionally, the sole area home to the Fell Cyclops is incredibly cold. Make sure you've got all the frost resistance you can stack up with armor and food.
The Fell Cyclops's biggest threat is its laser-powered eye. It can fire a variety of laser attacks your way. Some blasts will follow a line directly in front of the monster, some will sweep side-to-side, and sometimes its head will track you. The answer to all of these is to keep moving and do your best to get behind the Fell Cyclops itself.
It also features moves you'll be familiar with from fighting the other types of Cyclops. Swinging its hammer, trying to stomp you, and the enormously threatening ground slam that ruptures the earth. For this last one, you'll want to jump right before the beast brings both of its hands slamming to the earth. So long as you avoid the new laser moves, this should feel familiar to any player who has slain the other Cyclops variants.
Once you've managed to fell this towering creature, you can find a Fell Cyclops Head or Enshrouded Cyclops Eye. As you might have already guessed, the head is only good for trophy-making. However, the eye can be used to create the following pieces of gear:
 Technically, the Fell Critter Queen is more of a miniboss than a true boss in Enshrouded. However, it's still a worthwhile fight thanks to the Giant Critter Scales you can gather from defeating the beastie. These are necessary for crafting a multitude of chest pieces.
Luckily, it's also not one of the most challenging fights in the game. The biggest threat to keep track of is the Critter Queen summoning hordes of smaller bugs. These bugs will rush you, slash at you, and, most lethally, try to explode next to you. Dispatching them quickly is the key. At the same time, the queen herself will try to hit you with long-ranged wads of insectoid spit. The key in this fight, whether you're using a melee or ranged weapon, is to stay mobile.
As for attacking the queen, she is a bit on the squishy side. It won't take too much damage to bring her down. Ranged users ought to pick their minion-free moments and blast her from afar. Meanwhile, melee users should be aware that the queen will try to smack you with her claws if you get too close. Luckily, the queen isn't too fast and simply dodging these swipes to attack her rear can grant you tons of damage.
Location:
Technically, the Fell Critter Queen is more of a miniboss than a true boss in Enshrouded. However, it's still a worthwhile fight thanks to the Giant Critter Scales you can gather from defeating the beastie. These are necessary for crafting a multitude of chest pieces.
Luckily, it's also not one of the most challenging fights in the game. The biggest threat to keep track of is the Critter Queen summoning hordes of smaller bugs. These bugs will rush you, slash at you, and, most lethally, try to explode next to you. Dispatching them quickly is the key. At the same time, the queen herself will try to hit you with long-ranged wads of insectoid spit. The key in this fight, whether you're using a melee or ranged weapon, is to stay mobile.
As for attacking the queen, she is a bit on the squishy side. It won't take too much damage to bring her down. Ranged users ought to pick their minion-free moments and blast her from afar. Meanwhile, melee users should be aware that the queen will try to smack you with her claws if you get too close. Luckily, the queen isn't too fast and simply dodging these swipes to attack her rear can grant you tons of damage.
Location:
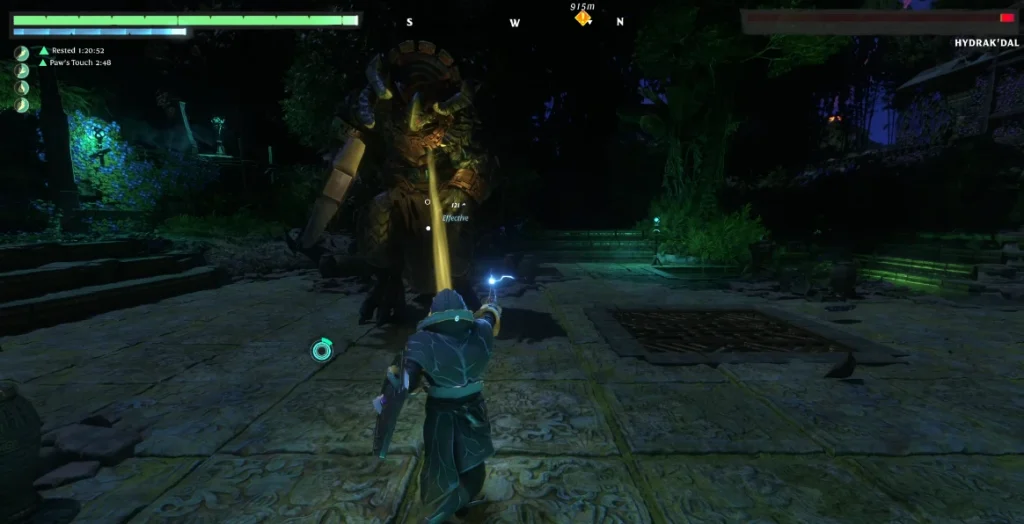 Another miniboss, the Hydrak'Dal is much more fierce than the title miniboss would imply. This lizard will rush you relentlessly and even cast a few magic spells this way. Even more so than the Fell Critter Queen, mobility is the most important factor in this fight. The Hydrak'Dal will try to slow you down with ice spikes, but the most dangerous spell is its earthquake summon. Luckily, it telegraphs the move with a large wind-up, and a glowing yellow circle will appear beneath your feet. Move out of the way fast, or you'll be sent flying with a seismic burst of energy.
Melee users will have the hardest time in this fight. Getting close to the Hydrak'Dal prompts it to unleash a flurry of melee attacks. For the best results, ranged battle is advised. Luckily, the arena where you'll fight a Hydrak'Dal is filled with platforms, nooks, and crannies. If you need a place to recover or simply get in a few ranged shots, it's easy to get up high and out of reach of the Hydrak'Dal's attacks. Well, most of them. Always keep an eye out for that personalized earthquake!
When you defeat the lizard, you'll receive a Hydrak'Dal Head as a reward. Good for trophies and necessary for upgrading your Flame Altar to level 9.
Location:
Another miniboss, the Hydrak'Dal is much more fierce than the title miniboss would imply. This lizard will rush you relentlessly and even cast a few magic spells this way. Even more so than the Fell Critter Queen, mobility is the most important factor in this fight. The Hydrak'Dal will try to slow you down with ice spikes, but the most dangerous spell is its earthquake summon. Luckily, it telegraphs the move with a large wind-up, and a glowing yellow circle will appear beneath your feet. Move out of the way fast, or you'll be sent flying with a seismic burst of energy.
Melee users will have the hardest time in this fight. Getting close to the Hydrak'Dal prompts it to unleash a flurry of melee attacks. For the best results, ranged battle is advised. Luckily, the arena where you'll fight a Hydrak'Dal is filled with platforms, nooks, and crannies. If you need a place to recover or simply get in a few ranged shots, it's easy to get up high and out of reach of the Hydrak'Dal's attacks. Well, most of them. Always keep an eye out for that personalized earthquake!
When you defeat the lizard, you'll receive a Hydrak'Dal Head as a reward. Good for trophies and necessary for upgrading your Flame Altar to level 9.
Location:
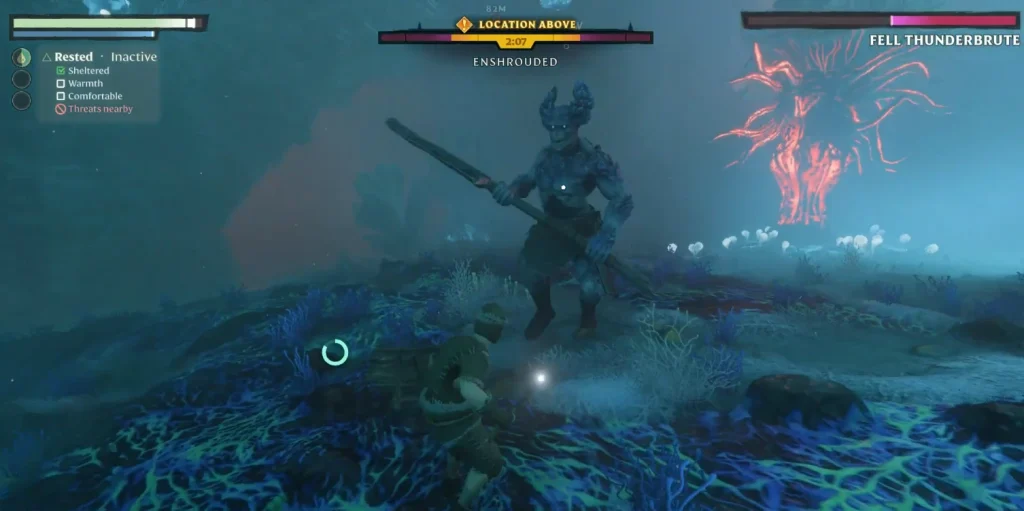 The final miniboss in our list, you'll run into Fell Thunderbrutes nearly everywhere in your adventuring. They're common, they're angry, but they aren't too hard to beat. The quickest way to defeat one is with ranged attacks. Thunderbrutes only want to get up close and smack you, but they're very slow. If you have a good few spells and/or a strong bow, you can dispatch a Thunderbrute at range with ease.
Melee users aren't out of luck either, though. The Thunderbrute's movement and attacks are all slow. If you're up close, you can easily dodge out of the way when it slowly winds up a swing or a stomp. Do your best to dodge roll behind it and lay on the pressure. As always, simply keep an eye on your stamina so you don't leave yourself without an escape.
When you've beaten a Fell Thunderbrute, it will drop a Shroud Core, a Fell Thunderbrute Head, and some Runes. It even has the chance to drop a Fell Commander's Bow if you're lucky. However, the Shroud Core is the real prize. With these, you can craft Improved Grappling Hooks or Medium Magic Chests.
Location:
The final miniboss in our list, you'll run into Fell Thunderbrutes nearly everywhere in your adventuring. They're common, they're angry, but they aren't too hard to beat. The quickest way to defeat one is with ranged attacks. Thunderbrutes only want to get up close and smack you, but they're very slow. If you have a good few spells and/or a strong bow, you can dispatch a Thunderbrute at range with ease.
Melee users aren't out of luck either, though. The Thunderbrute's movement and attacks are all slow. If you're up close, you can easily dodge out of the way when it slowly winds up a swing or a stomp. Do your best to dodge roll behind it and lay on the pressure. As always, simply keep an eye on your stamina so you don't leave yourself without an escape.
When you've beaten a Fell Thunderbrute, it will drop a Shroud Core, a Fell Thunderbrute Head, and some Runes. It even has the chance to drop a Fell Commander's Bow if you're lucky. However, the Shroud Core is the real prize. With these, you can craft Improved Grappling Hooks or Medium Magic Chests.
Location:
 This is a giant boss. Unlike most bosses, you’ll only find the Fell Wispwyvern in a single location. It has arena-sweeping ice attacks, can summon reinforcements, and it’s not too slow either. Luckily, it has a unique weakness. When you see the Fell Wispwyvern charging up a large, ice-breath attack, you can shoot its mouth with an arrow to stun it.
During this stunned phase, you’ll have a huge window of time to try and deal as much damage as possible. When that window is up, keep dodging its attacks and keep an eye out for another chance to knock it down.
Also, unlike other bosses, the Fell Wispwyvern offers a bit more unique loot. It drops its head, of course, which you’ll need to take your Flame Altar to Flame Level 4. However, it also drops Shroud Cores, Runes, a Commander’s Ring, and the Key to the Pike. The Commander’s Ring is a nice find as it increases your health and mana by a whopping 30 points each. The Key to the Pike is also useful, as it opens all doors in Pike Castle.
Location:
This is a giant boss. Unlike most bosses, you’ll only find the Fell Wispwyvern in a single location. It has arena-sweeping ice attacks, can summon reinforcements, and it’s not too slow either. Luckily, it has a unique weakness. When you see the Fell Wispwyvern charging up a large, ice-breath attack, you can shoot its mouth with an arrow to stun it.
During this stunned phase, you’ll have a huge window of time to try and deal as much damage as possible. When that window is up, keep dodging its attacks and keep an eye out for another chance to knock it down.
Also, unlike other bosses, the Fell Wispwyvern offers a bit more unique loot. It drops its head, of course, which you’ll need to take your Flame Altar to Flame Level 4. However, it also drops Shroud Cores, Runes, a Commander’s Ring, and the Key to the Pike. The Commander’s Ring is a nice find as it increases your health and mana by a whopping 30 points each. The Key to the Pike is also useful, as it opens all doors in Pike Castle.
Location:
 We’re back to bosses that can be found in multiple locations, and this one isn’t quite as intense as the Fell Wispwyvern. Despite its small moveset, however, it can still deal some damage.
The two things to keep in mind during this fight are to stay more mobile and to dispel the Hornets as quickly as you can. Whether you use an attack or a torch, you’ll want them out of the way so that you can focus on the Fell Monstrosity. Luckily, the beastie is vulnerable to fire, which can make things a bit easier.
Other than occasionally spawning Hornets, the Fell Monstrosity has only a few ranged attacks. They have obvious telegraphs and are easy to avoid, so long as you keep on moving.
While it doesn’t drop any unique rings like the Wispwyvern, you will need a Fell Monstrosity Head to, you guessed it, advance your Flame Altar. A Fell Monstrosity head will take your Flame Altar to its fifth Flame Level.
Locations:
We’re back to bosses that can be found in multiple locations, and this one isn’t quite as intense as the Fell Wispwyvern. Despite its small moveset, however, it can still deal some damage.
The two things to keep in mind during this fight are to stay more mobile and to dispel the Hornets as quickly as you can. Whether you use an attack or a torch, you’ll want them out of the way so that you can focus on the Fell Monstrosity. Luckily, the beastie is vulnerable to fire, which can make things a bit easier.
Other than occasionally spawning Hornets, the Fell Monstrosity has only a few ranged attacks. They have obvious telegraphs and are easy to avoid, so long as you keep on moving.
While it doesn’t drop any unique rings like the Wispwyvern, you will need a Fell Monstrosity Head to, you guessed it, advance your Flame Altar. A Fell Monstrosity head will take your Flame Altar to its fifth Flame Level.
Locations:
 Strangely, the Fell Sicklescythe has an incredibly small moveset. Yet, that doesn’t mean this boss is easy. It is quick, mobile, and, most frustratingly, often airborne.
When it throws its sickles at you, you need to dodge them twice: once when they’re thrown, and once when they return to the Fell Sicklescythe’s hands. If you see a giant, chattering skull floating your way, run. That skull will explode for heaps of damage, and you don’t want to be in the blast zone.
Once more, the loot that you should focus on is the creature’s head. A Fell Sicklescythe head will take your Flame Altar to a level six Flame Level.
Locations:
Strangely, the Fell Sicklescythe has an incredibly small moveset. Yet, that doesn’t mean this boss is easy. It is quick, mobile, and, most frustratingly, often airborne.
When it throws its sickles at you, you need to dodge them twice: once when they’re thrown, and once when they return to the Fell Sicklescythe’s hands. If you see a giant, chattering skull floating your way, run. That skull will explode for heaps of damage, and you don’t want to be in the blast zone.
Once more, the loot that you should focus on is the creature’s head. A Fell Sicklescythe head will take your Flame Altar to a level six Flame Level.
Locations:
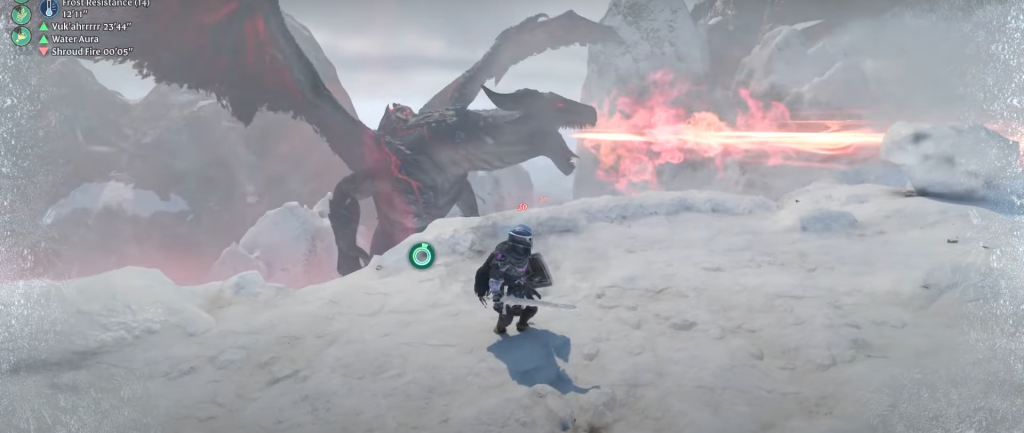 Finally, as a fresh addition with Souls of the Frozen Frontier, we have the Fell Dragon Youngling. Don’t let its name deceive you — this boss is massive!
Like the Fell Wispwyvern, this fella can only be found in one spot, and it takes more damage when it is stunned. Unlike the Fell Wispwyvern, it won’t give you a convenient opportunity to stun it. Using Chain Lightning or Stun Arrows to fill the beastie’s stun meter is likely your best bet. When it is stunned, take advantage, deal some damage to its head, and get ready to do it all again.
One thing you’ll want to be very good at during this fight is flying with your glider. The Fell Dragon Youngling can blow you off the arena’s edge, and you’ll be in for a nasty fall if you don’t pull out your glider quickly enough.
Additionally, using your glider to avoid the Fell Dragon Youngling's large fire-breath attack is a great idea. That breath attack will cover a huge part of the donut-shaped arena, but using your glider to soar underneath the dragon and land on the opposite side not only gets you out of the way, but also gives you a nice opportunity to deal some damage.
As far as loot is concerned, you’ll receive Shroud Cores, Runes, and a Fell Dragon Youngling Head for your trouble. We aren’t sure what the head's purpose is at this time, but it would look very impressive mounted on your base!
Location:
Finally, as a fresh addition with Souls of the Frozen Frontier, we have the Fell Dragon Youngling. Don’t let its name deceive you — this boss is massive!
Like the Fell Wispwyvern, this fella can only be found in one spot, and it takes more damage when it is stunned. Unlike the Fell Wispwyvern, it won’t give you a convenient opportunity to stun it. Using Chain Lightning or Stun Arrows to fill the beastie’s stun meter is likely your best bet. When it is stunned, take advantage, deal some damage to its head, and get ready to do it all again.
One thing you’ll want to be very good at during this fight is flying with your glider. The Fell Dragon Youngling can blow you off the arena’s edge, and you’ll be in for a nasty fall if you don’t pull out your glider quickly enough.
Additionally, using your glider to avoid the Fell Dragon Youngling's large fire-breath attack is a great idea. That breath attack will cover a huge part of the donut-shaped arena, but using your glider to soar underneath the dragon and land on the opposite side not only gets you out of the way, but also gives you a nice opportunity to deal some damage.
As far as loot is concerned, you’ll receive Shroud Cores, Runes, and a Fell Dragon Youngling Head for your trouble. We aren’t sure what the head's purpose is at this time, but it would look very impressive mounted on your base!
Location:
All Enshrouded Bosses
Before we jump into specifics, there are a few similarities between Enshrouded bosses to keep in mind. First, several bosses can be found in multiple spots throughout the world of Embervale. Second, bosses will respawn after a certain amount of in-game time has passed or following a server reset. Second, every boss has a chance to drop their head as a collectible item once they’re defeated. Some heads have a specific purpose, while others only exist as a trophy and testament to your victory. We’ll outline which heads are which down below.Vukah Brawler
A Vukah Brawler is likely to be one of the earlier bosses that you’ll encounter in Enshrouded. They’re not too tricky, but can prove a bit more challenging for melee-focused players.
Vukah Brawlers are vulnerable to fire damage and often surround themselves with smaller enemies. Take the smaller foes out before focusing on the Brawler, and you’ll have a much easier time. Specifically, you'll want to target any Vukah wielding a staff. They should be your first priority as they'll attempt to heal the Vukah Brawler and other enemies.
As far as the Brawler itself, it only has one attack — a giant leap across the arena to land on you. It's a quick and strong move, but one that's easily avoided with a dodge roll. However, you'll want to avoid large patches of mud. If your feet get caked with mud, you'll be significantly slower and have a harder time dodging the Brawler.
Along with their heads, Vukah Brawlers drop fairly average loot, such as common resources like leather and random weapons. However, there is a chance for Vukah Brawlers to drop a legendary weapon known as Jezmina’s Apotheosis.
Locations:
- Low Meadows - Vukah Ceremony Hill
- Nomad Highlands - Vukah Arena
- Nomad Highlands - Cave Passage - Pillars of Creation
- Kindlewastes - Vukah Sacrifice Hill
Scavenger Matron
There are three different types of Scavenger Matrons. The standard variety is a large, slow, and close-ranged attacker. Meanwhile, the Gorger variety will hurl poisonous projectiles toward players, and the Grizzler regularly calls in reinforcements.
No matter which kind you’re facing, you’ll have an easy time if you use some ranged attacks, such as bows or spells. Fortunately, the camps where you often fight Scavengers have a fair amount of tricky terrain. Tricky for the Matron, that is. If you put enough boxes, rocks, or other pieces of environment between the Matron and yourself, you'll have a very easy time plucking away the boss's health from afar.
Getting up close to a Scavenger Matron is a bit riskier, but there's a nice trick for melee users. Getting as close to a Matron as you can and staying behind it is very easy to do. They don't turn very quickly, and they don't have a great move for getting you if you're up close. They do have a large, close-ranged attack, but it has a large telegraph, and you can easily avoid it. So, when fighting a Matron, either get up super close or stay far away!
As far as loot goes, the Scavenger Matron’s head (or helmet in this case) is very valuable. You’ll need one in order to increase your Flame Altar to a Flame Level of 3. You'll also need one for a grapple hook upgrade, so, luckily, each Scavenger Matron variant can drop the head that you need.
Locations:
- Springlands - The Hill of Scavengers
- Revelwood - Glenwood’s End
- Revelwood - Fawnsong Frontier
- Nomad Highlands - Ruins northwest of Mining Rift
- Nomad Highlands - Lupa’s Lair
- Nomad Highlands - Surat’s Rest
- Kindlewastes - Ocean’s Heart
Cyclops
It's possible that the basic Cyclops in Enshrouded is the easiest boss in the game. This lumbering oaf doesn't have the best ranged attacks, and it telegraphs its close-ranged moves for a long time. If you're a ranged user, you shouldn't have any difficulty kiting the beastie around its dwelling and blasting it from afar.
If you're a melee player, you'll likely have an even easier time, as when you hug the giant's ankles, it will constantly try to stomp on you. However, its stomp has a fairly long and obvious wind-up. You can dodge out of the way and continue to relentlessly slash on the opposite foot for loads of damage. The only thing to keep an eye on is your stamina. Use too much, and one of those stomps might land on your head.
Once you've bested a Cyclops, you'll not have the most exciting loot in the world to claim: a Cyclops Head. What's it good for other than being gross? Well, it's nothing more than a trophy piece. Combine it with nails and wood planks at a Hunter crafting station, and you'll have a trophy. Throw in some bronze or iron bars, and you'll have a bronze or iron trophy, respectively.
Locations:
- Albaneve Summits - Cave Passage
- Albaneve Summits - Cyclops Cave Passage below Everfrore Keep
- Albaneve Summits - Quiet Caves
- Alvaneve Summits - Cyclops Cave near Lake Luma
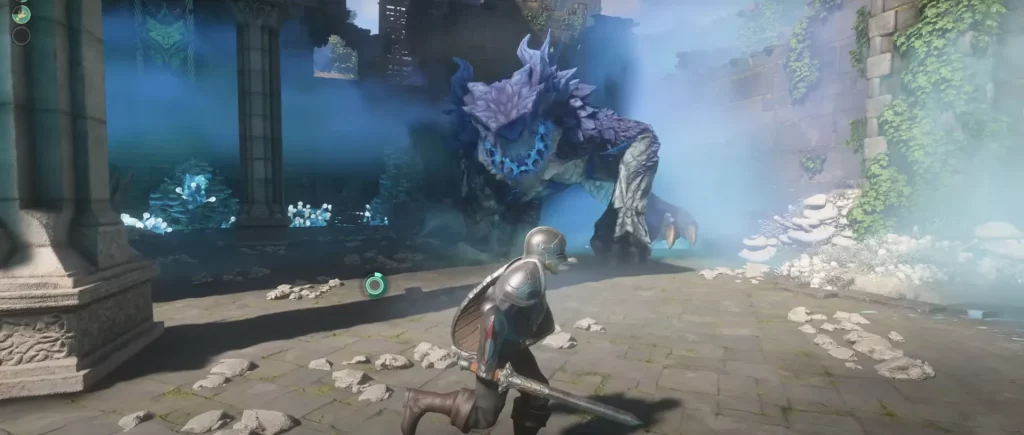
Hollow Cyclops
Much like the Matrons, when you’re fighting a Hollow Cyclops, you’ll want to avoid the middle ground. Either plink away its health from a distance, or try to stick to its backside. Unlike the Matrons, the Cyclops has quite a few tricks up its sleeve. For starters, its large club attack. This move cannot be blocked, but you can dodge away from it.
Next, if the Cyclops equips a large sword, it's about to do two horizontal swipes. The first swipe cannot be blocked and can only be dodged if you jump over it. A dodge roll will not work. Similarly, the second swipe cannot be blocked but can be avoided with a dodge roll.
As its final weapon-based move, the Cyclops will occasionally equip a dagger in each hand before delivering three targeted thrusts. These cannot be dodged, but they can be blocked with a shield! All of these different moves can be avoided if you're close enough to the Cyclops and dodge roll underneath it. Sticking around its feet will cause it to do a stomping move, so keep an eye out for that.
Finally, the Cyclops as a large AOE attack that covers the ground around it. Don't worry! It doesn't do any damage to you if it hits. It simply sends you high into the air, and you can use your glider to land safely. Make sure you use your glider, or you will take some fall damage.
When it comes to loot, a Hollow Cyclops doesn’t offer much unless you have a specific quest to gather its head or some Giant Bones.
Locations:
- Revelwood - Hollow Halls
- Highlands - Hollow Halls
- Kindlewastes - Hollow Halls
Fell Cyclops
We've come a long way from the basic Cyclops. The Fell Cyclops is a monstrously hard fight compared to its normal cousin. This is more of a late-game encounter in Enshrouded and, as such, you'll want the best armor and weapons you can get your hands on. Additionally, the sole area home to the Fell Cyclops is incredibly cold. Make sure you've got all the frost resistance you can stack up with armor and food.
The Fell Cyclops's biggest threat is its laser-powered eye. It can fire a variety of laser attacks your way. Some blasts will follow a line directly in front of the monster, some will sweep side-to-side, and sometimes its head will track you. The answer to all of these is to keep moving and do your best to get behind the Fell Cyclops itself.
It also features moves you'll be familiar with from fighting the other types of Cyclops. Swinging its hammer, trying to stomp you, and the enormously threatening ground slam that ruptures the earth. For this last one, you'll want to jump right before the beast brings both of its hands slamming to the earth. So long as you avoid the new laser moves, this should feel familiar to any player who has slain the other Cyclops variants.
Once you've managed to fell this towering creature, you can find a Fell Cyclops Head or Enshrouded Cyclops Eye. As you might have already guessed, the head is only good for trophy-making. However, the eye can be used to create the following pieces of gear:
- Eternal Frost Arrow II
- Frostbite Slasher Hood
- Hailcaster Hat
- Invisible Barrier
- Shroud Beam Channel
- Wolf's Fang Hood
- Albaneve Summits - Elixir Well
Fell Critter Queen
Technically, the Fell Critter Queen is more of a miniboss than a true boss in Enshrouded. However, it's still a worthwhile fight thanks to the Giant Critter Scales you can gather from defeating the beastie. These are necessary for crafting a multitude of chest pieces.
Luckily, it's also not one of the most challenging fights in the game. The biggest threat to keep track of is the Critter Queen summoning hordes of smaller bugs. These bugs will rush you, slash at you, and, most lethally, try to explode next to you. Dispatching them quickly is the key. At the same time, the queen herself will try to hit you with long-ranged wads of insectoid spit. The key in this fight, whether you're using a melee or ranged weapon, is to stay mobile.
As for attacking the queen, she is a bit on the squishy side. It won't take too much damage to bring her down. Ranged users ought to pick their minion-free moments and blast her from afar. Meanwhile, melee users should be aware that the queen will try to smack you with her claws if you get too close. Luckily, the queen isn't too fast and simply dodging these swipes to attack her rear can grant you tons of damage.
Location:
- Revelwood - Elixir Well east of Fort Kelvin
- Kindlewastes - Shroud Lair northwest of Low Tide
Hydrak'Dal
Another miniboss, the Hydrak'Dal is much more fierce than the title miniboss would imply. This lizard will rush you relentlessly and even cast a few magic spells this way. Even more so than the Fell Critter Queen, mobility is the most important factor in this fight. The Hydrak'Dal will try to slow you down with ice spikes, but the most dangerous spell is its earthquake summon. Luckily, it telegraphs the move with a large wind-up, and a glowing yellow circle will appear beneath your feet. Move out of the way fast, or you'll be sent flying with a seismic burst of energy.
Melee users will have the hardest time in this fight. Getting close to the Hydrak'Dal prompts it to unleash a flurry of melee attacks. For the best results, ranged battle is advised. Luckily, the arena where you'll fight a Hydrak'Dal is filled with platforms, nooks, and crannies. If you need a place to recover or simply get in a few ranged shots, it's easy to get up high and out of reach of the Hydrak'Dal's attacks. Well, most of them. Always keep an eye out for that personalized earthquake!
When you defeat the lizard, you'll receive a Hydrak'Dal Head as a reward. Good for trophies and necessary for upgrading your Flame Altar to level 9.
Location:
- Veilwater Basin - Hydrak'Dal Temple northwest of Lake Heartblood
Fell Thunderbrute
The final miniboss in our list, you'll run into Fell Thunderbrutes nearly everywhere in your adventuring. They're common, they're angry, but they aren't too hard to beat. The quickest way to defeat one is with ranged attacks. Thunderbrutes only want to get up close and smack you, but they're very slow. If you have a good few spells and/or a strong bow, you can dispatch a Thunderbrute at range with ease.
Melee users aren't out of luck either, though. The Thunderbrute's movement and attacks are all slow. If you're up close, you can easily dodge out of the way when it slowly winds up a swing or a stomp. Do your best to dodge roll behind it and lay on the pressure. As always, simply keep an eye on your stamina so you don't leave yourself without an escape.
When you've beaten a Fell Thunderbrute, it will drop a Shroud Core, a Fell Thunderbrute Head, and some Runes. It even has the chance to drop a Fell Commander's Bow if you're lucky. However, the Shroud Core is the real prize. With these, you can craft Improved Grappling Hooks or Medium Magic Chests.
Location:
- Springlands - Elixir Well east of Braelyn Bridge
- Springlands - Elixir Well west of Ferndale
- Low Meadows - Ring of Rot
- Revelwood - Ancient Bridge
- Revelwood - Bramblespine Boneyard
- Revelwood - Elixir Well west of Pikemead's Reach
- Revelwood - Huckstar Square, Pikemead's Reach
- Revelwood - Pike's Port, - Pikemead's Reach
- Nomad Highlands - Smothering Pit
- Nomad Highlands - Elixir Well south of the Pillars of Creation
- Kindlewastes - Low Tide
- Albaneve Summits - Elixir Well
Fell Wispwyvern
This is a giant boss. Unlike most bosses, you’ll only find the Fell Wispwyvern in a single location. It has arena-sweeping ice attacks, can summon reinforcements, and it’s not too slow either. Luckily, it has a unique weakness. When you see the Fell Wispwyvern charging up a large, ice-breath attack, you can shoot its mouth with an arrow to stun it.
During this stunned phase, you’ll have a huge window of time to try and deal as much damage as possible. When that window is up, keep dodging its attacks and keep an eye out for another chance to knock it down.
Also, unlike other bosses, the Fell Wispwyvern offers a bit more unique loot. It drops its head, of course, which you’ll need to take your Flame Altar to Flame Level 4. However, it also drops Shroud Cores, Runes, a Commander’s Ring, and the Key to the Pike. The Commander’s Ring is a nice find as it increases your health and mana by a whopping 30 points each. The Key to the Pike is also useful, as it opens all doors in Pike Castle.
Location:
- Revelwood - The Pike in Pikemead’s Reach
Fell Monstrosity
We’re back to bosses that can be found in multiple locations, and this one isn’t quite as intense as the Fell Wispwyvern. Despite its small moveset, however, it can still deal some damage.
The two things to keep in mind during this fight are to stay more mobile and to dispel the Hornets as quickly as you can. Whether you use an attack or a torch, you’ll want them out of the way so that you can focus on the Fell Monstrosity. Luckily, the beastie is vulnerable to fire, which can make things a bit easier.
Other than occasionally spawning Hornets, the Fell Monstrosity has only a few ranged attacks. They have obvious telegraphs and are easy to avoid, so long as you keep on moving.
While it doesn’t drop any unique rings like the Wispwyvern, you will need a Fell Monstrosity Head to, you guessed it, advance your Flame Altar. A Fell Monstrosity head will take your Flame Altar to its fifth Flame Level.
Locations:
- Nomad Highlands - Cradle of Dusk
- Nomad Highlands - Elixir Well in Umber Hollow
- Kindlewastes - Elixir Well near Rose Shell Burrow
Fell Sicklescythe
Strangely, the Fell Sicklescythe has an incredibly small moveset. Yet, that doesn’t mean this boss is easy. It is quick, mobile, and, most frustratingly, often airborne.
When it throws its sickles at you, you need to dodge them twice: once when they’re thrown, and once when they return to the Fell Sicklescythe’s hands. If you see a giant, chattering skull floating your way, run. That skull will explode for heaps of damage, and you don’t want to be in the blast zone.
Once more, the loot that you should focus on is the creature’s head. A Fell Sicklescythe head will take your Flame Altar to a level six Flame Level.
Locations:
- Kindlewastes - Haunted Sun Temple near Brittlebush
- Kindlewastes - Ridgeback Mine
- Kindlewastes - Elixir Well near Low Tide
- Kindlewastes - The Grim
- Kindlewastes - Hollow Halls
Fell Dragon Youngling
Finally, as a fresh addition with Souls of the Frozen Frontier, we have the Fell Dragon Youngling. Don’t let its name deceive you — this boss is massive!
Like the Fell Wispwyvern, this fella can only be found in one spot, and it takes more damage when it is stunned. Unlike the Fell Wispwyvern, it won’t give you a convenient opportunity to stun it. Using Chain Lightning or Stun Arrows to fill the beastie’s stun meter is likely your best bet. When it is stunned, take advantage, deal some damage to its head, and get ready to do it all again.
One thing you’ll want to be very good at during this fight is flying with your glider. The Fell Dragon Youngling can blow you off the arena’s edge, and you’ll be in for a nasty fall if you don’t pull out your glider quickly enough.
Additionally, using your glider to avoid the Fell Dragon Youngling's large fire-breath attack is a great idea. That breath attack will cover a huge part of the donut-shaped arena, but using your glider to soar underneath the dragon and land on the opposite side not only gets you out of the way, but also gives you a nice opportunity to deal some damage.
As far as loot is concerned, you’ll receive Shroud Cores, Runes, and a Fell Dragon Youngling Head for your trouble. We aren’t sure what the head's purpose is at this time, but it would look very impressive mounted on your base!
Location:
- Albaneve Summits - Howling Peak
Crea tu propio servidor
de Enshrouded
de Enshrouded
¡Elige un plan, escoge un juego y juega con tus amigos!
Suscríbete a nuestro boletín
¡Suscríbete para recibir las últimas actualizaciones sobre todo lo relacionado con los videojuegos!
Únete a nuestro Discord
¡Sé parte de nuestra comunidad de más de 20.000 miembros con ideas afines!
¿Cómo calificarías este blog?
¡Comparte tu opinión y ayúdanos a mejorar nuestros blogs!
No me gustó
Neutral
Me gustó

¿Necesitas un servidor de juegos?
Renta un servidor de juego donde tú y tus amigos puedan jugar en privado con baja latencia y configuraciones personalizadas. Elige entre 100+ juegos, invita a gente de todo el mundo y disfruta de partidas privadas, o construye tu propia comunidad en línea con tus propias reglas.

Blogs relevantes


¡ENTÉRATE DE TODO!
Únete a nuestro correo para recibir actualizaciones sobre nuestros juegos alojados, noticias de la empresa y ofertas exclusivas. ¡Mantente al día!