Summary
Geyser and Floodgate are plugins that allow players to join a Minecraft Java Edition server using a Bedrock Edition client. Geyser is a bridge between the Java and Bedrock Editions of Minecraft. It translates the protocols the two game versions used, allowing Bedrock players to connect to Java servers. Floodgate is a plugin that works with Geyser, providing an authentication system allowing Bedrock players to log into Java servers using their Microsoft or Xbox Live accounts.
| Requirement |
| Installing Geyser and Floodgate on a server requires Premium or Budget with a dedicated IP addon. For current Budget servers, contact support here to request the addon. |
| Note | PaperMC or SpigotMC must be installed on the server. Learn how to here. |
How to Install Geyser and FloodGate on a Minecraft Java Server
1. Log in to the BisectHosting Premium or Budget panel.
2. Stop the server.![]()
3. Download both geyser-spigot.jar and floodgate-spigot.jar here.
4. Go to the File Manager tab.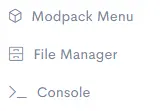
5. Open the plugins folder.
6. Choose the green Upload button and drag and drop both .jar files from step 3.![]()
7. Start the server, wait for it to boot up completely, then stop the server.![]()
8. Copy the IP. Do not copy the port.![]()
9. Go back to the File Manager tab.
10. Find the following directory: plugins/Geyser-Spigot/ .![]()
11. Open config.yml for editing.![]()
12. Under bedrock:, delete # from the address: line.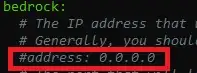
13. Change 0.0.0.0 to the server IP from step 8. Do not copy the port.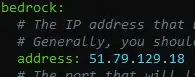
14. Choose the blue Save and close button on the lower right.
15. If the server is on version 1.19.1+: Go to the Server Properties tab and change enforce-secure-profile to false. 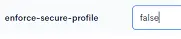
16. Click the blue Save button at the bottom.![]()
17. Navigate back to the Home tab.
18. Click Enable UDP Network. 
19. Start the server.

